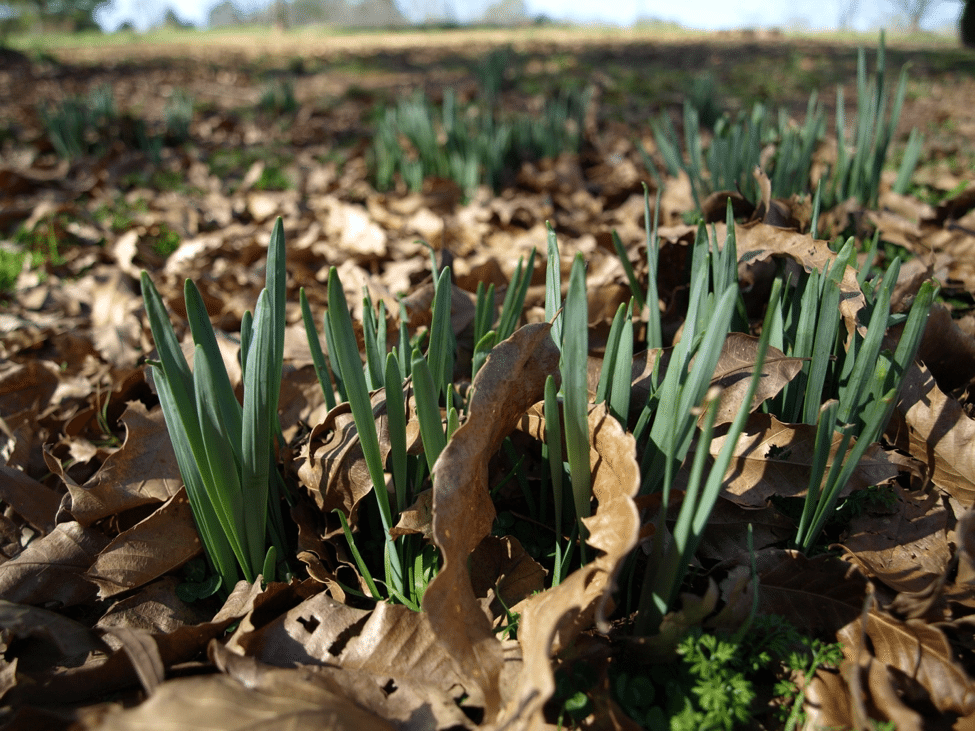
Daffodil (Narcissus sp.) bulbs and other spring-flowering bulb-like plants (corms, tubers, tuberous roots, and rhizomes) make excellent additions to the landscape. These plants add color and interest to the late winter/early spring garden while other plants are still dormant. They can be placed most anywhere in the garden and make great additions to beds, borders, and containers.
The ideal planting time for spring-flowering bulbs is fall to mid-winter to allow enough chilling time (below 40-50 degrees) to induce flowering. For landscape companies looking to generate some wintertime business, perhaps a bulb planting service in order. Established daffodils have already started to emerge and the window for planting is closing fast, so grab your planting tools and get to work!
Plant Narcissus bulbs 3-6” deep, root side down of course, and backfill with a clean topsoil. Fertilize during planting and just after flowering to provide plants with adequate nutrients for next year’s flowers. For more information on selecting, planting, and installing bulbs, refer to UGA Extension Bulletin (B 918), “Flowering Bulbs for Georgia Gardens.”
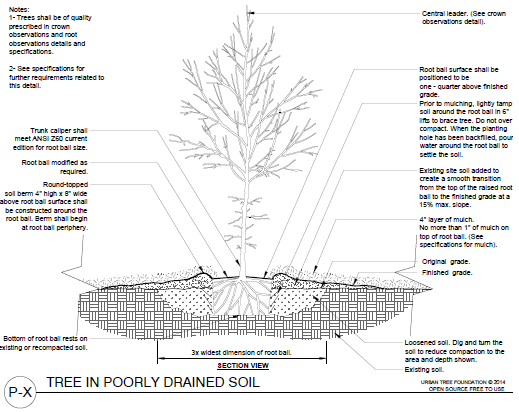
Standard tree planting language was established through publication of the ANSI A300 transplanting standard most recent addition. Although the standard encourages the profession to write detailed planting specifications, few have become readily available or recognized. As a result, many in the green industry use out-of-date specifications.
Dr. Ed Gilman from University of Florida, Jim Urban, FASLA, and Brian Kempf and Tyson Carroll of the Urban Tree Foundation have developed a modern, up to date and peer reviewed set of details and specifications in AutoCAD and PDF formats for the green industry. These are designed specifically for landscape architects, engineers, architects, contractors, urban foresters, arborists, municipalities and state agencies. All are open source, free and can be edited by the user. You and your colleagues are free to use them in projects without charge and without credit to the Urban Tree Foundation or any of the project team members. Although we encourage modification to fit your specific site and project needs, make your changes only after carefully considering all the pertinent variables at the planting site.
Funding for this project was provided by the California Department of Forestry (CDF), Urban Forestry Program. A special thanks to all reviewers of this project.
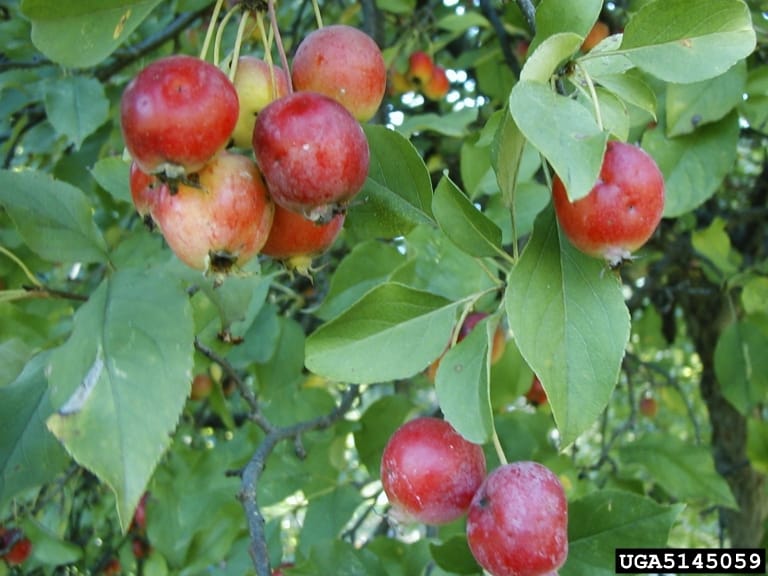
Ornamental landscape plants are broadly grouped into two categories: woody ornamentals and herbaceous ornamentals. Woody plants usually have larger root systems than herbaceous plants and are more likely to interfere with septic drainfields.
Install woody plants an appropriate and safe distance from the septic drainfield. A good rule of thumb is to use the ultimate mature height of the selected tree as the minimum planting distance from the septic drainfield, then increase the distance. For example, if you are planting a crabapple, plant the tree at least 25 feet from the nearest drain line; 50 to 75 feet would be even better. Consider planting smaller and less aggressive cultivars, if possible.
Herbaceous plants, on the other hand, die back to the ground during the winter and include annuals, perennials and turf. Perennials, including turf, will return the next year from their roots, but annuals will have to be planted fresh each year. These plants are usually smaller in size and their root systems tend to be shallower and less aggressive than those of woody plants.
Both woody and herbaceous plants can be used when landscaping on septic drainfields as long as a few guidelines are followed. Remember that septic drainfield lines are often very shallow, some no more than 6 inches from the surface. Excessive digging, rototilling or other methods of soil preparation for planting can damage these lines.
Don’t choose plants that typically thrive in wet locations. When tree roots invade these septic drain lines, the extra moisture and nutrients favor root and plant growth, and lines become clogged and damaged.
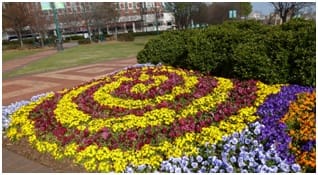
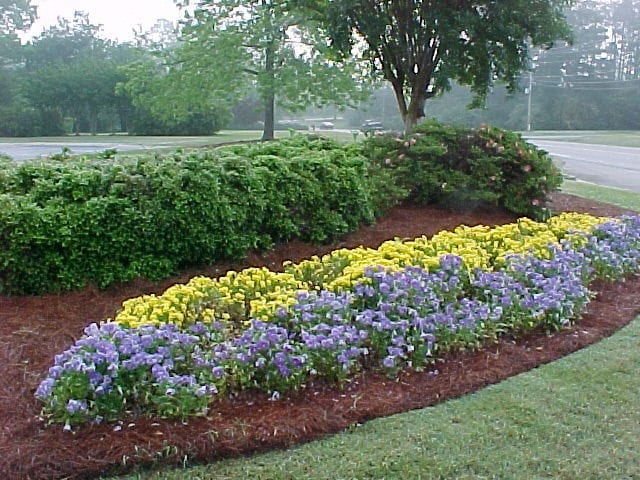
Cool weather is upon us and with it, pansy season! Even though pansies are the mainstay for winter color beds, there are increasingly more plant choices available, providing an exciting palette for landscapers to play with.
The following veggies are used for height, color, texture and vegetative element:
Ornamental Cabbage
Kale
Swiss Chard
Mustards
Lettuces
Parsley
Cardoon (Ornamental Artichoke)
Oregano
Thyme
Other flowering winter annuals are:
Alyssum
Iberis
Dusty Miller
Cool season grasses
Perennial plants that serve as foliage accents are:
Sedums
Ivy
Evergreens
Acorus
Heuchera
Dusty Miller
Carex
Euphorbia – these can be year-round
Deer-resistant plants used as flowering accents are:
Dianthus
Snapdragons
Poppies
Scabiosa
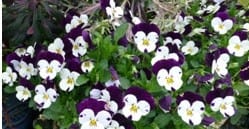
The pansies and their cousins, the violas, are the bread and butter of the winter color beds, so let’s take a look at how we can keep them happy and flowering all winter long! First, a few words about each of these:
Pansies
Pansies
Larger, fewer blooms per plant
Need minimum of 6 hours of direct sunlight
Need dead-heading
Slower to recover after a hard freeze
Violas
Small, multiple blooms per plant
Can tolerate some shade
Self-cleaning
Higher nutrition for better performance
Violas
Planting season starts in October, which usually gives the plants ample time to grow and develop a good root system in favorable temperatures before the winter settles in. This starts with the right foundation – the bed.
If you have existing beds, make sure you remove all plant debris from the summer planting, including any mulch. Get a soil test, which will tell you important information about the existing nutrient levels and the soil pH. Remember that pH controls nutrient availability – too high, and the plants develop deficiencies, too low, and the plants develop toxicities.
Ideal soil pH for pansies should be between 5.4 and 5.8. pH higher than 5.8 can lead to increased incidence of black root rot, a devastating disease on pansies and violas. You should test the soil later in the growing season as well, because pH does change.
Make sure you add organic matter to the bed and till well, 8-12 inches deep. Rake to create a gentle slope and trench the front edge of the bed to help with drainage. If you are making new beds, use the following soil recipe: 60% well-aged compost, 20% gravel (#89), 10% coarse sand, and less than 10% native soil.
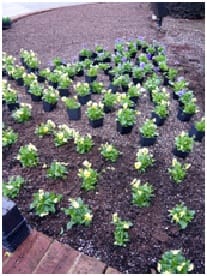
Pre-set plants in large beds before planting.
To get a better idea of how the planting will appear – pre-set large beds. The recommended spacing for fall planting is 8” on center and 10” on center for spring planting.
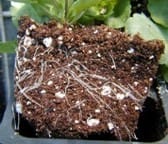
Gently remove the plant from the pot by inverting the pot and squeezing the sides to release the root ball. Before you plant, examine the root system. A healthy root system has many fine white roots and is not pot-bound. Brown-colored, water-soaked roots are an indication of disease – you should not plant affected plants.
Make sure you plant at the same level the plants originally grew, not deeper, nor shallower.
Mulch is essential for many reasons – weed control, keeping soil temperatures higher, and preventing soil desiccation. Small-size pine nuggets work very well.
After a thorough watering you should liquid-feed the plants for faster establishment. In addition, top-dress the beds with a slow-release fertilizer to ensure an adequate level of fertility.
Low temperatures will become an issue as winter settles in. Even though the soil in Georgia very rarely freezes (exception in the Mountains), soil temperatures below 45oF causes slow growth due to low uptake of nutrients. Plants stop flowering and appear starving even if high fertility is present in the soil!
When soil temperatures drop below 60 oF, begin a liquid feed program with a formula having at least 50% nitrate nitrogen, such as calcium nitrate, potassium nitrate, or magnesium nitrate. The reason being is that ammonia-based fertilizers are not utilized because the bacteria responsible for converting them to a form that the plant roots can absorb are not as active in temperatures below 60 oF. Applying ammonia fertilizer is not only a waste of money but it can also compromise the health of your pansies and violas.
For best results, apply a standard 15-2-20 formula, high-nitrate pansy formula fertilizer at 4-day intervals through March 15. These formulations also have little effect on soil pH, so nutrient deficiencies are less likely to occur. Fertilization frequency depends on the vigor and performance of the planting – more frequent feeding may be needed when the growth is good. If a period of warm weather occurs, cut back on the liquid feed to avoid foliar stretching during the midwinter, which may result in weak, floppy stems. When fertilizing with liquids, apply enough liquid to saturate soil to a depth of 4- to 6-inches.
Removing frost-damaged flowers and old, faded flowers should be a top priority with pansies; not only for aesthetics but to prevent the onset of seed pods that consume the plant’s energy. This also reduces the changes of fungal blight diseases that feed on old blossoms. Trim lanky shoots periodically to encourage branching, compact growth and improved flowering.
A healthy root system has many fine white roots and is not pot-bound.
Emphasizing again the soil pH, make sure you test during the season. If the soil pH rises above 5.8, drench at 10-day intervals with either iron sulfate or aluminum sulfate (1 to 3 lbs/ 100 gal) to lower the pH. Lightly rinse plants after application to prevent foliage injury. Continue these corrective treatments until the soil pH drops and stays in the 5.4 to 5.8 range.
Soil temperatures usually are on the rise by March 15, so you can start using fertilizers containing ammonia nitrogen. Use the standard fertility program for summer annuals – 200 ppm 20-20-20 (N-P-K) or a slow release/granular fertilizer during the remainder of the growing season.
Bodie Pennisi, Department of Horticulture and Willie Chance, Center for Urban Agriculture
Well-groomed landscapes are often a result of considerable effort by landscape companies. Employees make them happen with routine care and, above all, attention to detail. A quality landscape and the image employees present on the job speak highly of the professionalism of the firm. Quality control (QC) is everyone’s responsibility and an essential part of a landscaper’s job. This publication describes the basics of creating and implementing a successful QC program for your landscaping company. See the entire publication