Growing Onions in the Home Garden

Source(s): Jacob G Price


There are many different varieties of onions that you can grow in your garden.

Varieties

  • Green bunching–Crystal Wax, Eclipse, Evergreen Bunching, White Portugal, Beltsville Bunching (42 – 55 days to maturity)
  • Dry onions–Crystal Wax, Grannex 33, Grano 502, Sweet Vidalia, (bulb-type), Sweet Georgia ‘(100 – 120 days to maturity)

Culture

803314819_7b2d5d76bc_bBoth can be planted January 1 – March 15 (Spring), Green Bunching – September 1 to December 31 (Fall), Bulb-types – October 10 – November 10.

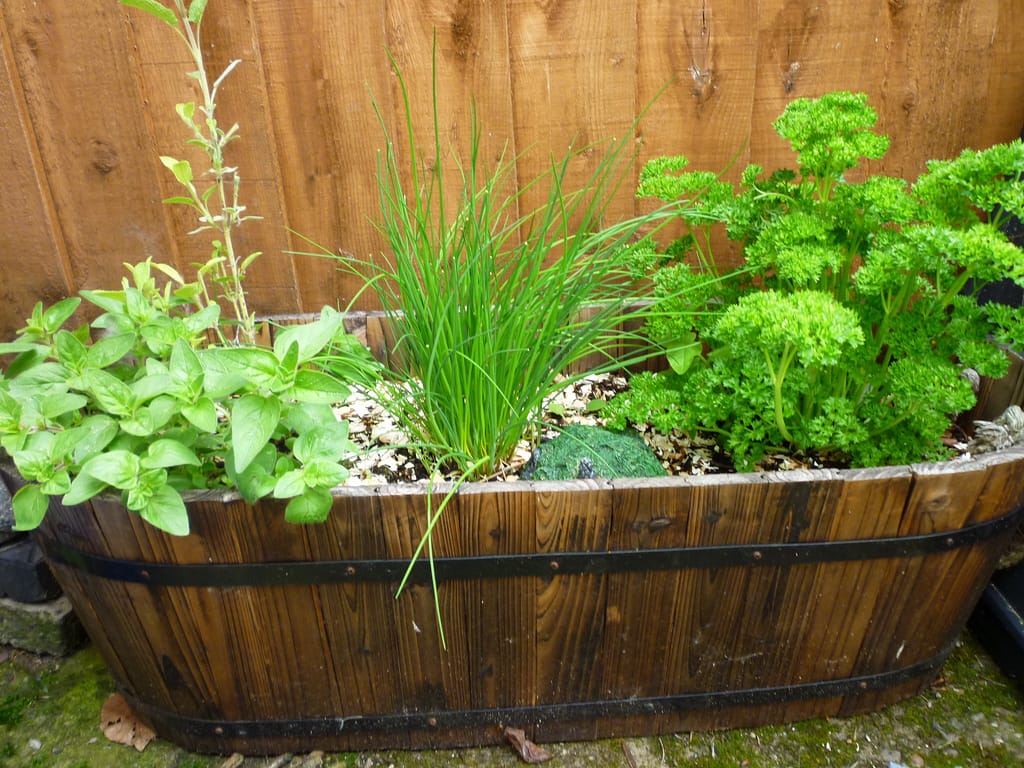
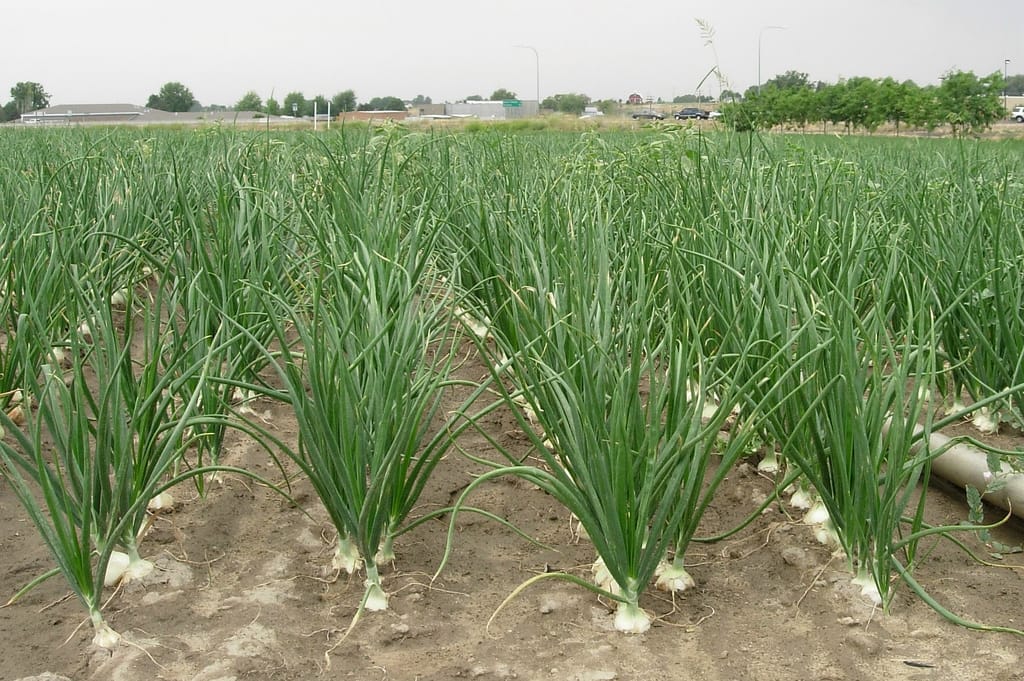
Green bunching (or spring onions) are easily grown. Sets and plants should be spaced about three inches apart in good soil.

Large, dry onions can be grown only on deeply dug, fertile soil and in full sun. For best results, dig or plow the onion plot in the fall, adding generous amounts of manure or compost. Add lime in the fall, too. Soil test if in doubt. In early spring, dig-in 3/4 pound of general fertilizer per 25 foot row, going down at least nine inches. Rake to remove all lumps and stones and then firm the soil well.

Space the onion plants about six inches apart and cover the roots with only one-half inch of soil. The plants will stand erect once the roots take hold and growth begins. Sometime around the end of April, when bulging soil around the plants shows that the bulbs are enlarging, pull the soil away from the onions, repeating as they mature. Side dress with about 3/4 cup fertilizer per 25 foot row after the first soil removal.OLYMPUS DIGITAL CAMERA

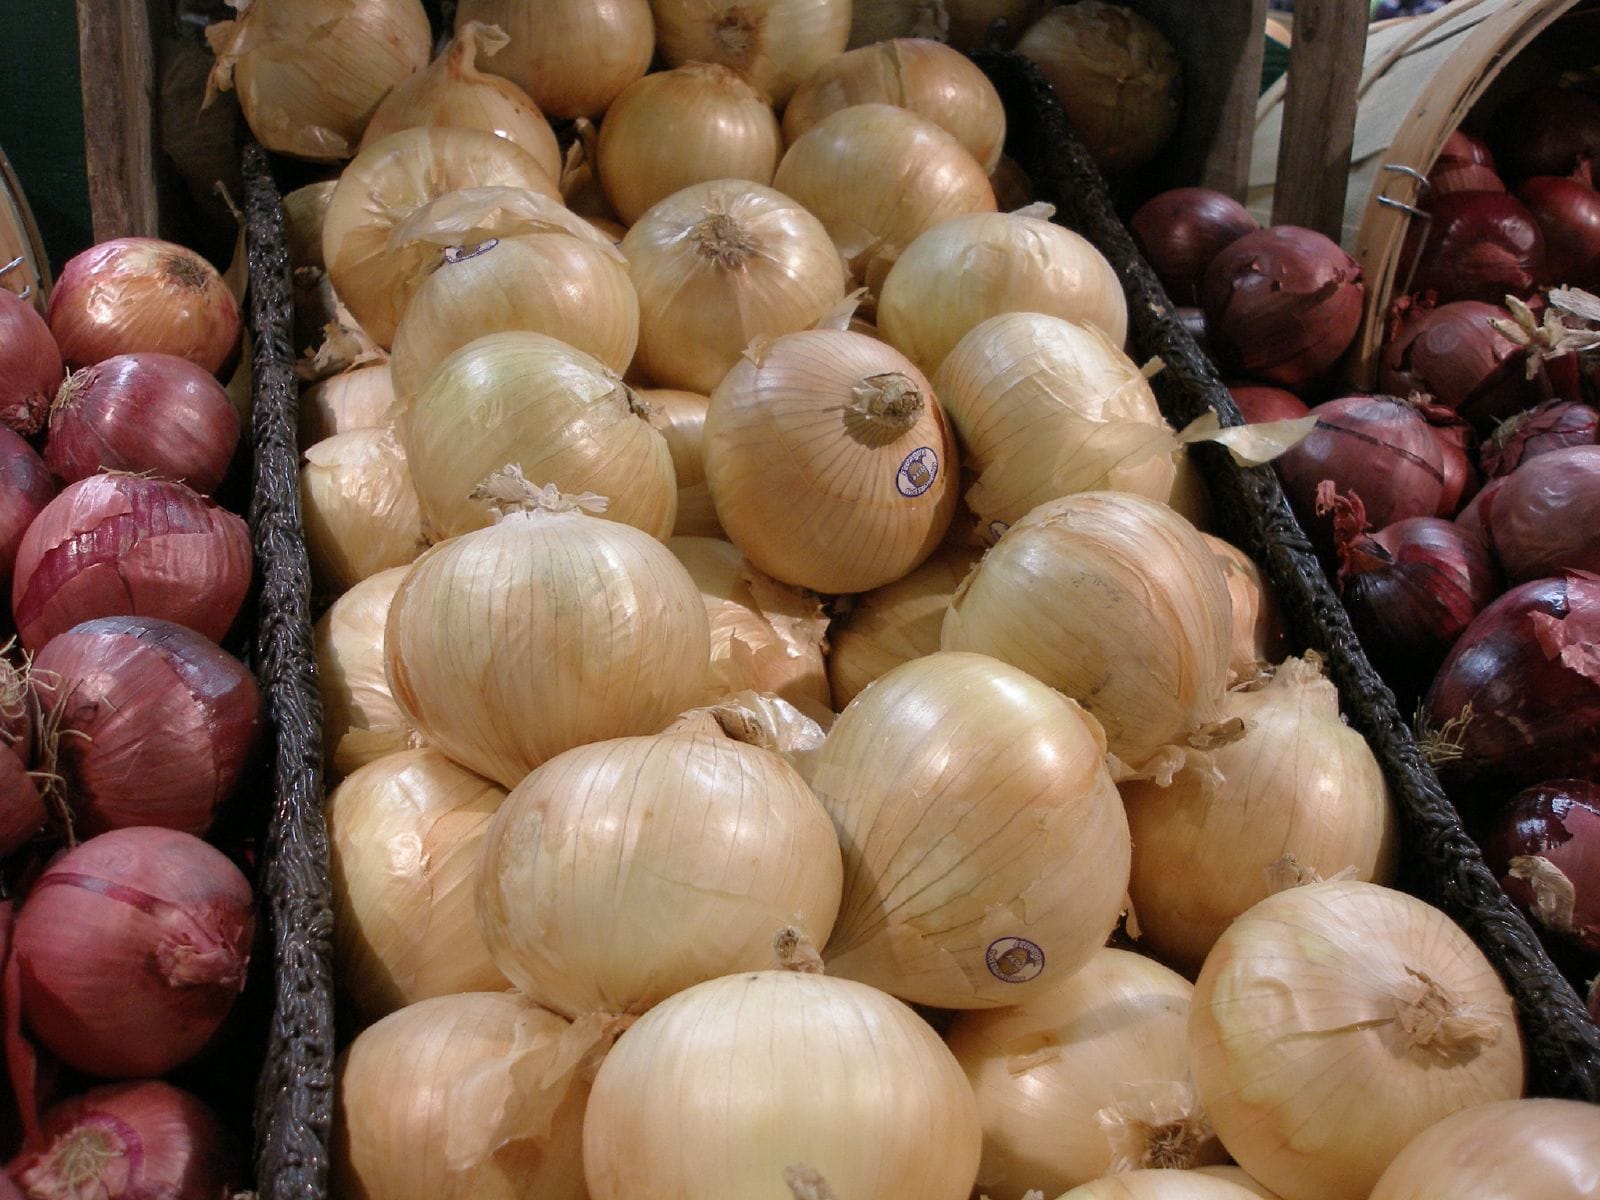
When the plants are almost mature (usually when about 3/4 of the tops have fallen) use a broom or rake to knock over those still standing. This helps onions mature thoroughly.

After a few days when all the tops are dead, pull the onions and spread them in the sun for a day or two to dry. Place the tops over the bulbs to prevent sun scald, or if raining, dry under protection. After the onions are dry, cut off the tops an inch above the bulbs and store in slatted crates of mesh bags in a cool place where air can circulate.

The name “Vidalia Onion” is just a term used locally to designate dry onions grown in the Vidalia or Glennville areas. The main variety grown is the Granex which is also widely grown in Texas and other southwestern states. Due to soil type, climactic conditions or other reasons local grown onions seem to have a better flavor than the same variety shipped in and consequently the “Vidalia Onion” has become well known in Georgia.

Gardeners in DeKalb must provide good soil preparation, on a well-drained site, in full sun. Set quality plants in late February or early March. Correct application of lime and fertilizer is essential. If a fall crop is considered, set the plants in early September. Local catalogs and some nurseries sell Granex (Vidalia) type onions.


Resource(s): Vegetable Gardening in Georgia

Center Publication Number: 78

Growing Pansies: A Colorful Display for Fall, Winter, and Spring

Source(s): Raymond Kessler, Extension Horticulturist, Alabama Cooperative Extension Service, Auburn University.


The flower most often planted in the fall by Georgia gardeners is the pansy. The main reason pansies are so popular is the fact they provide a colorful floral display for almost 6 months during the fall, winter, and spring. Few other bedding plants can perform as well in the landscape.Growing Pansies: A Colorful Display for Fall, Winter, and Spring

Growing Pansies

Pansies grow best when night temperatures are below 65 F, which makes them ideal for fall gardens. Plant them from mid September into October, depending on where you live in Georgia, for blooms that last until hot weather starts in April. Even though plants are available for sale in packs earlier in garden centers and mass-market outlets, planting when it is too hot can cause problems for the plants. Pansies can survive temperatures as low as 2 F in the winter.

A big plus with the pansy is the variety of colors. Pansies can be purchased in almost every color of the rainbow, even those with black flowers! There are solid colored pansies and pansies with faces.

Pansies also come in a variety of sizes. The large category has blooms that range in size from 3 1/2 inches to 4 1/2 inches. Medium size blooms run 2 1/2 inches to 3 1/2 inches. The small, or multiflora, bloom sizes run 1 1/2 inches to 2 1/2 inches. Generally, pansies with smaller flowers tolerate heat and adverse growing conditions better than the large flowered types. Some pansies that grow well in Georgia include the Springtime Yellow Blotch, Universal Plus Yellow Blotch, Happy White Face, and Imperial Pink Shades.

Pansies love to grow in full sun, but they also will grow and flower in part shade better than other annuals.

In most cases, pansies perform much better in the landscape if you do a good job of preparing the soil. Choose a location with well-drained soil. Pansies will not grow well in soil that stays constantly wet. Work 4 to 6 inches of organic matter, such as garden compost, peat moss, soil conditioner or well- rotted leaves, into the soil with a shovel or tiller.

Ideally, you should perform a soil test to determine how much fertilizer and limestone to add to the soil. Contact your county extension agent for instructions. Pansies grow best in a soil with a low pH, so little if any limestone is usually needed. They don’t need a high amount of fertilizer, so fertilize sparingly.

Plant pansies in the bed at about the same level they were growing in the packs or just slightly higher. Don’t plant them too deep, with soil covering the stem. After planting, cover the surface of the soil with 4 to 6 inches of mulch such as pine straw, pine bark or wheat straw. Water the bed thoroughly, immediately after planting to a depth of at least 6 to 8 inches. Remember to check the bed for watering in the first 3 weeks or until they establish a root system and begin growing.

Pansies have many applications in the winter landscape. They add drifts of single-colors to an otherwise dull winter landscape or as a mass planting with several colors mixed together. Use pansies in a flowerbed with colors appropriate for holidays such as red and white for Christmas. Pansies also perform well in containers placed on the deck or patio or next to the entrance to your home.


Resource(s): Success with Pansies in the Winter Landscape

Center Publication Number: 121

Growing Rutabagas

Source(s): Alex McCrackin, College of Agricultural and Environmental Sciences (Extension Master Gardener).


14849980749_ae5d0b2227_oRutabaga, or Swedish Turnip, Brassica napobrassica, as a member of the mustard family, is related to cabbage and cauliflower. It probably originated in the Middle Ages from a cross of turnip and cabbage, but it differs from the common turnip in several respects.

The rutabaga, in contrast to the turnip, has a distinct leafy neck, smooth bluish leaves, and a root which is not only larger but has a denser and finer texture than that of the turnip. In terms of nutrition the top is an excellent source of vitamins A and C, and the root is high in vitamin A. Also, rutabagas are low in sodium.

Suggested Varieties

The most popular and widely available variety of rutabaga is American Purple Top, which produces a yellow-fleshed root with a tender, fine grain (88 days). Macomber, a white root variety, is somewhat sweeter than the yellow types (92 days). Two other varieties less frequently available are Monarch and Sweet Perfection White. Laurentian is a also a very dependable variety.

Getting Started

Because rutabaga is a cool season crop, in our area the seeding is best done from mid-July into August to allow vigorous growth during the lower temperatures of late fall and early winter. The ripening period should then come before the first frost, which, in any case, should not harm this cold-resistant crop. Harvesting should be completed before the first hard freeze.

Rutabagas require a well-worked soil and fertilizers similar to turnips and beets. Soil test for lime requirements. In clay soils, working in liberal amounts of compost or other organic matter may be necessary to allow the root to develop to its full and proper shape. Apply a 5-10-15 or 6-12-12 fertilizer at the rate of approximately 3-4 pounds per 100 square feet. Split applications are best. Higher levels of nitrogen will cause the plant to develop its leafy top at the expense of the root.

Sow seeds 1/2″ deep and 1/2″ apart in rows spaced 15-18″ apart. Thin the young plants to 6-9″. Frequent shallow cultivation is necessary until harvest. When the size of the plot permits, hand weeding is recommended; this practice avoids damaging the developing root. Water deeply every five to seven days during dry periods.

Near the maturity time stated on the seed package examine several plants to see how they have developed; pull rutabagas when they reach maturity and, if possible, when the soil is somewhat dry to minimize dirt on the side roots.

Insects and Diseases

Rutabagas are affected by the same insects and diseases as cabbage and turnips. Aphids, root maggots and flea beetles are the most common insect pests. Diseases such as club root, black root and anthracnose are seldom serious problems. Consult your County Extension Service for information and literature to identify and control specific pests or diseases. Before using any chemicals, read and follow all label directions and precautions.

StorageRutabaga,_variety_nadmorska

To store rutabagas for an extended period, trim the crowns, side roots, and tap roots; place in a cellar or other place with a very cool temperature and high humidity. Heated basements are not suitable for storage because the low humidity tends to dry and shrivel the roots. Waxed roots kept in the refrigerator crisper can last up to three months. Home waxing of roots is not recommended.

Enjoying the Harvest

Rutabaga tops may be prepared the same as collard and turnip greens. Reducing the boiling time will retain more of the flavor and nutrients in the greens and at the same time keep the texture crisp.

Treating rutabagas much like potatoes tremendously increases the variety of courses available. Traditionally, rutabaga has been peeled and boiled with a teaspoon of sugar to enhance the flavor. Other possibilities include baking, mashing and french flying. The addition of fresh herbs such as mint, basil, or dill along with butter or margarine adds new zest to an old favorite.


Resource(s): Vegetable Gardening in Georgia

Center Publication Number: 42

Growing Tomatoes

Source(s): Robert R Westerfield, College of Agricultural and Environmental Sciences, Extension Horticulturist


It would be hard to imagine any home garden that did not have at least a few tomato plants. Tomatoes are considered by many to be the most prized vegetable in the garden. There is also plenty of discussion among fellow gardeners as to the best varieties and method of growing each type. This publication will discuss the basics of growing tomatoes successfully, as well as avoiding common problems encountered by the home gardener.

Tomatoes_1400x1050Soil Requirements

Tomato plants can be started indoors from seed four to seven weeks before they are to be planted. Transplants can also be purchased from a garden center, ready to plant immediately. If starting your own plants from seed, use a light soil mix and give the plants plenty of light. You may need to use supplemental light if a south-facing sunny window is not available for growing. About a week before transplanting, harden-off indoor grown plants by gradually exposing them to an increasing number of hours of light each day.

Tomato plants can be set out in the garden in mid-March to early May after any danger of frost has passed. Some southern areas of Georgia can also produce a second crop of tomatoes when planted in late July.
Tomatoes are warm-season plants that grow best at temperatures of 70 degrees to 80 degrees F and require six to eight hours of sunlight. Choose a sunny location that receives at least eight hours of sunlight each day.

Tomatoes prefer soil that is well-drained and amended heavily with organic matter. Rotted manures, compost, rotted sawdust or other humus can be tilled into the garden site as soon as the soils can be worked in the spring.

Tomatoes require a soil with a pH in the range of 6.2 to 6.8. The pH is the general measurement of acidity in the soil. Soil testing through your local county extension office is the best way to determine the pH. If the pH of the soil is too low, add dolomitic limestone according to the soil recommendations. In the absence of a soil test, apply lime at the rate of 5 pounds per 100 square feet of area. Add lime several months before planting to allow time for it to react with the soil. Till or spade the lime into the soil. Dolomitic limestone also provides calcium and magnesium, which are important elements for the growth and health of the plants. If the pH test comes back normal, but the calcium level is low, apply gypsum at the rate of 1 pound per 100 square feet.

Planting3875245604_aff00dc673_z

Select only healthy transplants for planting in the garden. Tomatoes can develop roots all along their stems so plant them deeply to encourage a strong root system. Set the transplants down to the first set of true leaves near the soil surface. If transplants are in peat pots, it is not necessary to remove the container, but be sure to plant them deep enough so the pot is not exposed to the soil surface, causing the root ball to dry out. Firm the soil around the plants to force out any air pockets.
Give tomatoes a light amount of fertilizer at planting time. This can be accomplished by using a starter solution of fertilizer. Pour about 1 pint of starter solution (2 tablespoons of 5-10-10 or 5-10-5 fertilizer dissolved in 1 gallon of water) around each plant.
If plants are to be staked or trellised, space them 24 inches apart in rows 4 to 6 feet apart. Although it requires more work initially, staking makes caring for tomatoes easier and keeps the plant’s leaves from contacting the ground and possibly introducing disease. This in turn produces higher quality fruit.
Staking can be done using commercially available cages or by using 6-foot tall, 1-inch square wooden stakes. Drive wooden stakes into the ground about 1 foot deep and 4 to 6 inches from the transplants. Heavy twine or strips of cloth can be used to tie the plants to the stake about every 10 inches vertically as the plants grow. Tomatoes can also be supported by training them to trellises or using a weaving system of cord and stakes.

Mulching

Tomatoes will benefit from mulch placed around their stems. Mulching should be done soon after transplanting. A material such as weed-free straw, chopped leaves or compost can make an excellent mulch and will help conserve moisture and reduce weed growth. Apply mulch to a depth of 2 to 3 inches. Newspaper can also be used as an effective mulch. Lay the newspaper about three sheets thick around plants to act as a weed barrier and to conserve moisture. Then place an organic mulch on top of the paper.
Synthetic weed barrier rolls are also available and can be very effective in reducing weed problems and conserving moisture. They work best when laid down over beds prior to planting transplants. Small slits can then be made in the material to allow for planting of the transplants. Soil or small stakes may be needed on the edge of the material to secure it during windy conditions.

Tomato_scannedFertilizing

Tomatoes are medium feeders and will require fertilizer beyond the initial starter solution. It’s best to soil test through your local county extension office to find out the actual requirements for your soil. In the absence of a soil test, incorporate 1.5 pounds of 10-10-10 fertilizer for 100 square feet of bed prior to planting. Use a complete fertilizer that contains minor nutrients. After the first tomatoes form on the vine and are about the size of a quarter, side-dress them with 10-10-10 at the rate of 1 pound per 100 square feet of bed. Repeat every three to four weeks until harvest is completed.
If a liquid soluble fertilizer solution is used, be careful not to apply too much or too frequently as this can lead to excess nitrogen. This is a common problem causing vigorous vegetative shoot growth but few blooms or fruit.

Watering

Tomatoes need about 1 to 2 inches of water per week depending on the type of soil they are growing in. If rainfall does not provide this quantity, water plants thoroughly once or twice per week. One or two heavy soakings are better than many light sprinklings.
Consider using drip irrigation or soaker hoses around your plants. These methods will help conserve moisture and avoid getting the foliage wet which can cause disease. Hoses can be laid near each plant above the soil but under the mulch layer.

Harvesting and Handling

For best quality, harvest tomatoes when they are fully ripened on the vine. If harvested before they are ripe, but after they reach the mature green stage, tomatoes can be allowed to ripen in the home.
Place unripe mature green or pink fruit in a room with a temperature of around 70 degrees F. Fruit should be well-ventilated and not jammed together.
Fully ripened fruit may be placed in the refrigerator to prolong keeping, but never put unripened tomatoes in the refrigerator. Tomatoes can last several weeks under refrigeration.


Resource(s):

Hanging Baskets

Source(s): Randy Drinkard


basketHanging baskets are an attractive and practical way to add color, interest and beauty to outside areas, such as patios, decks and terraces. And since they can be used inside, hanging baskets are becoming extremely popular! In the old days, hanging baskets contained only one type of plant. But in recent years, mixed baskets have become very popular. This “instant garden” look appeals to beginning gardeners and longtime hobbyists alike.

Plastic hanging baskets are inexpensive. But you may want to use moss and coco fiber to get that “organic” look. Plants in moss and coco baskets can dry out fast, though. You may need to water often, especially if the plants are large and in a drafty place. If you’re making your own moss or coco basket, insert a piece of plastic with holes in it for drainage. This will allow water to stay longer in the container. To retain a natural effect while helping hold moisture, you can put black plastic liner inside the moss liner and poke holes in it.

Often called “potting soil,” the best potting mix doesn’t contain any soil. Regular topsoil usually doesn’t have the qualities necessary to support good plant growth in containers, and it may contain diseases and weed seeds. A good potting or soilless mix is well-drained and aerated and holds moisture and nutrients well. Such mixes may contain peat, bark, perlite and vermiculite in various proportions. The pH of the mix, that is, how acidic or alkaline it is directly affects the plant’s ability to take up nutrients. Make sure you choose a mix in the 5.5 to 6.5 pH range.

Windy sites aren’t good for hanging baskets. The wind causes them to dry out fast and need frequent watering. This can stress your plants and cause them to perform poorly. For places that get 4 to 12 hours of sunlight per day, select plants for full sun to partial shade. For those that get 2 to 4 hours of early or late sunlight per day, select plants for partial to full shade.

Remember this rule: All plants combined in one basket must have similar water, light and nutrition requirements. When you plant a hanging basket, fill the basket with potting mix to within a few inches of the rim. If your mix doesn’t contain nutrients, mix in some slow-release fertilizer. Be sure to follow label rates for the size container you’re using. If you’re mixing in a water-retaining agent, mix it with the media before you plant.

Select healthy, high-quality plants. Inspect the foliage and flowers for any signs of pests or diseases. Take the plant from the pot and examine the root system, which should be white and well-developed. Avoid root-bound plants. Some examples of trailing plants that are beautiful in hanging baskets are petunias, million bells, geraniums, Bacopa, torenias, verbenas, portulacas, helichrysums, English ivy, German ivy, potato vines, scaevolas, Bidens, angel wing begonias and Vinca vines.

To keep your hanging plants growing and flowering, you have to supply plenty of water and nutrition all season. When plants are small, their water and nutrition needs are less. As the weather warms and plants grow, though, their water and nutrition requirements increase. Container-grown plants need fertilizing about once every other week. When using a liquid plant food, make sure the potting mix is moist. If it’s dry, the fertilizer salts could damage the plant roots.

Regular deadheading (removing spent flowers) encourages new flowers to develop. Pruning and trimming stimulates new growth. Scout thoroughly and often for pests and diseases. Look closely at the flowers and foliage for pests and damaged, deformed or discolored leaves or flowers. You may have to part the foliage to examine the center of the plants closely. Don’t stress your plants by not properly watering or fertilizing them. A stressed plant is more prone to diseases and pests. Planting healthy, high-quality plants is a good start, but to keep them robust and attractive, you also will need to provide the best growing conditions.


Center Publication Number: 86

Harvesting and Preserving Herbs

Source(s): Wayne McLaurin, Professor Emeritus of Horticulture, The University of Georgia, College of Agricultural and Environmental Sciences


Herbs grown for foliage may be harvested at any time, though the essential oils are most concentrated just prior to blooming. The seedheads of herbs grown for their seeds, such as fennel and dill, may be collected soon after seeds have reached maturity. Herbs are best collected in the late morning, rinsed quickly, and air dried. Drying or freezing will preserve them.

4740593116_6c73441beb_b

Drying

The ideal conditions for drying herbs is a warm, dry, dark, well-ventilated place. An attic or similar room with good air circulation meets all these conditions. The simplest method is to tie herb stems together in small bunches and hang the bunches upside down from a rod or rafter. The bunches should not touch so that air can freely circulate around them. Herbs to be dried for seed collection can be enclosed in large paper bags with holes cut into the sides for air circulation.

It is difficult to recognize dried herb leaves, so label the bunches.

Herbs may be dried in a gas oven at very low temperature, about 100 degrees F (electric ovens cannot usually be set at this temperature). Strip the leaves from the stems and place them in a single layer on a wide, flat sheet or pan. With the door of the oven ajar, the herbs should dry sufficiently in about three to five hours. Stir herbs gently every 30 minutes during the drying period.

Herbs can be dried in a microwave oven. The preferred method is to put the herb leaves in between paper towels. Microwave about one minute on low. If herbs are not dry, microwave several more seconds. Herbs will burn quickly in a microwave and volatile oils may spark. Sparking, like browning of the leaves, indicates overprocessing. Herbs dried in the microwave should retain a green color.

Store herbs away from heat out of direct light. If moisture forms on the inside of the storage container, redry the herbs.

Freezing

Herbs are prepared for freezing by a quick rinsing, then by shaking off the excess moisture and patting the leaves dry. Remove the leaves from the stems, put in labeled freezer bags, and store in the freezer. An alternate method is to drop the leaves into ice trays, fill with water, and freeze. The quality of frozen herbs will usually begin to deteriorate after about three to six months. Strong-flavored herbs, such as chives and rosemary, may affect other foods in the freezer and should be stored in freezer jars.

Special Uses of Herbs

Herbs have been grown for centuries for artistic, culinary, and medicinal uses. There is a great resurgence of interest in herbal treatments for human illness. Many traditional uses have not been sufficiently documented, however, and scientists have not identified nearly all of the compounds present in various parts of herb plants. They do not know for certain the effect on the individual of medicinal herbs, either in single use or use in combination. It is important to know the margins of safety in using herbs. Use caution with unfamiliar herbs.

A growing body of literature exists about herbs and herb uses. Explore herbal medication and cosmetic use carefully through reputable sources. There is a growing body of literature on herbs and herb uses, including cosmetic and medicinal.

Herbs can be enjoyed many ways; dried in bundles, used in flower arrangements, or made into potpourris, they add to interior decor and scent the air. Herbs are also incorporated with other garden materials into wreaths, “tussie-mussies,” bath accouterments, herbal pillows and hot pads, as well as cosmetic products.

Potpourris

While a successful moist potpourri is somewhat difficult to concoct, a dry potpourri can be made from almost any combination of herbs, dried flowers and spices as long as some basic rules are observed. The plant parts must be thoroughly dry and a fixative should be used for longevity. The mixture should be made, stored, and used in a non-metallic container; it should season for six to eight weeks.7307558960_b24317875b_o

Fixatives absorb and release the essential oils in herbs that otherwise would evaporate and be lost. The most common fixatives are orris root (or calamus), gum benzoin, and vetiver. Add prepared essential oils to the fixative and then combine into the mixture. The oils can also be used later to restore scent to potpourris.

A Basic “Recipe” for Potpourri

1 quart dried herb leaves, e.g., lemon verbena, scented geranium)
1 quart dried flowers or flower parts (e.g., rose, marigold)
1 ounce fixative
5-10 drops essential oil
Mix in a non-metallic container; cover tightly; store in a dark, cool place; allow to season about two months. Stir or shake the mixture periodically. Put the mixture in a decorative container that can be covered when not being used to preserve the scent.


Resource(s): Herbs in Southern Gardens

Center Publication Number: 261

Help for Holiday Plants

Source(s): Willie O Chance


The Christmas season is over and gone for another year. Unfortunately, so are the flowers on your poinsettias. Does this means it’s time to toss them and your other holiday plants out? Why not keep them and grow them to rebloom later this year?


Amaryllis

After your amaryllis has bloomed, the first step is to cut off the old flower stalk or stalks. Place the plant in a bright location and continue to water to encourage foliage growth. Continue this process throughout the spring and summer until fall. In late August or early September, reduce watering and allow the bulb to rest for two months in a cool (not freezing) location. If the soil has become crusty or hard, you may want to repot the bulb in fresh potting soil so that 1/3 of the bulb is above the soil surface and about an inch of soil is between the bulb and the sides of the pot. About mid to late October, put the plant in a well-lit location. Water sparingly until the flower stalk emerges, then water daily. Reflowering should occur about eight weeks later, just in time for the holidays.

Azaleas

After your azalea has ceased flowering, place the plant in a sunny east or west window, where it will receive lots of indirect but bright light. The ideal temperature range is 60o to 70o Fahrenheit as azaleas will suffer in dry air above 70o F. Keep azaleas evenly moist and mist occasionally, if possible. Remove spent or wilted blooms to encourage future flowering. Heavy leaf drop and/or yellowing of the foliage means that the plant is likely getting too much water or not enough light. Try a new location and check the soil to be sure it is not overly wet. Fertilize in the spring and summer with a product designed for acid-loving plants; read and carefully follow directions for indoor, container plants.

Christmas Cactus

After the holidays, place your Christmas cactus in a cool, well-lit location. Water sparingly or when the soil surface becomes dry to the touch. Keep temperatures not over 70o F. during the day and 50o to 55o F. at night, if possible. Continue this process throughout spring and summer, feeding with a houseplant fertilizer according to the label directions. Short, cool days are needed to reflower Christmas cactus plants in time for the holidays. Therefore, provide these plants with 60o F. temperatures and 14 hours of continuous, uninterrupted darkness every night followed by 10 hours of bright light during the day beginning in October and lasting through November. Then relocate Christmas cactus plants to a bright area where they will continue to develop flower buds and bloom.

Poinsettias

Poinsettias are a challenge to grow inside and rebloom, but reflowering can be accomplished with care and patience. After most of the leaves have dropped, cut the stems back to reshape the plant and encourage new growth. You may also need to repot the plant if the soil has become crusty and hard. Place the poinsettia in a bright location and continue to water and fertilize. To initiate the colorful “flowers”(bracts), provide poinsettias with 14 hours of continuous, uninterrupted darkness at nights followed by 10 hours of bright light each day beginning in mid October. Once the bracts have begun to develop, return the plant to normal indoor growing conditions of bright light and barely moist soil. Continue to grow and enjoy your colorful poinsettia plant.


Center Publication Number: 241

Fire Blight of Fruit Trees and Ornamentals

Source(s):

  • Nancy Doubrava, HGIC Information Specialist
  • James H. Blake, Extension Plant Pathologist, Clemson University

Fire blight is one of the most devastating and difficult-to-control diseases of many fruit trees including apple and pear, and other rosaceous ornamental plants. Caused by a bacterium (Erwinia amylovora ), fire blight can spread rapidly, killing individual apple and pear trees and ornamental plants when conditions are right for disease development.

Symptoms

The first symptoms of fire blight occur in early spring, when temperatures are above 60 °F and the weather is rainy or humid. Infected flowers turn black and die. The disease moves down the branch, resulting in death of young twigs, which blacken and curl over, giving the appearance of a “shepherd’s crook.” Leaves on affected branches wilt, blacken and remain attached to the plant, giving it a fire-scorched appearance. Slightly sunken areas, called cankers, appear on branches and the main stem. Many parts of the plant can be affected including blossoms, stems, leaves and fruit. During wet weather you may notice a milky-like, sticky liquid oozing from infected plant parts. Insects and rain can spread the disease.

Plants Commonly Affected

In the home orchard, fire blight can be very destructive to apple and pear trees. Pear trees are particularly susceptible. Some ornamental pear trees, such as ‘Bradford,’ are considered resistant to the disease but can become infected when conditions are favorable for disease development. Certain plants in the rose family (Rosaceae), including many ornamental plants, can be affected by fire blight. Some of these include crabapple, pyracantha, cotoneaster, hawthorn, photinia, quince, loquat and spirea.

Prevention and Treatment

There is no cure for fire blight, making disease prevention extremely important. Controls for fire blight include selecting tolerant varieties, using recommended cultural practices and sanitation measures and applying insecticides and bactericides. Although these methods are not 100 percent effective, they help reduce disease severity.

Recommended Varieties

Select cultivars that are less susceptible to fire blight, and suitable for planting. Some relatively resistant ornamental pear varieties are ‘Bradford, ‘Chanticleer, ‘Fauriei’ and ‘Whitehouse.’ ‘Aristocrat, ‘Autumn Blaze, and ‘Redspire’ are all very susceptible to fire blight infection. A relatively resistant pyracantha is ‘Laland Firethorn,’ and a resistant hawthorn is ‘Washington.’ Relatively resistant edible pears include ‘Kieffer,’ ‘Moonglow,’ ‘Magness,’ ‘Orient,’ and ‘Seckel.’ Resistant apple varieties include ‘Red Delicious,’ ‘Ozark Gold,’ ‘Priscilla,’ ‘Prima,’ ‘Freedom,’ ‘Liberty’ and ‘Spartan.’ Several relatively resistant crabapples include ‘Adams,’Doldo,’ Jewellberry,’ and ‘Liset.’

Cultural Practices and Sanitation Measures

Reduce the spread of fire blight by removing and destroying all infected plant parts. Pruning cuts should be made 12 to18 inches below any sign of infected tissue. Disinfect all pruning tools between cuts using a solution of 1 part household bleach to 9 parts water. Succulent new growth is easily infected, if injured. Also, avoid excess nitrogen fertilization which results in excess succulent growth.

Insecticides and Bactericides

Bacteria enter the plant through blossoms, fresh wounds or natural openings. The disease is spread by rain and insects attracted to the bacterial ooze, such as bees, ants, flies, aphids and beetles. These insects inadvertently carry the bacteria to opening blossoms. Control of insects can reduce the spread of bacteria and the occurrence of infections. During bloom, bees can carry the fire blight bacteria during pollination. Do not use insecticides during bloom.

Fruit Plants

Apple

The recommended bactericide for susceptible apple trees is streptomycin which should be sprayed during bloom and when insects or mechanical means injure tender shoots. Use streptomycin as a preventative treatment only. The time between streptomycin application and fruit harvest must be a minimum of 50 days. Apply all chemicals according to directions on the label.

Pear

Pear trees can also be treated with streptomycin. Apply the first spray as soon as the blossoms open. Repeat at four- to seven- day intervals as long as blossoms are present. The time between streptomycin application and fruit harvest must be a minimum of 50 days. Apply all chemicals according to directions on the label.

Crabapple

Crabapple trees can be treated with one of the following: copper hydroxide, streptomycin, or a commercially available combination spray of sulfur and basic copper sulfate. Do not use streptomycin once fruit is visible. Copper should be applied before and after bloom. If applied during bloom, it will cause russeting on the fruit and possibly fruit abortion. Apply all chemicals according to directions on the label.

Note

Control of diseases and insects on large trees is usually not feasible, since adequate coverage of the foliage with a pesticide cannot be achieved.


Resource(s): Common Landscape Diseases In Georgia

Center Publication Number: 195

Herbicide Damaged Plants

Source(s): Stephen D Pettis


Powdery_mildewChemicals can damage plants in a number of ways. Chemicals can cause foliar burns, defoliation, leaf curl, and stunting when applied improperly. Household chemicals such as paints, cleaners, or solvents can injure plants but most often we see injury caused by agricultural chemicals such as fertilizers, insecticides, fungicides, and herbicides that have been misapplied.

Herbicide damage is by far the most common type of chemical plant injury. These agricultural chemicals have been designed to kill plants so as you might guess, are likely to injure desirable plants. Some herbicides kill all plants, and some kill only certain plants (grasses but not broadleaves for example). No matter, if the herbicide is applied at too high a rate or when the temperatures are too high, you can get damage on non-target plants.

Symptoms of herbicide damage can vary depending on the chemical applied and the plant affected. Some common symptoms include leaf curling or cupping, yellowing, dead or necrotic tissue, odd leaf texture, and reddening of leaf veins. Some plants are very sensitive to herbicides while others are not.

Herbicides are often very specific and damage can occur if you do not read the label carefully. The label always has detailed instructions on proper use and safety as well as what plants the product may be used on. For instance, if you used a preemergent herbicide labeled for centipede on a fescue lawn you would end up with yellow or dead grass. Or, if you applied this same fertilizer to the proper grass when the air temperature is over 85F, then you could get some damage. Preemergent herbicides must be applied at specific times of the year as well. If applied too early, you can end up stunted roots as shown in the picture to the right.

There is no way to reverse herbicide damage. Once plant tissue is damaged, there is no way to improve it. Most plants will recover by themselves if they are not severely injured by chemicals. Pruning out damaged branches or leaves can improve the looks of damaged plants sometimes and pruning initiates new growth. If you suspect chemical damage, inspectors from the Georgia Department of Agriculture’s Pesticide Division will investigate the situation if you request that they do so.


Center Publication Number: 149

Herbs in the Landscape

Source(s): Wayne McLaurin, Professor Emeritus of Horticulture, The University of Georgia, College of Agricultural and Environmental Sciences


Herbs aren’t just for the garden; many are attractive in perennial borders or even among foundation plantings. Pots of herbs add to the appearance of a porch or patio. They can provide traditional materials for landscaping that are both useful and ornamental.

4603835368_797269a444_b

Herbs offer bloom, color variation or texture in beds or perennial gardens. In early summer, yarrows lift dense flower heads while, in fall, pineapple sage displays showy, bright red inflorescence. Lavenders, artemisias, and lamb’s ears proffer gray-green or white mounds of foliage much of the year.

Herbs, such as germander, santolina, winter savory and chives can be used effectively as edging plants; various thymes (including woolly, creeping, and lemon thyme) are both fragrant and attractive growing between stones in the patio or sidewalk, or in niches in a retaining wall.

As with other landscaping plants, select herbs according to their foliage colors, size, cultivation needs and growth habits.

Herb Size

  • Tall/large herbs — anise, hyssop, yarrow, lemon verbena, fennel, mountain mint, bay
  • Medium/upright or mounding — basil, sage, lavender, artemisia, scented geranium
  • Small/upright or prostrate — thyme, stachys, germander, santolina

Container Plantings

Herbs grow well in urns, hanging baskets, strawberry pots, and other containers as long as the light, moisture, and fertility requirements are met. Use a good lightweight, well-drained artificial soil mix, not garden soil, for container-grown herbs. Container-grown herbs do not have access to surrounding soils, are more likely to dry out quickly, and must be watered regularly, even daily. Containers should have drainage holes so excess water can escape. Regularly empty any water in the saucers under containers to prevent roots from deteriorating. Uniform monthly fertilizing keeps herbs lush, but be careful to avoid fertilizer salts build-up. Water containers sufficiently so the water runs through the holes in the bottom of the container.

Note: Some herbs — French tarragon, chervil, cilantro, cumin, and chamomile — are particularly susceptible to humid southern springs and summers and may grow best in containers under more carefully controlled conditions.13853083_1f43661419

Indoor Plantings

Herbs can be grown indoors if the right amounts of sun and moisture are provided. Herbs need to receive at least four to six hours of sunlight each day. Do not assume that herbs near windows automatically receive enough light for growth. An average south-facing window should provide adequate light. Herbs will grow tall and spindly in inadequate light. Rotate the plants periodically so that all sides receive enough light and pinch them back to promote bushiness. Plants grown indoors will generally not grow as fast as those grown outdoors and there will not be as many leaves to harvest.

Herbs such as scented geraniums, patchouli, and bay are sensitive to cold temperatures; if they are planted in containers, they can be easily moved indoors during cooler weather.

Water herbs only when they are dry. If the soil feels at all moist 1 inch below the surface, do not water the plant. Over-watering increases the chance of disease and may eventually block necessary oxygen to the roots.


Resource(s): Herbs in Southern Gardens

Center Publication Number: 262