Herbicide Damaged Plants

Source(s): Stephen D Pettis


Powdery_mildewChemicals can damage plants in a number of ways. Chemicals can cause foliar burns, defoliation, leaf curl, and stunting when applied improperly. Household chemicals such as paints, cleaners, or solvents can injure plants but most often we see injury caused by agricultural chemicals such as fertilizers, insecticides, fungicides, and herbicides that have been misapplied.

Herbicide damage is by far the most common type of chemical plant injury. These agricultural chemicals have been designed to kill plants so as you might guess, are likely to injure desirable plants. Some herbicides kill all plants, and some kill only certain plants (grasses but not broadleaves for example). No matter, if the herbicide is applied at too high a rate or when the temperatures are too high, you can get damage on non-target plants.

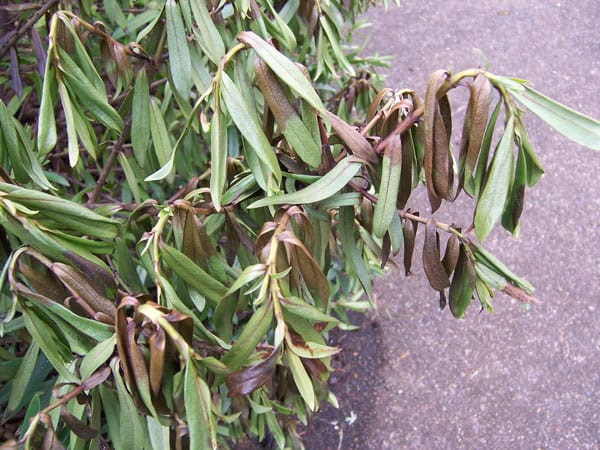
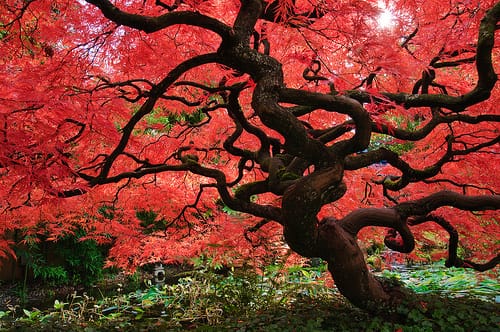
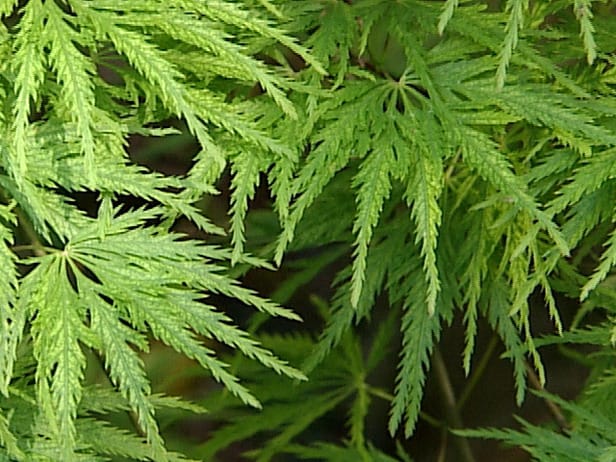
Symptoms of herbicide damage can vary depending on the chemical applied and the plant affected. Some common symptoms include leaf curling or cupping, yellowing, dead or necrotic tissue, odd leaf texture, and reddening of leaf veins. Some plants are very sensitive to herbicides while others are not.

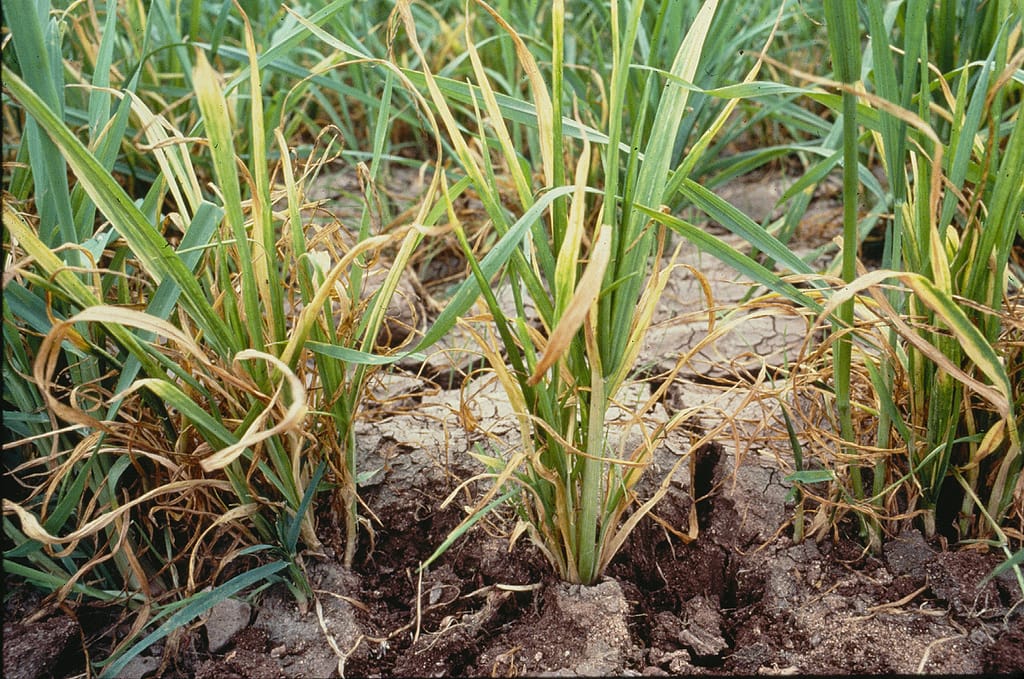
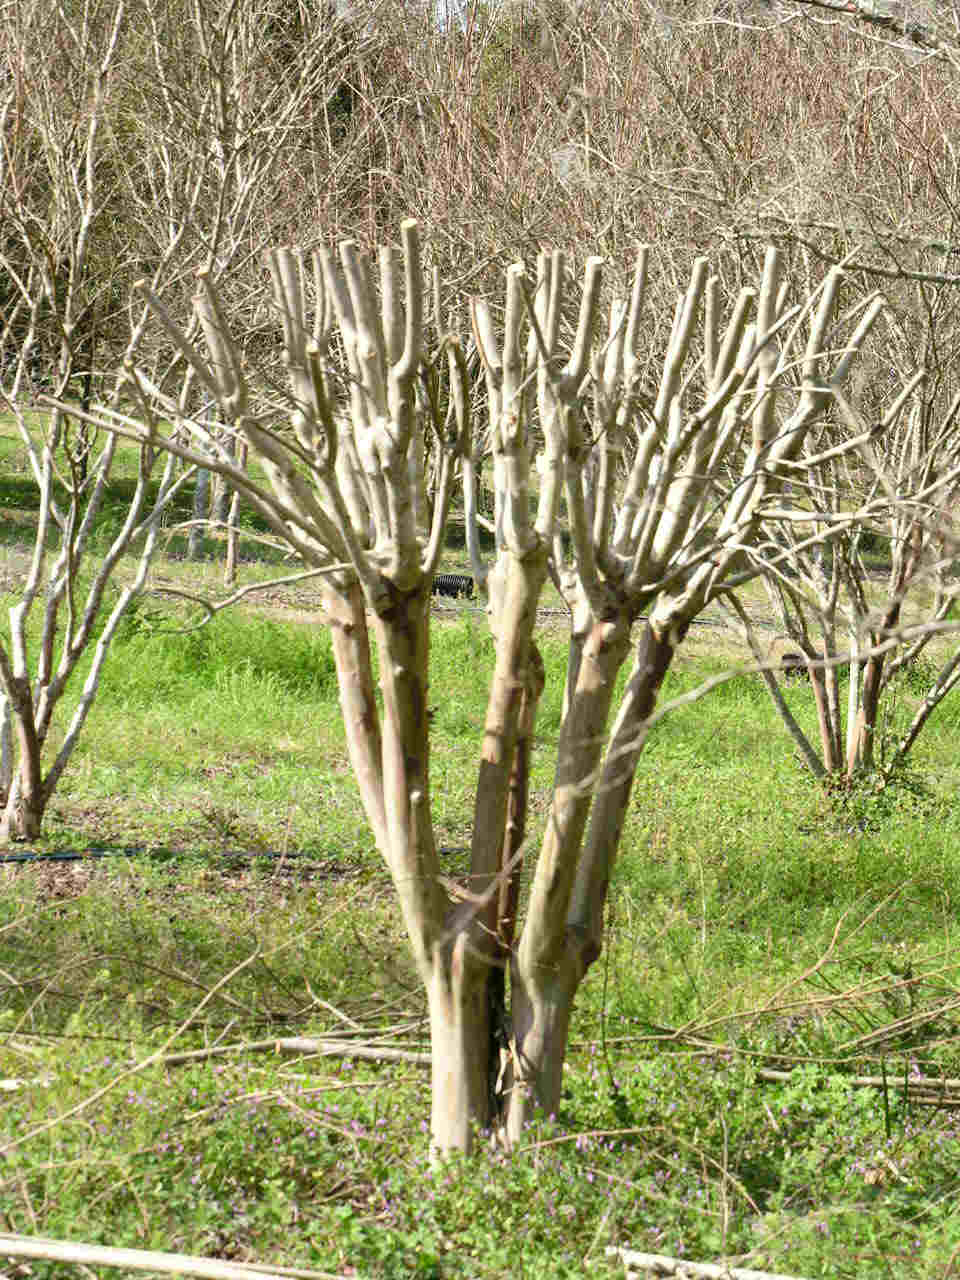
Herbicides are often very specific and damage can occur if you do not read the label carefully. The label always has detailed instructions on proper use and safety as well as what plants the product may be used on. For instance, if you used a preemergent herbicide labeled for centipede on a fescue lawn you would end up with yellow or dead grass. Or, if you applied this same fertilizer to the proper grass when the air temperature is over 85F, then you could get some damage. Preemergent herbicides must be applied at specific times of the year as well. If applied too early, you can end up stunted roots as shown in the picture to the right.

There is no way to reverse herbicide damage. Once plant tissue is damaged, there is no way to improve it. Most plants will recover by themselves if they are not severely injured by chemicals. Pruning out damaged branches or leaves can improve the looks of damaged plants sometimes and pruning initiates new growth. If you suspect chemical damage, inspectors from the Georgia Department of Agriculture’s Pesticide Division will investigate the situation if you request that they do so.


Center Publication Number: 149

IPM in the Garden

Source(s): Stephen D Pettis


Gardening in the southeast is a wonderful hobby. We have long growing seasons, fertile soil, and beautiful summer weather. The daylight lasts until 9:00 pm and there is no end to the kinds of plants we can grow here. There is however a drawback to growing plants in our climate; pests enjoy the same conditions our plants do.

ipmHigh humidity and warm temperatures make pest pressure in the southeast the highest in the nation. This makes gardening in our area most difficult some years. Diseases, insects and weeds are all very aggressive in Georgia and, at times, gardening can get to be almost intimidating. Chemicals are scary, weeds grow like crazy and plant diseases seem to follow every rain.

There is hope for Georgia gardeners, thankfully. By practicing IPM or Integrated Pest Management in our gardens all year long, we can substantially reduce pest pressure. IPM is the use of all available tactics (biological, cultural, and chemical) to control pests. More simply put, IPM involves using everything at our disposal to control pests, including chemicals as a last resort. The following is a list of things we can do to get the jump on weeds, insects and plant diseases in our landscapes and vegetable gardens this spring:

  • Think back to last year. Did you have any pest problems? If so, begin your scouting program in these ‘hot’ spots. Scouting involves examining problem areas for signs of insects, diseases, weeds or the damage caused by them. If you cannot remember from year to year, start a garden notebook to write down your observations for reference in the years to come.
  • Begin scouting weekly in February for signs of insect damage. Look closely at the trunks of trees, the buds of flowering plants, the undersides of leaves and around your home for signs of insect damage. Know the enemy! Familiarize yourself with our most common pests. Several publications are available from your local County Extension office that detail what signs to scout for.
  • Apply pre-emergent herbicides at the appropriate time to lawns to prevent the weed infestations that are bound to occur. This will reduce herbicide use throughout the summer.
    Think about what cultural measures you might employ to keep plants healthy and resistant to pest attacks. Proper fertility, irrigation, mulching, plant site selection and pruning will help assure tougher plants. Again, your local County Extension office is a valuable resource for publications that describe proper cultural techniques.
    Use pest resistant varieties of plants in vegetable gardens and flowerbeds. Pest resistance is often listed on the labels of vegetables and some ornamentals.
    Be vigilant! Scouting weekly and keeping good records of pest sightings, attacks, cultural methods, and chemical applications can avert large pest outbreaks in the long run.
    Use all the tools at your disposal to manage pests.
  • Gardening in the south can be wonderful if gardeners take the time to employ IPM. Many garden problems can be avoided by a proactive approach to dealing with pests. When infestations do occur, using all control tools available will reduce pesticide use and preserve beneficial insects

Resource(s):

Center Publication Number: 164

Leylands Get Really Big

Source(s): Stephen D Pettis


Leyland cypress (Cupressocyparis leylandii) is one of the most commonly used landscape trees in Gwinnett County today. The tree has many fine attributes such as rapid growth, easy propagation, and inexpensiveness. It is a terrific plant for screening due to its rapid growth. Unfortunately, due to poor planning, we are starting to see some serious problems associated with this popular plant. It seems we just plant them too close together.

leyland-2

Leylands have traditionally been pest resistant, owing much of their popularity to this fact. This is changing now due to overuse of the plant, poor sighting and spacing, and the emergence of some lethal fungal infections. There are many disease problems plaguing Leylands today. Because they are often planted too close together, Leyland Cypress is prone to several damaging canker diseases, root rot and other pests. Prolonged drought and other stresses exacerbate disease susceptibility as well.

In Georgia, cankers are probably the most important and destructive diseases of Leyland cypress in the landscape. Cankers are the tree equivalent of human sores; exposed, infected tissue that exudes infectious liquid. Two examples of damaging canker diseases are Seiridium canker and Botryosphaeria (Bot) dieback.

Seiridium canker tends to appear as tip dieback whereas Bot canker tends to appear as branch dieback. Seiridium causes numerous thin, elongated cankers on stems, branches and branch axils. These cankers cause twig and eventually branch dieback. Bot causes sunken, girdling cankers at the base of the dead shoot or branch. Sometimes, the main trunk shows cankers that might extend for a foot or more in length. These cankers rarely girdle the trunk but will kill branches that may be encompassed by the canker as it grows.

Proper establishment and care are the best defenses against canker diseases in residential and commercial landscapes. Due to the endemic nature of these fungi and the size of many Leylands, spraying is not an option. Proper siting and sanitation are the best controls for canker diseases. Plant Leylands at least 12’ apart to avoid overcrowding and reduction of air flow through the canopy of the trees. Try to avoid planting the tree in shady areas where leaf dampness may persist. If a planting or rows of trees have begun to grow into one another, consider taking out every other tree. Sanitation, such as removal of cankered twigs and branches, helps prevent disease spread. Destroy pruned materials, and disinfect pruning tools by rinsing in rubbing alcohol or a solution of 1 part bleach to 9 parts water. Remove extensively damaged trees or trees that are damaged in the main trunk.

Due to its relatively poorly developed root system, plant Leyland Cypress in well-drained soils to encourage plant vigor. Remember, these trees hate ‘wet feet’. To minimize water loss and water competition with other plant species such as turf, mulch an area several feet beyond the lowest limbs. During hot, dry summer days, irrigate trees thoroughly around the base of the tree every 7-14 days, depending on soil composition. Take special care of trees located near driveways, paved areas or heat-reflecting buildings by providing adequate irrigation during periods of drought. Avoiding excessive watering and heat stress is vital to establishment of a healthy, disease resistant Leyland Cypress.


Center Publication Number: 113

Protect Plants from Cold Weather

Source(s): Stephen D Pettis


Cold injury, the damage caused to plants by freezing temperatures, may occur on the fruit, stems, leaves, trunk and roots. Water inside plant parts can freeze and expand, tearing cell walls and causing them to leak. This damage may go unnoticed until the plant fails to come out of dormancy in the spring.

wirrigemcolddamage306b

There are three types of cold injury. The first is called a ‘burn’. Often cold damaged plant parts will become mushy and turn brown or black. Over time the damaged leaves or stems will dry out and appear to have been burned with a torch. Sunken areas may appear on branches and trunks and the bark may peel.

The second type of cold damage, desiccation, can be caused by winter winds. Cold air does not hold moisture like warm air (summer humidity and dry winter air) and can dehydrate plants if it is sustained for long periods of time. Leaves may dry up at the edges and eventually turn completely brown.

The third type of winter damage is wood splitting or ‘frost cracks’. This damage occurs on stems and branches. On particularly cold nights, water in the cells just beneath the bark of trees and shrubs freezes. When the sun hits these areas the next day, the water thaws quickly killing the cells and splitting the wood. Eventually, longitudinal (lengthwise) cracks may appear. Often these are not evident until the following summer.

Preventing cold damage to plants begins by planting plants that are native to our area or acclimated to the temperatures we experience. The USDA has created climatic zones based on average coldest temperatures for the regions of the US. Plants are categorized according to the areas in which they are hardy. Gardeners can choose plants that will perform in their area. For a map of the USDA hardiness zones they may visit the USDA website http://www.usna.usda.gov/Hardzone/ushzmap.html.

There are other ways to protect tender plants during the winter:

  • Plant site selection can be crucial to winter hardiness of some plants. Planting under a tree canopy or near the southwest side of a home to maximize evening winter sun can protect plants.
  • Plant nutrition can play a minor role in freezing. Maintaining proper fertility levels can lower the temperatures a plant can tolerate by 5 degrees.
  • Windbreaks can be constructed or planted to block frigid winter winds.
  • Plants can be covered with fabric on cold nights. Be sure to remove the fabric every day.
  • Finally, watering plants keeps them hydrated and prevents plants from drying due to cold air and frozen soil.


Resource(s):

Center Publication Number: 161

Pruning Crape Myrtles

Source(s): Stephen D Pettis


The Crape myrtle (Lagerstroemia indica) is one of the most commonly used flowering trees in landscaping today. It also has the dubious distinction among gardeners and horticulturists as the plant that gets butchered in the worst way by homeowners and property maintenance companies.

Perfectly pruned crape myrtle. Note the umbrella shape of the canopy.

‘Crape murder’ is a term used to describe the horrific pruning that many unfortunate crapes must endure and it isn’t far off the mark. The plants do not seem to mind particularly, as they are actually stimulated by extreme pruning. But, to those of us who empathize with abused creatures, the sight of mutilated crape myrtles is hard to stomach.

Crape myrtles are trained by nurseries into two basic shapes: single-stemmed tree-form and multi-stemmed. To achieve these shapes, growers allow crapes to grow for a year in either containers or fields, and cut them down to the ground in the spring of the second year. Later that summer when the plant has coppiced or grown many stems from the original root system, the grower will choose the single best stem and train it into a single-stemmed tree-form tree or choose an odd number of the best stems (3 or 5 for example) for a multi-stemmed tree. These trees are then grown out to salable size and purchased by landscapers and homeowners.

Pruning crapes so that they retain the appropriate form is relatively simple. Prune the trees in the winter when dormant. For trees that are just the right height or shorter, simply prune off the old flower heads and seedpods. If the tree was perfect last year but the past summer’s growth made the plant too tall, remove just that growth. Always remove any suckers that have sprouted from the roots or lower trunk. The key is to not allow the trees to get so overgrown that extreme pruning is ever necessary.

Sometimes though, we may forget to do our yearly maintenance pruning or it may be we take over a property where the previous maintenance person did a lousy job and now a harsh pruning is necessary. In either case, the trees can be pruned in such a way as to minimize the aesthetic impact of the removal of sizable portions of the tree. Begin by identifying the main stems and remove any others that might have suckered from the roots. Next, prune out any branches that rub and any branches in the interior of the tree that have suckered. Then decide the height you wish the tree to become. Make cuts at the very top of each trunk to remove any growth above that height. The tree may look a little flat-topped, but you can make shaping cuts to make the canopy the shape you want. I prefer the very top to be a little flat and to taper the sides into a rounded shape. One might describe it as umbrella shaped(see picture).


Resource(s):

Center Publication Number: 112

Take Care of Garden Tools

Source(s): Stephen D Pettis


Winter is a tough time for avid gardeners. We struggle to find something to do in the yard after all of the leaves are raked, the perennials divided and the pruning is done. We turn to UGA football for some relief but, alas, it ends all too soon. We rack our brains and scour gardening books for ideas but eventually wind up wandering aimlessly around our yards in the months of January and February when the weather is nice enough to get outside.

Inevitably we wind up in the tool shed. There we see all our tools there still dirty and grimy from the summer’s toil. Your favorite shovel has red clay caked on it, the pruners are nearly stuck with sticky sap in the blades, and both are dull. Our hosepipe lies in a heap like a dead snake in the corner and the wheelbarrow has a flat tire. The spirit lifts now that some purpose has come back into the poor gardener’s existence. There are tools to be maintained.

The first tool to get the treatment should be our favorite shovel. This tool is, after all, the one instrument that sees the most use in the garden and serves us unfailingly all summer. Using a strong stream of water and a brush, remove any caked on mud and plant debris. Be sure to pay attention to the shank (the area where the handle inserts into the shovel blade) because bits of roots, soil, and plant debris can get stuck in there. This a good place for plant diseases to hang out until next year.

Next sharpen the business end of the blade to a working edge not a razor’s edge. A working edge is one that is slightly blunt (a 15-20 degree angle) and is not quite sharp enough to cut you. It will last much longer than a narrow edge. Use a wire brush or some steel wool to clean any remaining debris and rust from the blade. Apply a light coat of oil to the blade. If the shovel has a wooden handle, use sand paper to smooth any rough patches and oil with linseed or tung oils. Store your shovel for the winter by hanging it on the wall instead of standing it up in the corner to avoid damage to the edge.

After working on the shovel, tackle the pruners. Use a rag and a solution of bleach to clean the blades of bypass and anvil pruners. Scrub any difficult to remove crud with steel wool and oil the hinge and spring with a household lubrication product such as WD40. Sharpen the blade to a 40-45 degree angle with a metal file being extra careful not to cut yourself. ALWAYS WEAR GLOVES WHEN SHARPENING TOOLS! If the pruners have removable blades, consider replacing them. Store the pruners in a locked cabinet or drawer to prevent children from playing with them and getting hurt.

Finally, take care of that old wheelbarrow. Clean the tire, handles and the tray with water and soap. Tighten any nuts or screws that might have loosened over the summer. Read the tire pressure requirement on the side of the tire and fill it with air. Use a bicycle tire pump instead of an air compressor. A really powerful compressor can burst a wheelbarrow tire sending tire shreds flying. Most wheelbarrows have sealed wheel bearings so greasing or oiling the wheel isn’t necessary. On the off-hand chance yours has a grease fitting, use regular trailer grease and a grease gun. Store the wheelbarrow inside if you can or if you have to store it outside, turn it upside down to prevent water from standing in the tray.

There are many tools in our shed that we seldom use or that don’t really require much maintenance. Simply hose off your pick, mattock, flat shovel and rakes. Drain and roll up your hoses. Hang all of your tools if you have the means to keep them from taking up too much room in the corner. Hopefully, maintaining your gardening tools will keep you busy for a while and prevent you from wandering aimlessly around your yard…like I do.

Cutleaf Japanese Maples, Refined and Delicate

Source(s): Stephen D Pettis


One of the loveliest of all the small trees is the group of trees known as Cutleaf Japanese Maples. These oriental relatives of our native maples exhibit traits that have been selected by Japanese gardeners and horticulturists for thousands of years. These are the most refined and most delicate of all the maple family.

Cutleaf Japanese Maples Cutleaf Japanese Maples

The Cutleaf Japanese maple gets its name from its deeply cut leaves. The lobes of the leaves are cut to the leaf petiole. Each lobe is finely serrated and each serration is further toothed. This delicate leaf morphology is colored in shades of either green or red and is the most attractive feature of the plant.

Japanese maples in general are rounded trees with smooth bark and undulating branches. The cutleaf varieties are all very small ranging from 3-9 feet in height. Their small size lends them to being excellent specimen trees near patios, homes and driveways. The tree can be used as an accent and even as a potted plant. Branches of the plant are layered much like many of our native trees such as redbud and dogwood. In deep shade this layering effect is pronounced and the tree takes on the wispy look of smoke drifting. The tree can be trained as either single or multi stemmed tree. Many of the cutleaf varieties will form a multi stemmed shrub-like tree that hides its branches behind a skirt of the wonderful leaves. In this form in makes a rounded mound of vibrant color.

Cutleaf Japanese Maple Requirements

Japanese maples have specific site requirements. These trees prefer dappled shade, although I have seen them in full sun. Japanese maples in the full sun tend to be stressed and pick up summer leaf spot diseases readily. Cutleaf Japanese maples require evenly moist well-drained soil conditions for best performance. These trees should be protected from winds and winter cold by siting them near structures, large trees or among a planting of other small trees and shrubs.

One drawback to Japanese maples in general is their relatively slow growth rate. Japanese maples grow very slowly their first few years after being planted but will pick up speed as the years go by. One can expect a cutleaf maple to achieve maturity in ten to fifteen years depending on growing conditions.

Japanese maples are generally very expensive. This is because propagating maples in general is not an easy task. Japanese maples are more difficult and the cutleaf varieties harder still. The plant is usually readily available but at substantial costs. It is worth it to own one of these gems. Most Japanese maples are grafted. Producers graft the cutleaf varieties onto rootstocks of other maples to improve their performance. You can sometimes see the junction between the upper portion or the scion and the lower portion or the rootstock. Sometimes the rootstock can send up its own trunk or sucker. These occasional suckers should be pruned and removed when they emerge, as they will look completely different than the upper portion of the tree.

When someone asks the best way to grow their own Japanese maples, I tell them to grow them from seed. Collect the seed or samara, a type of winged fruit, prior to their becoming dry. This is generally in June. Plant the seeds directly in moist peat. A relatively small percentage of the seeds should germinate the following spring. Sometimes, Mother Nature will do the work for you. Search under your favorite mature tree for seedlings and transplant them in one-gallon pots filled with general potting soil.

These rounded deciduous trees elicit comment from almost everyone who walks by one in the garden. There is a lovely example just outside the main entrance of the University of Georgia Botanical Gardens. Any time you visit, you will invariably see someone stooping over in front of it to get a look at the sign just beneath it so that they might identify this majestic plant.


Resource(s): Landscape Plants for Georgia

Center Publication Number: 148

Create Bird Habitats in Your Landscape

Source(s): Stephen D Pettis


Create suitable habitats for birds through landscaping. Gardeners can provide birds with the things they need to survive and birds can provide gardeners with hours of enjoyment in the backyard.

Woodpecker on Snag
Woodpecker on Snag
Make the environment inviting

Planning a landscape that is suitable for birds is easy. Sketch the existing landscape, making note of all structures, plantings and topographical features. Choose areas to plant trees and shrubs that birds can utilize. Annuals and perennials that flower throughout the season attract insects that birds may feed on. Standing dead trees will provide habitats for birds such as woodpeckers.

After making plant choices that provide food, shelter and cover for birds, artificial features should be considered. Water sources such as birdbaths, fountains and ponds may be added to landscapes to attract birds. The features should be in the open away from any place cats and other predators can hide. Rocks and water plants add to a water feature’s attractiveness to birds as well as keeping the water fresh. Man made birdhouses can be installed. These should be placed in sheltered spots near a shrub or tree. Finally, birdfeeders can be added. All bird feeders should be placed in the open near some sort of cover. Baffles and guards should be placed on mounting poles of both birdfeeders and houses to prevent predation.

Trees and Shrubs for Birds

Plant

Plant type

Feature

Birds attracted

Oak

Tree

Excellent nesting

Blue jays, sparrows, acorn woodpeckers

Pine

Tree

Excellent nesting

Robins, purple finches, mourning doves, warblers, sparrows

Holly

Large shrub

Shelter

Towhees, thrashers, mockingbirds

Elderberry

Large shrub

Summer fruit

Warblers, grosbeaks, goldfinches

Dogwood

Small tree

Nesting, late summer fruit

Bell’s vireos, summer tanagers

American Beautyberry

Shrub

Late summer fruit

Many birds

Native roses

Shrub

Nesting, cover

Many birds

Eastern Red Cedar

Tree

Nesting, winter fruit

Sparrows, robins, mock-ingbirds, many others

Winterberry Dec. Holly

Small shrub

Late winter fruit

Robins, blackbirds, cedar waxwings

Attracting birds to one’s yard by birdscaping can be rewarding. Birds are not only beautiful and fun to watch, but also provide control of adult insects, grubs, and caterpillars. By improving suburban and urban landscapes, people can help replace bird habitat that has been reduced or destroyed by development. To learn more about attracting birds to your landscape, contact the Gwinnett County Extension Service at (678) 377-4010.

Feeders

Squirrel proof feeders Spinners, flippers, trapdoors prevent pesky squirrels from robbing feeders
Platform feeders Feeds many birds at once
Tube feeders Plastic tube with staggered holes
Hummingbird feeders Glass feeders filled with sugar water (1 part sugar, 4 parts water; no red dye needed; boil and cool before use)
Suet feeders Wire suspended suet cake. Birds often hang upside down to feed.
Thistle feeders Narrow tube feeders
Peanut feeders Attracts woodpeckers
Window feeders Suction cups attach feeder to window

.


Resource(s):

Reviewer(s):

  • K. Lynn Davis, CEA- Turner County. The University of Georgia College of Agricultural and Environmental Sciences.
  • Brandy Wilkes, CEA- Cook County. The University of Georgia College of Agricultural and Environmental Sciences.

Center Publication Number: 105

Butterfly Gardens

Source(s): Stephen D Pettis


There are many species of butterflies but one thing about all of them is true; they are all lovely. Most folks despise most insects but few people do not welcome these insects into their gardens. Many gardeners actually plant flowers and flowering trees and shrubs to attract these summer time friends.

panee-butterfly-garden

The key to successful butterfly gardening is to select a variety of flowering plants so butterflies are attracted to the food source all summer long. Plant annuals, perennials, and flowering trees and shrubs to attract a variety of butterflies consistently. Utilize plants of different colors as well. Plants such as daisies, Queen Ann’s lace, yarrow, alyssum, golden rod, alfalfa, clovers, and vetches will attract beneficial insects. Keeping your plants flowering for as long as possible is another key to having a consistent variety of butterfly attracting plants. Annuals and perennials benefit from ‘deadheading’ or removing spent flowers. Pinching off old flowers stimulates herbaceous plants to produce more blooms for longer periods of time. Be sure however to leave the very last set of flowers if you wish to collect seed.

Flowering trees and shrubs benefit from pruning at the appropriate time. Plants such as hydrangea and forsythia should be pruned in early summer after flowering. Shrubs such as hollies and butterfly bushes benefit from an early spring pruning to stimulate new shoot growth. Proper fertility keeps plants growing vigorously and provides new shoots, flowers, and fruit with the extra nutrients they need to really put on a show. Irrigate in a timely manner.

Water sources attract butterflies. Birdbaths, temporary puddles, small dishes of water, and dripping water can be easily installed in any garden. Remember to replace your water every few days to avoid mosquitoes and to keep it attractive. Place small ‘perches’ in water sources so that insects can access the water. The final way to encourage butterflies is to provide them shelter. Areas that are left undisturbed benefit insects. Allow forest edges to grow wild and do not mow open areas unnecessarily. Plant perennial flowerbeds that will flower all season by staggering different species throughout the bed. Hedgerows also provide beneficial insects with shelter.

Plants for a Butterfly Garden Plant type Flowering time Favored Soil Situation Sun or Shade
Hydrangea quercifolia, Oakleaf Hydrangea Shrub Late May-July persisting Moist loam Partial shade
Callicarpa Americana, American Beautyberry Shrub June Dry loam Partial shade
Lilium longiflorum,

Easter Lily

Perennial April-May Moist loam Full Sun
Hemracolis spp., Daylily Perennial May-July Dry loam/clay Full Sun
Achillea filipendulina, Yarrow Perennial May-August Dry clay Full Sun
Iris xiphium, Dutch Iris Perennial April Dry clay Full Sun
Rudbeckia hirta, Black-eyed Susan Perennial June-August Dry clay Full Sun
Ageratum eupatorium, Floss Flower Perennial May-October Moist loam Full Sun
Centaurea cyanus,Corn Flowers Annual March-May Moist loam Full Sun
Lantana camara, Lantana Shrub June –September Dry clay Full Sun
Buddleia davidii, Butterfly Bush Shrub June-September Dry Clay Full Sun
Milkweed Asclepias spp. Annual Mid June Moist loam Full Sun
Sunflower Annual June-August Moist loam Full Sun
Ilex verticillata, Winterberry Shrub December-

January

Moist loam Full Sun
Cleome hasslerana, Cleome Annual May-September Summer to early fall Full Sun
Cosmos spp., Cosmos Annual May- September Spring to early fall Full Sun
Lunaria annua, Money Plant Biennial April- May Spring to mid summer Full Sun
Delphinium spp., Larkspur Annual April- May Spring Full Sun

Resource(s): Flowering Perennials for Georgia Gardens

Center Publication Number: 110

Build a Home Greenhouse from Recycled Materials

Source(s): Stephen D Pettis


A greenhouse provides winter sanctuary for gardeners and a place to keep green plant material. Greenhouses are simple, easy to build and they can be quite inexpensive if you use recycled materials.

green_0

Greenhouses have been around for centuries. The first greenhouses were invented by the Dutch in the 1600’s.Through ingenuity and the invention of paned glass, grapes were started early under panes of glass leaned up against stone walls. This trapped heat and maximized the poor spring sunlight to allow earlier crops of fruit. From panes of glass leaned against walls, greenhouses have evolved but are still simply a collection of windows.

Windows and glass doors are replaced in homes around our county everyday. The windows that are replaced are often thrown away and wasted. These windows and doors could be recycled to create a greenhouse in a number of ways.

The simplest is to build a cold frame raised bed. Simply build a raised bed the size of your window. Make sure the top slopes a bit to ensure water drains off quickly. Install weed barrier cloth in the bottom and fill with potting soil. This bed can be used to harden off seedlings started indoors in the spring, used for rooting cuttings in the summer, and for cool season veggies in the fall and winter.

The greenhouse can be built by starting out with a wooden frame of any sort. Orient the greenhouse so that full direct sunlight cannot penetrate the windows. If you have a full sun situation, purchase shade cloth to reduce sun penetration that might harm tender plants.

Use an opaque roofing material such as corrugated plastic or fiberglass. Attach the windows to the frame with hinges so that each is independent allowing for temperature regulation. In the winter, caulk the windows to insulate against the winter chill. Employ the use of a boxed heater and lights to warm the greenhouse during particularly cold winter nights.