Carefulness costs you nothing. Carelessness may cost you your life.
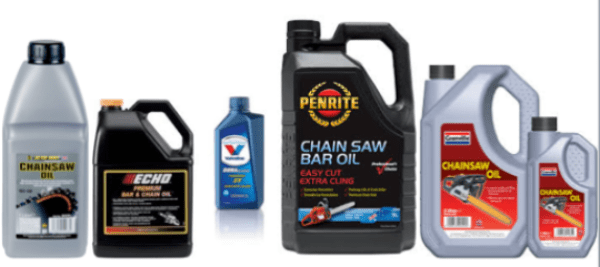
A well-lubricated chainsaw is crucial.
Oil
If it isn’t oiled, heat will build up from friction, the saw will need more gas, and the chain won’t turn as fast.
Most saws are self-lubricating.
There is an oil reservoir in the housing from which oil is pumped out using the same crankshaft assembly that turns the chain. Oil is pumped into the groove in the bar. As the chain runs, it lubricates itself and the bar.
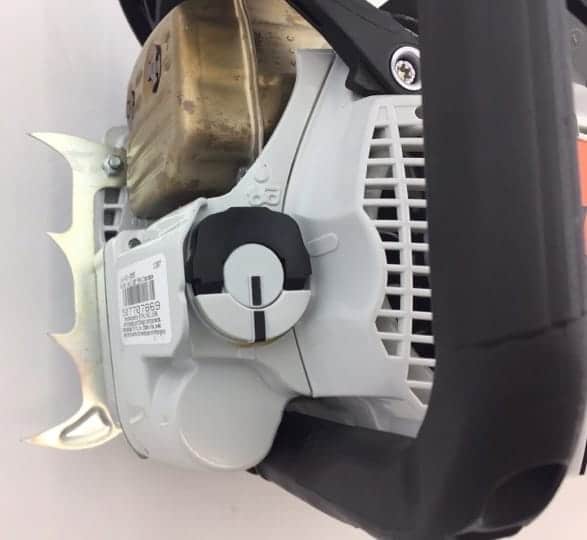
Check the oil level when you refuel the saw.
Use chainsaw oil. It is cheaper than regular oil, stays on the chain better, and has better sling characteristics. Using old motor oil is not a good idea since it has metal particles in it and may dull the chain.
Fuel
Each chainsaw manufacturer has specific requirements for the fuel and oil mixture. On professional saws, the fuel oil mixtures are as high as 50:1. On less expensive saws they can be as low as 25:1. All fuel/oil mixtures must meet the manufacturers’ specifications.
This is an easy way to test oil flow on your chain.
Carefulness costs you nothing. Carelessness may cost you your life.
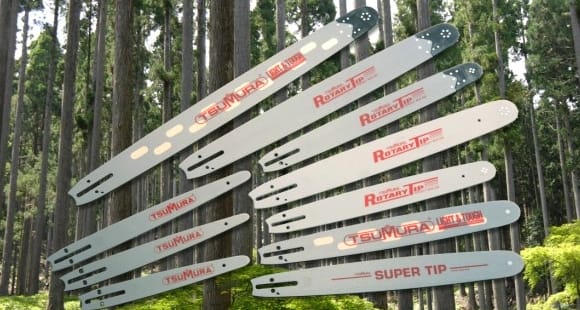
Let’s talk about the bar…
No, not that place you may go after work. There is much to be said for a cozy watering hole, but we aren’t going to talk about that today. Let’s have a heart-to-heart about your saw bar. It is definitely under-loved and over-used.
The bar is just as important as the chain, and it needs attention. Follow these steps to give your bar the TLC it needs:
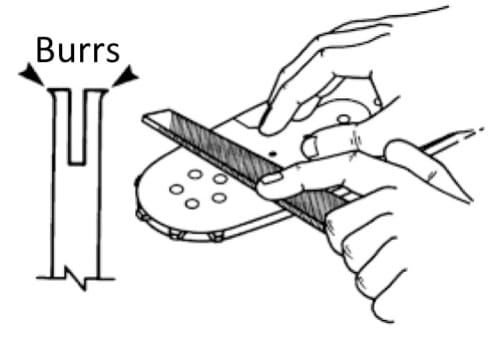
Wearing gloves, take the bar off the saw. Check to see if it is straight. On a long bar, you can sight down it. If you have a flat surface, lay a bar of any length down on the surface and look for light underneath it. If the bar is curved, it’s time to replace it.
To make sure the side rails are level, stand the bar on its edge. It should stand up on its own. If not, use your flat file to level it out by filing from the tip downwards towards the opposite end. Test both the top and the bottom of the bar.
Check the bar edges for burrs. Check both sides of both sides. You can do this by running a flat file along the edge of the bar starting near the tip and working towards the opposite end. File off any burrs.
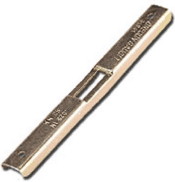
Clean the groove on the bar by running a bar cleaning tool in the groove to get the debris out.
bar cleaning tool
Grease the sprockets if you have a sprocket-nosed bar. There is a special grease gun that can be purchased to do this. Look for the hole near the sprocket that’s usually labeled “grease” and fill it with grease.
Finally, put a new chain on it and check the chain for excessive side-to-side wiggle. The rails can spread when a pinched bar wiggles in a tree. If your chain wobbles side-to-side, time to get a new bar.
Each time you sharpen the chain, flip the bar over to even the wear on both sides of the bar.
Now that this bar work is done, you we can talk about that other one . . .
Carefulness costs you nothing. Carelessness may cost you your life.
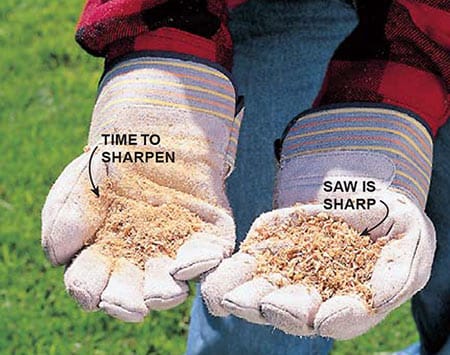
After a certain amount of use, the cutters on your saw chain will need sharpening. When you see dust rather than chips, it’s time.
If you’re using a square chisel, take it to the shop. Those square files are tricky to use.
You can sharpen all other cutters yourself.
Follow these steps to find the right file for your cutter:
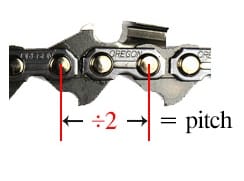
Determine the pitch of your chain; measure any three consecutive rivets in the saw chain from center to center in 1/16ths of an inch. Divide that measurement in half. This number is the pitch.
Use this chart to determine the size of the file you need.
The file size needed for your chain may also be printed on the saw bar.
Don’t forget to file the depth gauge with a depth gauge tool. Otherwise you’ll still have a slow cut with a sharp chain.
depth gauge tool
Most cutters have a witness line on the top of the tooth. It will help you maintain the correct file angle when sharpening.
When the cutter is sharpened to the witness mark, it is time to discard the chain.
There are many great videos online to help with sharpening.
Do not think because an accident hasn’t happened to you that it can’t happen.
Starting a Chainsaw Safely
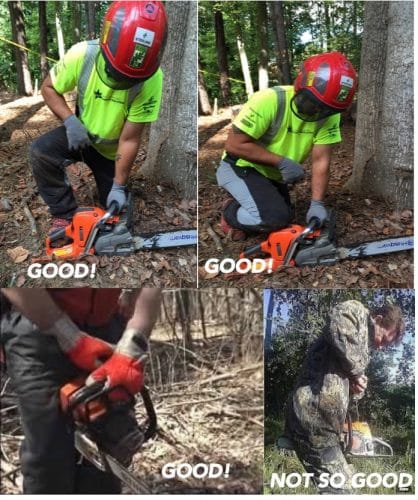
There are three safe and good options for starting a saw:
Put the saw on the ground, place your boot in the handle to stabilize the saw, then pull.
Put the saw on the ground, place your knee on top of it to stabilize the saw, then pull.
Pinch the saw handle in your legs to stabilize the saw, then pull.
You see a lot of folks using a drop start. That is when the chainsaw is held with one hand and the recoil rope with the other. Both arms are moving when the saw is started. This technique is not safe, OSHA will fine you, and you will need to replace the recoil rope frequently.
For one thing, you’re holding a tool that’s running at 11,000 RPM which means that there is potential for a ton of vibration that’s transferred to your hands and forearms. This may lead to numbness of your hands and fatigue on your arms and shoulders.
Plus, you’re working with an extremely sharp chain traveling at 55 MPH.
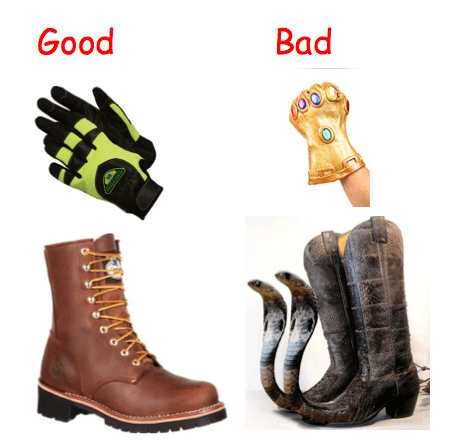
What are some characteristics of a good pair of gloves?
Gel padding in the palms to drastically reduce vibration.
Lined with cut-resistant DuPont Kevlar fiber to prevent minor cuts. They should be rated at Level 3 for cut resistance. (ANSI/ISEA 105-2005 Standard.
Snug fit. Get the right size to fit your hands.
Non-slip with breathable Spandex with goatskin or other materials that provide good control for your fingers and palms. Make sure the top of the glove is well made.
Knit wrist closure with Velcro keeps debris out and doesn’t get caught in things like chippers, saw tips, or sticks.
Machine washable if possible.
Why worry about boots?
You are on your feet for more than eight hours a day. Your ability to work efficiently is directly proportional to your foot comfort.
Protecting your feet in rough conditions should be a high priority.
What are characteristics of a good boot?
Correctly fitted to the size of your foot.
Lined with DuPont Kevlar for chain cut resistance (24m/sec chainsaw speed)
High abrasion resistance.
Steel shank for support.
Moisture repellent upper.
Pillow cushion inserts.
Steel, titanium or plastic toed boots. Titanium and plastic toed boots reduce the overall weight of the boot.
OSHA requires that a protective hard hat is worn whenever you are working in an area where there is potential for injury to the head from falling objects. For tree care workers that means every time you get out of the truck. Tree workers are often hit on the side of the head (as well as the top) and would benefit from a helmet with side protection.
Q&A
How do I know if I have a safe helmet?
Look on the inside of the helmet. It should have the manufacturer’s name or ID, the date of manufacture, the type and class of helmet, head size and ANSI Z89.1-2014, Z89.1-2009 or Z89.1-2003.
The ANSI numbers mean it has met all the safety requirements for helmets.
What are those other markings?
– The hard hat can be reversed, worn backwards or forward.
HV – The hard hat meets all testing requirements of the standard for high visibility colors.
LT – Low temperature use.
HT – High temperature use.
Can I wear a cap, scarf, or liner in cold weather under the helmet?
Only liners specified by the manufacturer can be used. Check with the manufacturer.
Can you put decals or spray paint the helmet?
Generally, decals are not a problem, but spray paint or adhesives may degrade the plastic or hide defects in the helmet. Again, check with manufacturer.
Do hard hats wear out?
YES! Check hats daily for cracks, dents, penetration, plastic chip flakes, discoloration, and chalky appearance. Look at the liner. If it’s worn or broken it should be replaced immediately.
If a big branch falls on me, I’m going to die anyway, why bother with a hard hat?
Small branches fall too, chippers spit out objects, climbers drop tools, your workplace is full of hazards. In 2012, more than 65,000 cases involving days away from work occurred due to head injuries in the workplace (2015 edition of the National Safety Council chartbook “Injury Facts”). That same year, 1,020 workers died from head injuries sustained on the job. Only 1 in 65 died from a head injury, the 64 others got hurt. Bet they’re glad they had their hard hats on!
No doubt about it, hard hats prevent injuries and save lives!
Should I wear a hard hat if there is no apparent danger?
Yes. Wear it every time you get out of the truck. In your work environment, unexpected hazards are the norm. Your hard hat will defend you from sudden dangers, when you don’t have the time or space to move out of the way.
Are hard hats considered sexy?
Definitely…
Why you should wear a hard hat cutting down a tree
Want to see what happens to tree care workers who don’t wear a hard hat? OUCH!!!! Nigel needs more PPE!