The Dreaded Squash Vine Borer

If you have grown squash for very long you have probably run across the dreaded squash vine borer (Melitta curcurbitae).  One day your plants look great and the next day the plants look wilted.  Shortly after they collapse and die.  The base of the plant becomes mushy.  You may even see small holes at the stem base.   Squash vine borers have probably paid your garden a visit.

Squash Vine Borer Photo by Jim Jasinski, Ohio State University Extension, Bugwood.org

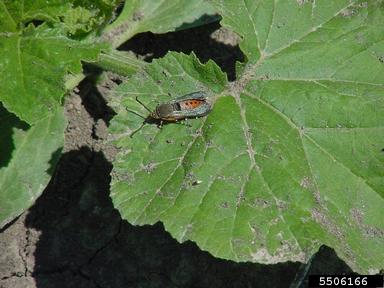
To understand how to control this pest we need to understand a bit about its biology.  In June/July adults emerge from under the soil.  They fly during the daytime and lay a single egg at the base of susceptible plants like squash and pumpkins.  After about a week the egg hatches and the larva bores into the plant stem.  The insect will feed through the center of the stem for several weeks.   Then the larva will exit the stem and burrow back into the soil to pupate until next summer where it emerge as an adult.  There is one generation per year.

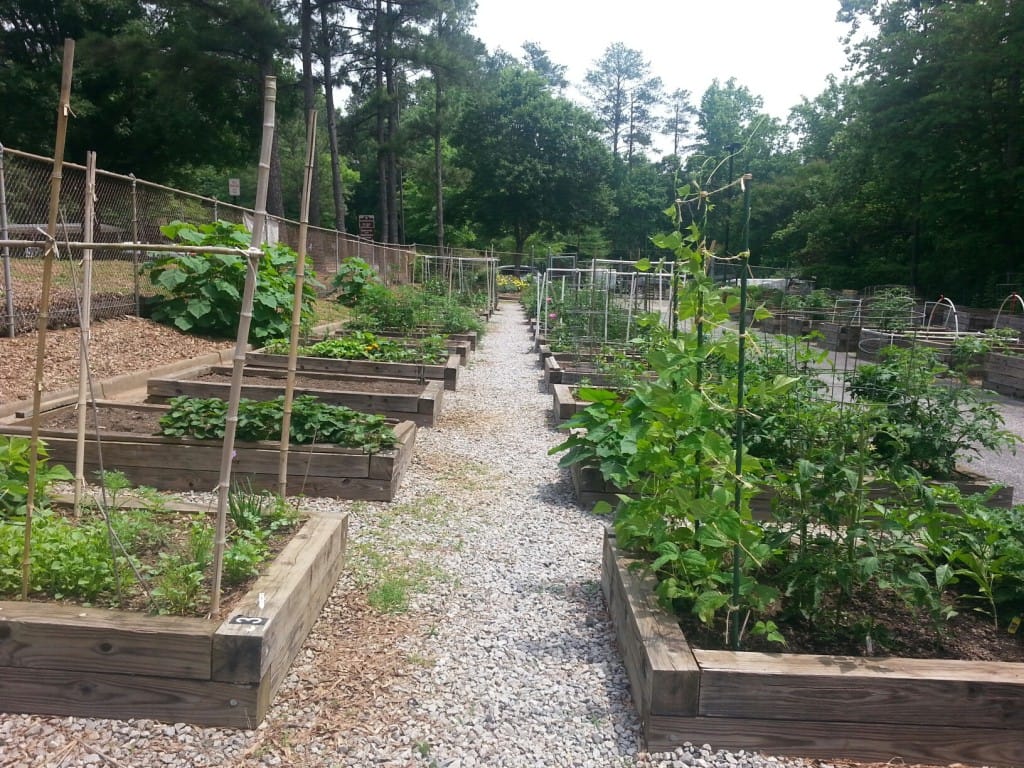
Knowing this biology we can use integrated pest management (IPM) to help combat this pest.  Choose plants that the vine borers don’t like.  Gardeners have had success with moschata types of squash like butternut.  Their stems seem to be more resistant to the borer.   Next, especially if you have ever had vine borers, you must rotate your crops.  Don’t plant squash in the same place next year because the pest is in the soil waiting until next summer to emerge.

If you have planted in an area that does not have a history of squash vine borers you can use row covers (simply structurally supported netting) to block the flying adults from laying eggs.  As soon as the squash starts to flower you will need to remove the row covers to give the necessary pollinators access to the flowers.  Some gardeners have had success with trapping.  The adults are attracted to the color yellow.  Some gardeners use yellow bowls with filled with water.  The thought is the yellow bowls will attract the insects and they will drown.  Yellow sticky traps are also available.

Squash Vine Borer Larva Photo by Gerald Holmes, California Polytechnic State University at San Luis Obispo, Bugwood.org .
Squash Vine Borer Larva Photo by Gerald Holmes, California Polytechnic State University at San Luis Obispo, Bugwood.org

Change your squash planting time.  If you can plant very early so that the squash will be mature and fruited before the adults lay eggs, you might outwit the pest.  When the squash plant has finished producing vegetables, remove it from the garden.

What if it is too late and you are already infected with squash borers?  One recommendation is to make a sharp slit in the stem and remove the borer.  Afterwards pile soil around the stem so that the wound is covered with soil.  Insecticides can be used for prevention but once the pest is inside the plant, insecticides aren’t very helpful.

If your crop is a complete failure, your local Farmers Market will probably have some squash and you can try again next year.

Contact your UGA Extension Agent for more information on combating the vine borers.  Also, visit Homegrown Summer and Winter Squash by Florkowska and Westerfield for other tips on growing squash.

Happy Gardening!

Help Fight Hunger-Guest Post by Ellen Bauske

Plant a Row for the Hungry Marker

Buried in Veggies?  It can happen. I was in college when I planted my first garden and I had a taste for zucchini. I planted 50 seeds and ultimately grew 36 fine zucchini plants.

I stir-fried zucchini, baked zucchini casseroles, made chips, and baked bread. I sold it at the local coop. I gave it to the neighbors and gave more to the neighbors. Eventually, they stopped coming to the door when I knocked. I put in on tables in front of my house with a sign, “Free to a Good Home.” Did you know zucchini makes a fine addition to the compost pile?

Fortunately, you can do much better with your extra produce today. The Plant a Row (PAR) Program was started by Jeff Lowenfels, a garden columnist in Anchorage Alaska. He asked his readers to plant an extra row of vegetables for Bean’s Café, an Anchorage soup kitchen. The program was very successful. In 1995 Jeff introduced the program to the Garden Writers Association and eventually, they created a foundation to administer and expand the program. The program has helped collect over 20 million pounds of produce to date.

Freshly Washed Produce Ready for Donation.

Some community gardens have dedicated spaces or rows specifically for food donation. They are cared for by the entire group or even visiting groups of young gardeners or FFA (Future Farmers of America) students.

If you are near the Atlanta metro area, you can easily donate your extra veggies to those in need. The Atlanta Community Food Bank’s Community Gardens web site has a very handy-dandy locator that will help you find a PAR drop-off site. Ample Harvest also lists many food pantries. Ask around. It isn’t hard to find a place.   MUST Ministries in Cobb or Cherokee county would love to have your extra produce.

You will want to contact the food pantry before you show up with your harvest. They may have a preferred delivery date and time. Harvest your crops in the early morning on delivery day to take advantage of the cool air. Dry off any dew.

Now this next part is really important. Inspect each item for bruising, insect damage and ripeness. If you would not serve it to your family, do not give it to the pantry. If it is the sort of veggie or fruit you would put in a stew, don’t give it to the pantry.

A Plot Dedicated to Feeding the Hungry at the Cherokee County Senior Center Garden.

If the pantry gives you packaging instructions, follow them. If not, put the produce in a supermarket bag and take it to the pantry at the requested time and date.

Bring what you have. If you have a bushel of zucchini and 10 tomatoes, bring them both to the pantry. Your food will be aggregated with the donations of others. Handle the food just as you would for your family. You are protected by the Emerson Good Samaritan Food Donation Act. This Act encourages food donation while provided the donor with protection form criminal and civil liability provide you do not exhibit negligence.

Just as you have always suspected, you can make the world a better place by gardening.

Dr. Ellen Bauske is a Public Service Associate with the Georgia Center for Urban Agriculture who still enjoys zucchini.  She is active in the local food movement.

Happy Gardening!


Growing Popcorn

Corn Tasseling
Corn Tasseling

Sweet corn can be a challenge to grow in the community garden, especially for the one to two ears you get for each corn stalk. It can shade your other crops, or your neighbor’s.   Some community gardens have rules that prohibit growing corn for that reason. Popcorn can be another story.  The cultivars can be shorter than sweet corn and even though the yield is about the same, you can make popcorn last a long time.

Tom Thumb popcorn grows to be about 3 feet tall and is a popular cultivar all over the country.  Pennsylvania Butter Flavor, Dakota Black, and Cherokee Long Ear are cultivars Master Gardeners have had great success growing in Georgia.  Know that all corn types, including popcorn, are heavy feeders so make sure you have good fertility in the soil.  If you can plant the corn where a legume has been growing – fantastic!  The legume will have added nitrogen to the soil for you!  You will want to add some compost  or nitrogen when the corn is about 6 inches high and again when it is about knee high.

Sow twice as many seeds as you think you will need and thin to about 8-12 inches apart.  Keep weeds at bay and when the corn is about knee high add soil over the exposed roots for good support.  If you decide to try growing popcorn this late in the season, determine how many days until maturity (usually this information is on the seed package) and make sure it will have time to mature before frost.

The trick to successfully growing popcorn is to know it is wind pollinated.  The pollen of the male flowers (the tassels) need to

Cherokee Long Ear Small Popcorn

reach the female flowers (the silks).  Especially when you are growing limited amounts you want to think “blocks” instead of “rows”.  Planting in squares will drastically improve pollination as the wind-blown pollen grains will have a better chance at landing on another corn stalk.  So for a 4′ X 8′ plot you could have four stalks across and at least four stalks down the plot for a total of at least 16 stalks.  With this plot size, know popcorn would take up at least half of your plot area.  This would probably be a minimum for good pollination.  You could always help the wind out by gently shaking the stalks yourself!

The wind pollination can be an issue if another community gardener is also growing another type of corn, especially if either one of you is planning on saving seed. You could get cross- pollination.  You may want to separate your planting dates by a couple of weeks so that the corn doesn’t tassel at the same time.  Or maybe you all can grow the same type of popcorn.Your local Extension Agent has all types of information on growing all types of corn.

Let the popcorn ears remain on the stalks until the husks are dry.  The downside here is this takes time that could be used to start another crop.  Bring it inside to finish drying for several weeks.  You can remove the corn kernels from the ears by hand, by twisting the kernels off or by rubbing two cobs together.  Experience teaches that it is fairly easy to remove them by flicking them off with your thumb.  This winter when there is a nice fire in the fireplace and a good book in hand, you will appreciate the time and effort it took to grow your own popcorn!

Happy Gardening!


Bountiful Blueberries

Blueberries About to Ripen

This is a good blueberry year.  The rain we had in the early spring and the cold winter temperatures helped make the berries plump and delicious.  They are fun to snack on as you work in the garden and fun to take home for later.

Many gardeners are frustrated when the birds get to the berries first.  One recommendation is to put netting over the plants.  This is not a perfect solution as it makes it hard for you to harvest the blueberries.  And, it is extremely sad to deal with a bird caught in netting.  Some gardeners tie aluminum pie pans to the bushes.  The sun reflecting off of the pan and movement of the pans with wind can help deter birds.   Experienced gardeners will advise to just keep the bushes picked.  As soon as the berries are ripe harvest them; don’t leave the blueberries on the bushes ripe for very long.  This seems to be an invitation for birds.

Now that you have an abundance of delicious berries what can you do?

Best defense against the birds - keep the blueberry bushes picked!
Best defense against the birds – keep the blueberry bushes picked!

To store them frozen, freeze them in a single layer on a cookie sheet.  After they have frozen, pack the berries in containers or freezer-type plastic bags and return them to the freezer.  You can take them out of the containers a few at a time.   Wash the berries just before you use them.  This way you can enjoy blueberry muffins and cobblers all winter!  You can also put up some blueberry jam.  Canning supplies are found in some big box stores as well as many local hardware stores.   Preserving Food: Jams and Jellies has great information for the beginning jam maker, including a berry jam recipe.

For summer eating, nothing is as good as a Blueberry Crisp.  This recipe is from a Cobb County Master Gardener Volunteer, Beth St. Jean, and is published in Farm to Table which is a collection of recipes from the Master Gardeners of Cobb County.  It is the perfect use for blueberries!

Blueberry Crisp

  • 3 T all-purpose flour
  • 2 T granulated sugar
  • 6 cups fresh blueberries
  • 1/4 cup lemon juice
  • 1 cup brown sugar
  • 2/4 cup all-purpose flour
  • 3/4 cups quick-cooking oats
  • 1  1/4 tsp ground cinnamon
  • 1/2 cup butter

Preheat oven to 375 degrees F.  Stir together in a large bowl the flour and sugar.  Gently toss in blueberries and lemon juice.  Spread berry mixture in bottom of ungreased baking dish.  Set aside.  To prepare the topping, combine brown sugar, flour, oats, and cinnamon.  Cut in the butter with a pastry blender until the mixture resembles coarse crumbs.  Sprinkle mixture evenly over the berry mixture.  Bake uncovered for 30 minutes or until top is golden brown and edges are bubbly.  After cooling for 45 minutes, may be served with ice cream on top!

If you don’t have blueberries in your community garden yet, we will discuss how to do that in a later post closer to the appropriate planting time.  Meanwhile, know that your local UGA Extension Agent can help you with any blueberry plant questions or problems.

Happy Gardening!

Composting in the Community Garden-Guest Post by Amanda Tedrow


Compost Bin at Woodstock Community Garden

Every year, more and more people decide to start a compost pile in their backyard or community garden. By recycling organic materials from the house and yard, composters reduce the amount of material going into the landfill and create a free soil amendment for their yard. Anyone can compost, but the process can be tricky for first-time composters.

Here are a few tips that can improve your composting process and product.

Keep your ratio of carbon to nitrogen as two-thirds carbon and one-third nitrogen. Carbon sources include dead leaves, sticks, branches, shredded paper, dead flowers and sawdust. Nitrogen sources include fruit and vegetable scraps, coffee grounds, tea bags and grass clippings.

Keep your compost pile moist throughout the pile. The microorganisms (bacteria, fungi and microbes) and macroorganisms (earthworms and insects) need this moisture to survive. Your pile should be as wet as a wrung-out sponge. A pile that is too wet will smell, and a pile that is too dry will decompose slowly.

Chop your ingredients before adding them to the pile. The smaller the inputs, the faster they will break down. Small ingredients are much easier for the micro and macroorganisms to consume!

Turn the pile regularly. The center of the pile is where the magic happens. In the center, the compost reaches the high temperature required for decomposition and killing weed seeds in the pile. Turning the pile ensures that all parts reach the center. Use a pitchfork to turn the pile every one to two weeks.

Compost bins at the North Fulton Annex Community Garden
Compost Bins at the North Fulton Annex Community Garden

The minimum size for a compost pile should be 4’x4’x4’. The pile needs to be this large to maintain temperatures for decomposition.

Do not put oily items, dairy or meat in your compost pile. These items will attract pests and rodents, and they can create foul odors in the compost pile.

Don’t limit yourself to just the backyard compost pile. Some gardeners use sheet composting, trench composting, com-posthole-ing, tumblers or vermicomposting. Research what method works best for your lifestyle and embrace it!

If you would like to learn more about composting, consider participating in the Georgia Master Composter Program. Participants of this nine-week program learn the chemistry and microbiology of composting, types of and reasons for composting, backyard composting techniques and tools for sharing this knowledge with their community. They also visit a variety of composting facilities.

The next Georgia Master Composter Program will be held in Athens from January through March, 2015. Registration will begin in November.  As always, your local UGA Extension Agent can help you develop a composting plan for your community garden.

Amanda Tedrow is a UGA Extension Agent for Athens-Clarke County and is affectionately known as the “compost queen!”

Happy Gardening!


Happy Pollinator Week

In honor of National Pollinator Week we ask the question “how important are pollinators in our community garden?”  VERY!! Technically pollination is the process where pollen is transferred from the male flower parts (stamen-anther and filament) to the female flower parts (pistil-stigma, style, and ovary).   Sometimes the male and female parts are on the same flower and sometimes they are on different flowers on the same plant, like squash and cucumbers.  Pollinators visit flowers to collect pollen and nectar.  The pollination process is a consequence.


Honey Bees - Jeff Martin photographer
Honey Bees – Jeff Martin Photographer

Pollinators are an integral part of any garden.  They play a major role in the production of 150 food crops in the United States.  Apples, almonds, melons, strawberries, blueberries, onions, squash, cucumbers, and broccoli are just a few food crops that are dependent on pollinators.  One third of every bite of food we eat is due to pollinators.  So, they are vital to your community garden.  How do you attract and keep pollinators?

Some community gardens have common areas set aside for flowers.  This is a great spot to add plants that attract pollinators.  Plants like black-eyed Susan (Rudbeckia spp.), bee balm (Monarda didyma), anise hyssop (Agastache foeniculum), zinnia (Zinnia elegans), butterfly weed (Asclepias spp.), yarrow (Achillea millefolium), sunflower (Helianthus annuus), dill (Anethum graveolens), and aster (Aster spp.) are all great choices.  These not only attract pollinators but other beneficial insects like lacewings, praying mantids, and parasitic wasps.  Plan your area for a long bloom time.  Bee balm and black-eyed Susan start blooming early in the summer while many asters bloom late into the fall.  Some gardeners may want to include a few of these in their individual garden plot.

102_2015
Bumble Bee on Orange Butterfly Weed (Asclepias tuberosa)

Perennial shrubs are also great for common areas since they create a more permanent landscape.  Consider fothergilla (Fothergilla gardenii)  which starts blooming early in the spring.  Sweet pepperbush (Clethra alnifolia) blooms in midsummer and is usually covered in pollinators.  Winter honeysuckle (Lonicera fragrantissima) provides flowers in the cooler months when the hairy bumble bees may be active. UGA Commercial Horticulturist, Jeffrey Webb, has a great publication, Beyond Butterflies:  Gardening for Native Pollinators, which has a comprehensive list of plant choices.

Use pesticides ONLY when necessary.  If you have to use them, spot spray rather than cover spray.  Apply pesticides that are the least toxic to pollinators.  And, spray when the pollinators are less active.  Your local UGA Extension agent can help you decide which pesticide is most effective with the least damage to the beneficial insects.

With a few additional steps your garden can even become a Certified Pollinator Garden.  The pollinators win since they have a great place to collect nectar and pollen.  Your food crops win because their flowers get pollinated.  You win because your vegetables are more abundant and extra delicious!

Happy Gardening!

Growing Southern Peas

June is the perfect time to get Southern peas, also known as field peas, in the ground.  The soil and air temperatures are very warm and hot summer days stretch out in front of us.   Southern peas include cream, crowder, and black-eyed types.  They thrive during hot weather in full sun.  Your local UGA Extension agent knows what types typically are grown in your area.

North Georgia gardeners are harvesting the end of the cool season lettuces and Southern peas would be a perfect replacement.  Add a bit of compost to the soil and sow seeds about 1 inch deep, 3-6 inches apart.  For those of you who grow in rows space them 20-42 inches apart.  Make sure your soil is well draining.

Southern peas act more like beans than peas.  Some cultivars are vining and will need some support and some are more bush type.  Experience shows that even bush types are easier to manage with a small trellis.  If you keep them picked they will keep producing all through our hot, humid summer!

Knuckle Purple Hulls using sunflowers as support.

Cream peas are the mildest in flavor.  Cream Crowder, White Acre, and Texas Cream #12 are non-vining cultivars to consider trying.

Black-eyed peas have a bit more flavor.  California #5, Magnolia, and Pink Eye Purple Hull are cultivars that are non-vining and grow well in our area.  Black-eyed peas are the ones seeped in Southern folklore.  If you eat black-eyed peas on New Year’s Day legend has it that your year will be prosperous.  Worth a try!

Crowder peas are the strongest in flavor.  You will remember them as the peas that are “crowded” in the hull.  Mississippi Silver and Mississippi Purple are non-vining while Knuckle Purple Hull and Colossus are cultivars that will need some type of firm support like fencing or staking.

You can harvest all of these either as green shelling peas or for drying.  A useful publication, although written for commercial production, is Southern Peas by UGA horticulturists Boyhan, Grandberry, and Kelley. This publication has additional information on cultivars and diseases.

Happy Gardening!


North Fulton Annex Community Garden

Christine Williams and Rolando Orellana of the North Fulton Annex Community Garden.

On occasion we will highlight different area community gardens in this blog. This is a great opportunity to see what others are doing and perhaps get some ideas for your own garden. Recently we visited the North Fulton Annex Community Garden on Roswell Road in Sandy Springs.

The space is a project of Fulton County Extension Agent, Rolando Orellana, and the Fulton County Master Gardener volunteers. Rolando gives full credit for the success of the garden to Christine Williams, the garden coordinator. She keeps things well organized and she makes sure the garden has a welcoming feel.

The area is made up of fifty-six 4’ X 8’ raised bed plots. Six of the plots are designated for a school program. The produce from four additional plots is donated to the local food bank or the Fulton Fresh Mobile Farmer’s Market program. There are also side gardens with herbs and flowers.

The garden charges a fee of $25 per year. The fee includes water (either sun-warmed or from the faucet) use of tools, access to compost, and the support of the Master Gardeners. What a deal!

The group works together to make valuable compost which anyone can use.

One unique feature of the garden is a play area for children complete with a sandbox. Christine says they want the garden to be welcoming for all ages and the sandbox helps keep little hands active. There are also child friendly gardening tools.

Gardeners can come and go from dawn until dusk but scheduled workdays are a social time at the garden. Members bring refreshments and the Master Gardeners provide mini-classes. This is especially useful for beginners.

When asked what they were most proud of with this garden, Rolando and Christine gave the same answer. The gardeners are a diverse group. Generationally, there are grandparents with grandchildren in tow, couples in their twenties, and young parents who are raising the next generation of gardeners. And, the group is diverse in cultural background. This makes for a

These 4' X 8' beds can grow alot of vegetables!
These 4′ X 8′ beds can grow a lot of vegetables!

great sharing experience, learning about other cultures through gardening and food. As Christine said, the diversity of the gardeners is the true nature of urban community gardening.

For more information about the North Fulton Annex Community Garden contact the North Fulton Extension office at 404-613-7670.

Happy Gardening!

Don’t Forget to Mulch

Is it important to mulch around vegetables in a community garden?    After all,  plots aren’t very large, the plantings aren’t permanent,  and it can be a lot of trouble to bring in mulch.  The answer is YES!  It is important to go to the extra trouble and add mulch.  Mulching is simply adding a layer of material over the bare soil around your plants.  For an extensive review of garden mulches see Robert Westerfield’s circular Mulching Vegetables.

Mulching does several wonderful things for our warm-season vegetables.  It helps hold in soil moisture.  Think of those hot, dry, sunny, Georgia summer afternoons.  Bare soil gets baked; mulched soil does not. Mulch also helps even out the soil temperature.  This is helpful for root development.  Mulch can be a barrier to weed growth, reducing need for weeding. Also, mulch is a layer between the plant and the bare soil which can help prevent some rots that occur when vegetables or fruits lay on the ground.

A suggested mulching depth is 3 to 4 inches.  Too little mulch will provide limited weed control while too much will prevent air from reaching plant roots.  Keep in mind some mulches, like pine straw, tend to settle.  Compost mulches can be tilled back in the soil after the growing season.

20140515_171823_resized
Pine straw is a common mulch.


The best way to accomplish mulching in a community garden setting is to determine what materials are available and inexpensive.  Wood bark, compost, leaves, pine straw, and hay straw are all possible choices.

A bail of pine or hay straw will usually fit in a car trunk.  Wood bark and some composts come packaged in large bags which aren’t hard to transport.  Maybe the group of gardeners wants to have a larger amount of mulch delivered and split the cost. Oftentimes, municipalities will take old Christmas trees and recycle them as mulch as a service to the community.  These are usually free of charge.  Your county UGA Extension Agent will be able to answers any questions you have about mulch.

However you decide to get your mulch, you will be very glad you did come harvest time.

Happy Gardening!