Using Seed Catalogs In the Classroom

The seed catalogs keep arriving. In my household that is cause for excitement. I save them until I have time to properly enjoy looking through them. What do you do with your seed catalogs after you have looked through them and placed your orders? If you throw them into the recycling bin you are missing out as these gems are full of useful information.

If you are a school gardener, or a community gardener that works with youth, the seed catalogs can be used throughout the year! To start with you can laminate the beautiful photos to use as plant markers.

You can use the information provided in the catalog for lessons:

Seed spacing guides can be used for students to create a garden bed design.

Days to harvest information can be used for students to determine the planting dates of their garden design so that all the produce is ready at the same time.

Seed package cost can be used to calculate the total cost of the garden design.

All of this information can be used to determine how much produce can be grown per square foot (inch, meter).

Marketing plans can be created to sell resulting produce at a Farmers Market.  How much money can be made given the input costs?

Aspiring artists can design artistic seed packets using the information given.

English classes can pick vegetables and re-write the plant descriptions.

Of couse, students can look through the catalog and pick a vegetable they have never tried before and make a plan to grow it.

Happy browsing!

Seed Catalogs Are Arriving!

It is a great time of year for gardeners.  The seed catalogs are arriving and our gardeners are as beautiful as our imagination, and the photos from the catalogs.  These catalogs are mesmerizing.   The photos are works of art and the vegetable descriptions are literature.  Many of them contain information on vegetable history,  how to plant, and how to use the produce.  Flowers are described by height, scent, color and attractiveness to pollinators.  And, oh so many new varieties to try!

Garden Catalog Tips

Robert Westerfield,  UGA vegetable specialist, gives us some tips on navigating our way through these catalogs and all of the vegetable choices.

The Seed Catalogs are Here!

Tip #1  If you are gardening for high yields or dependable results, use recommended varieties for your area.  UGA’s Vegetable Planting Chart has a list of varieties that have proven to do well in Georgia.  These are the least risky choices.

Tip #2 When trying a new vegetable variety order only a small quantity to start.  Experimenting is one of the great pleasures of the garden.  Succeed or fail, it is fun to try.  Just don’t over-invest in seeds until you know how they will perform in your garden.

Tip #3 Remember the vegetables you grew up with may not necessarily be the best ones to plant now.   There are many improved hybrid varieties that can hold up to our disease and heat issues.  A good example is Silver Queen corn.  While popular, it is definitely not the best variety to grow in Georgia.  There are many new corn hybrids on the market that are much sweeter and maintain their sweetness longer when stored.

Hopefully, these tips will be a helpful guide as you enjoy making your 2021 garden seed selections.  One bonus tip especially for school gardeners – the photos in the catalogs can be laminated and used as plant markers or in gardening lessons.

Happy Reading

Garlic Planting Step-by-Step

Late October is prime garlic planting time for the Atlanta area.  The bulbs overwinter in the garden and are harvested in the spring.  If you don’t traditionally plant winter crops, garlic is a great one to start with.

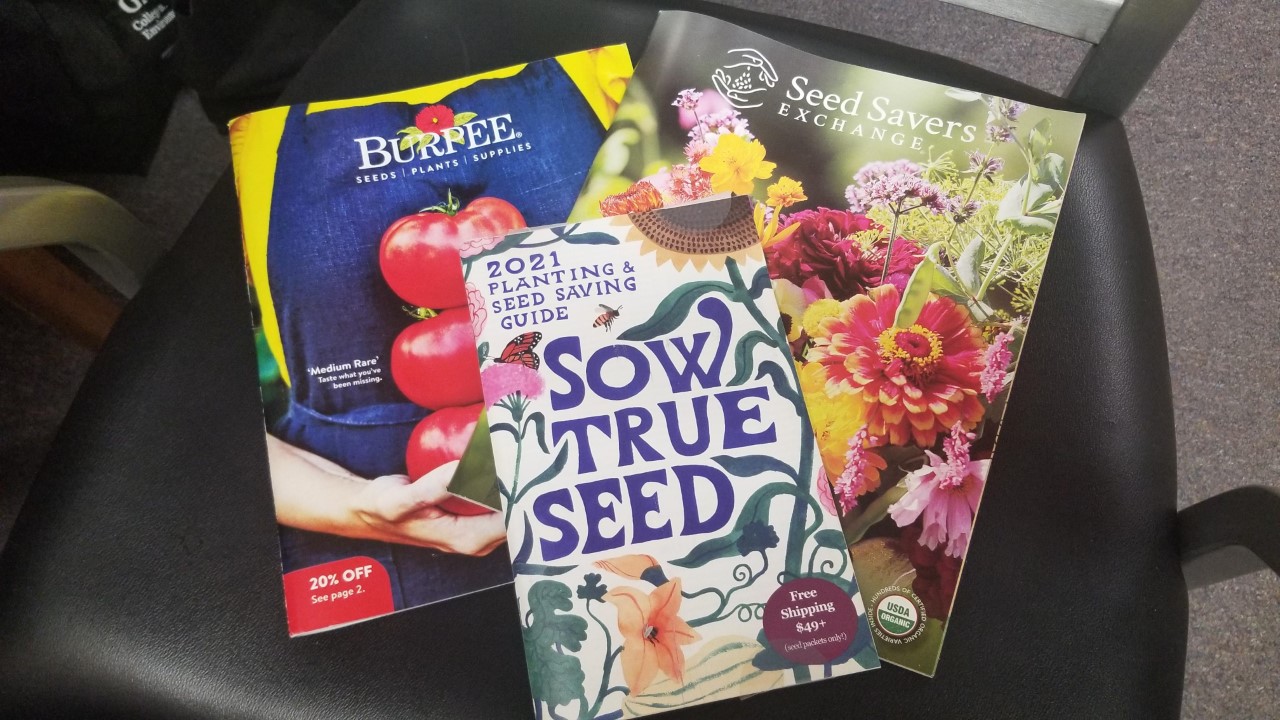
Garlic (Allium sativum) is a member of the onion family.  Its use dates back to 4000 BC in central Asia.  According to Seed Savers Exchange garlic was found in King Tut’s tomb, eaten by Olympic athletes, and used as medicine by Hippocrates.  There are over 600 types of garlic grown all over the world.   Why not give it a try?

There are two basic categories of garlic:  hard-necked and soft-necked.  Georgians have better luck growing soft-necked garlic as the hard-necked ones require the long, cold winters and long, cool springs of more northern climates.  There are three types of soft-necked garlic that grow well in Georgia:  silverskin, artichoke, and elephant garlic (actually a type of leek).  Recommended cultivars include Inchelium Red, California Early, and Chet’s Italian – all artichoke types.  If you want to try the silverskin type consider Mild French.

Garlic Production for the Gardener is a useful publication on the types of garlic, planting, and harvesting.  Planting involves just a few simple steps.  Your local UGA Extension Agent will also have information to help you get started.

Garlic D

Step 1:  Start with prepared soil.  Garlic needs rich, loose soil with a pH of about 6.5.  Make sure you add some compost after removing the summer plants; don’t just pull up spent plants and put the garlic in the ground.   If soil test results indicate adding fertilizer, do so.  Garlic is a medium-heavy feeder.  Nitrogen can be incorporated in the soil before planting, either with traditional fertilizers or bone meal.  Side dress in the spring when shoots are 4 to 6 inches tall.  Hold off on nitrogen after April 1st because you want to encourage bulb formation not leaf growth.

Garlic A

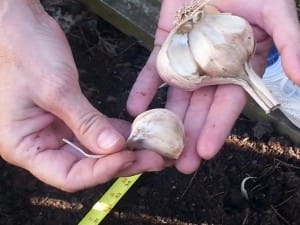
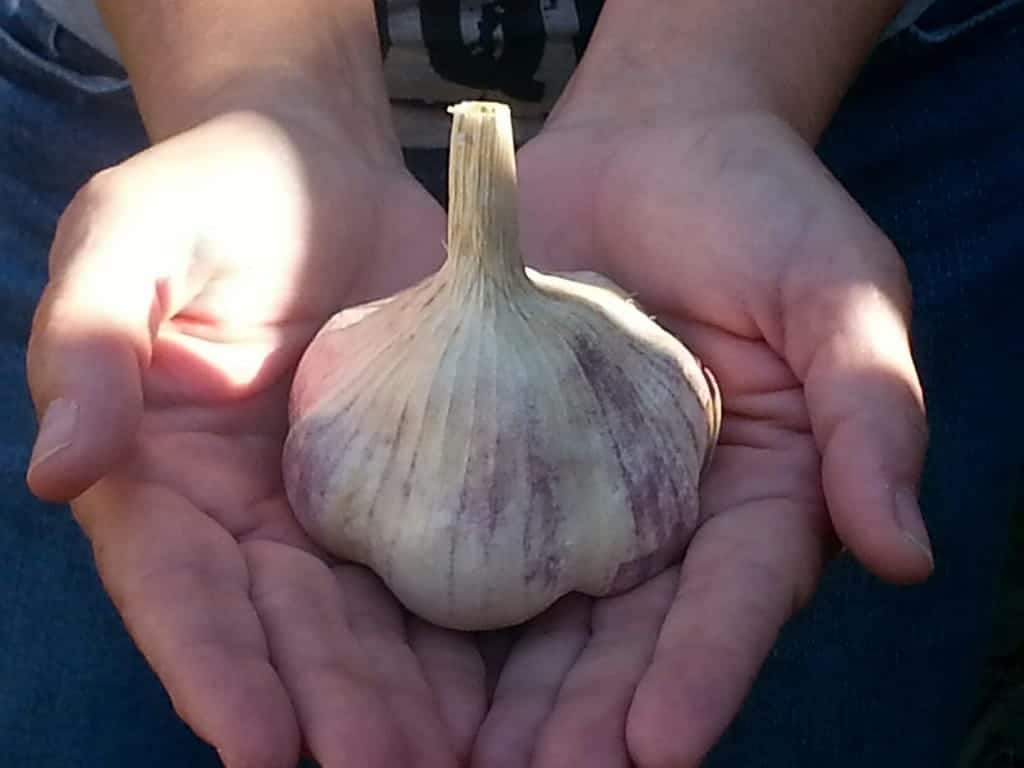
Step 2:  Pull the garlic head apart just before you plant.  Use the larger bulbs for best results.  Also, leave the skin on the bulb.

Garlic C

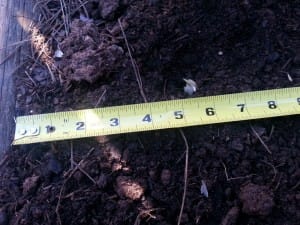
Step 3:  Plant the bulbs about 2 inches deep with the pointed end up.  Space them about 6-8 inches apart.

Garlic Mulch

Step 4:  Be generous with mulch.  A generous amount of  mulch helps keep the soil moisture and soil temperatures even.

Tops may show through the mulch by the end of  October and the bulbs should be well rooted by November.   Since October is one of our driest months of the year, irrigation is important at planting.  Watering may be needed in early spring, but be careful not to over water.  Stop irrigation once the tops begin to dry and fall over.

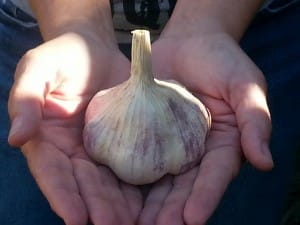
Garlic should be ready for harvest between mid-May to mid-July.  Look for the tops drying and following over.  When 1/2 of the tops are in this condition it is time to harvest.  Don’t leave the bulbs in the ground too long or they may rot.  Be very careful when harvesting not to damage your crop.

Allow the heads to dry in a warm, dry place.  Keep them out of direct sunlight.  After the garlic has dried store it in a cool, dry, dark place to keep it fresh as long as possible.  Garlic braiding is a unique way of storage.

A community garden plot can yield a year’s worth of garlic so you’ll be able to enjoy those delicious Italian meals all year long.  Garlic bread, calazones, tomato sauce, garlic chicken….

Happy Gardening and Mangiate bene!

Serve Squash Year-Round – A Guest Post from Bob Westerfield

October is Farm to School Month and this year Georgia is celebrating with Oh My Squash! You can visit the project webpage for more information on how to participate. Many of you may be growing a late crop of squash for this campaign so I thought it was worth reposting Bob Westerfield’s article on growing squash. He is a UGA horticulturalist and our go-to guy for vegetable production.   Bob writes:

To most Southern gardeners, fried yellow squash or grilled zucchini are staples on the table during the summer. Serving up home grown winter squash in the fall is worthy of bragging rights.

While normally easy to grow, the endless choice of varieties and numerous garden pests have made growing squash a little more challenging. Squash come in an endless assortment of shapes, sizes and colors. Choosing the right variety can seem daunting. The squash vine borer, a persistent pest, has caused some gardeners to give up on growing squash.

Read more

Give Growing Cucumbers a Try

Fresh slicing cucumbers are a favorite summer crop.   Extension Horticulturist, Robert Westerfield, has written a helpful circular called “Growing Cucumbers in the Home Garden” that will get you started.

Slicing cucumbers may have long vines.  With proper planning, and a few tips, you can have manage cucumber vines in the community garden.  There are a few cultivars that are bush-type cultivars, meaning they won’t take as much space.  Salad Bush Hybrid is advertised to take up about 1/3rd the area of a traditional vining cucumber.  Bush Crop and Fanfare are also commonly grown bush cucumbers.  Realize that they will still have some vines.

Cucumber vines can be managed.

If you want to try the vining cultivars you can stake or trellis them.  Wire-grid growing panels are perfect for cucumbers.  Or, recycle a portion of fencing. Trellising cucumbers has the added advantage of getting the fruit off of the ground which helps prevent fruit rots.  This also allows for increased air flow around the plant leaves which may cut down on disease problems.  Be conscientious of your fellow gardeners by not creating unwanted shade for your neighbor with your trellis.

Depending on how large your cucumber fruit matures, it may need support on the trellis.  Old panty hose or onion bags are perfect for this.  As the fruit becomes big, gently cup the cucumber in the hose or onion bag and tie it to the trellis.  Be careful not to bruise the fruit or tear it from the vine.  Burpless hybrid, Straight Eight, Sweet Success, Sweet Slice, Diva, and Marketmore 76 are good vining cultivars for Georgia.

Community gardeners list past poor fruit quality as a reason not to grow cucumbers.  If you know a bit about the biology of the cucumber plant you might have better success.  Cucumbers have two kinds of flowers.  They have male (staminate) and female (pistillate) flowers.  Staminate flowers do not bear fruit. Bees move pollen from staminate (male)  flowers to the

No summer salad is complete without a crisp, fresh cucumber!

pistillate flowers for pollination and subsequent fruit production.  This means if you, or your fellow gardeners, are using broad-spectrum insecticides you may be reducing the quality and quantity of your cucumbers by killing possible pollinators.  It is possible to hand pollinate cucumbers if you see few bees.

You may have heard of gynoecious cucumbers. These produce mostly female flowers.  They often have a heavier yield because of the increased number of female flowers. I’ve seen posts around the web suggesting that the few male flowers be removed.  Don’t do that!   It takes male and female cucumber flowers to make fruit!  General Lee and Calypso are two gynoecious types worth a try.

Be bold and try cucumber planting.  Your salads will be the better for it!  For more information on growing cucumbers with success contact your local UGA Extension Agent.

Happy Gardening!


Aphids are Pests in the Georgia School or Community Garden

Aphids are Pests in the Georgia School or Community Garden
Jim Occi, BugPics, Bugwood.org

Do you have aphids in your garden?  If so, are they a problem?  Spring when many plants have succulent, new growth is prime aphid time.

Aphids, also called plant lice, are soft-bodied, pear shaped insects with tail-like appendages known as cornicles.  Most aphids are about 1/10th inch long and can be several colors:  green, black, pink, brown. If you have trouble identifying your pest, contact your local UGA Extension agent.

Aphids use “piercing-sucking” mouthparts to suck the juices out of tender plant parts, secreting a sticky substance known as honeydew.  Ants are attracted to honeydew and will often protect the aphids making it.  Black sooty mold grows well on honeydew and is difficult to remove from

Aphids are Pests in the Georgia School or Community Garden
Sooty mold caused by aphids. Joesph O’Brien, USDA Forest Service, Bugwood.org

the leaves.  This sooty mold makes photosynthesis almost impossible on the leaves affected.  All this means that aphids can be a problem to the community gardener.

Aphids are a danger to plants in three ways.

They can:

  1. weaken a plant making it susceptible to a secondary infection
  2. cause curling of leaves and damage to terminal buds
  3. carry and spread plant viruses

Right now our gardens are full of leafy, new plant growth and as the temperatures warm up, check the underside of

Aphids are Pests in the Georgia School or Community Garden
Aphids on lettuce

leaves and terminal buds for aphid pests.   Look for those tail-like appendages.  (Some people call them tailpipes!) Also pay attention to ant trails.  They may lead you to the honeydew making aphids.

Since aphids tend to congregate as a group, you can try removing the one or two leaves where you find them.  Sometimes a good spray with the hose is enough to remove the insects.   If not, insecticidal soap is a good choice. Sometimes I can just wipe them off with a wet paper towel.

Beneficial insects are nature’s way of controlling aphids.   So avoid applying any chemical insecticide that could harm those beneficials.  Some of the natural predators include lacewings or lady beetles (lady bugs).  You can actually purchase lady beetles from insect distributors but once you get them you can’t control where they fly.

Wishing you an aphid-free spring!

Happy Gardening!

Earth Day 2019

Earth Day falls on Monday, April 22nd. It is a good day to appreciate our Earth and to evaluate how we are caring for it.

The first Earth Day was in 1970. The April 22nd date was chosen because it was after college spring break but before college exams. The expectation was that college students would be an internal part of that day and they were. Several of those students have grown to be very involved in the environmental movement. In 2020 we will celebrate the 50th anniversary of the first Earth Day.

In my household we usually celebrate the day with a huge feast feeling grateful for what we can grow and very thankful for the farmers that grow what I do not. Each year we have a theme. One year it was a native peoples feast featuring bison burgers. One year it was honey-themed and another year I featured strawberries. The point was to take some time to appreciate our Earth and the food we grow.

We can all take stock on how we treat our natural resources. As a vegetable gardener are you following best management practices in your garden? Are you using integrated pest management to handle pests instead of reaching for a pesticide? Are you creating and sustaining healthy soil? How are your composting skills? Can you pull the weed instead of using an herbicide?

This time of year I always create a goal towards improvement. What about you?

Happy Earth Day!

Georgia Agriculture Awareness (and Appreciation) Week

As the 2019 Georgia Agriculture Awareness week draws to a close I hope everyone took some time to enjoy some Georgia Grown food. I know my family did! Tuesday night we enjoyed Caprese Chicken made with Georgia chicken and tomatoes, topped with homegrown basil. I enjoyed seeing photos of how you all celebrated School Garden Day on Monday.

This year especially I have been reflecting on how very appreciative I am of Georgia agriculture. Every night I am blessed to be able to have a nutritious, delicious meal thanks to those who grew it. Some of the food we grow ourselves, in that wonderful Georgia soil, and some we purchase from other growers.

This past year our farmers have dealt with incredible difficulties from hurricane Michael and recently flooding. Many people don’t realize that the overwhelming majority of our farms are family operations. Georgia agriculture has been hit hard. It has been a sobering few months.

This week I have resolved to even eat more locally and make sure that I am supporting Georgia agriculture as much as I possibly can. Thank you, Georgia growers, and this week especially our hats are off to you! #GaAgWeek2019

Indoor Seed Starting – Part One

Over the next few weeks we are going to talk about seed starting. I did three in-depth posts last year and I am going to rerun them this year by request. Spring is coming….

Just flipping through one garden seed catalog I found 89 varieties of tomatoes, 21 varieties of cucumbers, 20 varieties of eggplant and 26 varieties of sweet peppers, including three types of lunchbox peppers. Compare that to the different types of vegetable plants that you would find at your big box retail store. Add some variety to your life and try starting your own seeds!

The rule of thumb is to start your warm-season seeds 6-8 weeks before planting time so over the next weeks we are going to explore indoor seed starting in-depth. For beginners, follow along with me as you start your first seeds. For seasoned seed-starting veterans, you may pick up a trick or two. I also encourage you to share your experience through the comments.

Let me begin by writing that there are many effective ways to start seeds indoors. I am going to share with you the way that I like to do it. I have been starting seeds indoors for decades and I have found a way that works best for me. You may find a different way that works best for you and that is terrific. I look forward to learning from you all as well.

To start, I like these re-useable plastic trays. They are easy to store and come in many sizes. I have friends who save their old plastic milk jugs and trim them down for seed starting; that works well for them.

These trays are easy to use for seed starting.

Any plastic trays MUST be disinfected before adding soil media and seed. I use a solution of 9-parts water to 1-part bleach. This step is important to eliminate any pathogens that have been overwintering on remaining soil particles. Starting with clean trays is an important step towards healthy seedlings. Don’t skip it.

These soil particles could hold pathogens. Disinfect those trays!

I like to use the peat moss discs for my planting media. As a bonus, the peat moss contains properties that discourage fungal growth. This helps prevent the disease damping off which is a real problem for seedlings.

The pellets expand with the addition of water.

These pellets are readily available and are easy to store. Add water and the pellets expand. I use warm water to create a favorable environment for the seeds. It is important here to not oversaturate the discs with too much water. Too dry is better for the seeds than too wet. Too wet means that the seeds could rot or disease will become a problem. You want the planting media to be just damp. If you can wring water out of the media, it is too wet. If this happens you can let the discs sit outside the tray for a few hours so that they can dry out a bit. You will get the hang of how much is too much as you practice.

Okay, gather your seed starting equipment, and play around with the pellets. Next week we will talk about planting the seeds.

Happy Gardening!

Trying Something New in the Georgia Community Garden – Corn

Today we continue our series on a good replacement for tomatoes in our summer community garden plots. Today’s crop to consider is corn.

Usually corn is avoided in the community garden. The tall stalks shade other plants, there is not much yield in the amount you can grow in a small space, and corn takes a large amount of water. That being said, I sometimes find community gardeners who really want to grow their own corn. They remember eating corn fresh from a grandparent’s farm or working the corn patch with their parents. Often these gardeners are now city dwellers and the corn means a great deal to them.

Corn tassels waiting on wind to spread the pollen

Instead of totally abandoning the idea of growing corn, why not think about trying some of the short growing varieties? Several of the seed companies offer shorter varieties. Burpee advertises a corn for growing in a patio container called On-Deck Hybrid. The description of this type states that it grows 4 – 5 feet high. Compare that to Silver Queen which stretches 8 feet tall.

Park Seed offers a shorter variety called Early Sunglow Hybrid. Stalks from this corn are expected to top at 4 feet. Another thought is popcorn. Seed Savers offers Tom Thumb popcorn which grows only 3-4 feet tall. I have grown popcorn many times. It is fun to grow and fun to pop with children or grandchildren.

I will caution you that more than a few stalks need to be grown to get any kind of yield. Many stalks yield 1-2 corn ears per plant. If you are serious about trying corn in the community garden consider allocating at least half of your 4’X 8′ garden bed for the crop. Also, remember that the crop is wind pollinated. It does not hurt to shake those corn tassels yourself to make sure the pollen moves around.

Happy Gardening!