Growing Gourds

Source(s): Walter Reeves, College of Agricultural and Environmental Sciences, Former County Extension Agent – DeKalb County


GOURDS are one of the oldest crops on record. They have been used as ornaments, dippers, water jugs, household containers, bird houses and others. The Luffa (dishrag gourd) has a number of possible uses. It has been used in oil filters, upholstery, life preservers, hats and as a dish cloth. In the immature state it can be eaten and is often called vining or running okra. Other types of gourds may be sold as vegetable spaghetti or healing squash.

Classification

Gourds belong to the plant family Cucurbitaceae which includes cucumbers, watermelons, cantaloupes, squash, pumpkins and citron. Gourds are primarily in the following three genera:

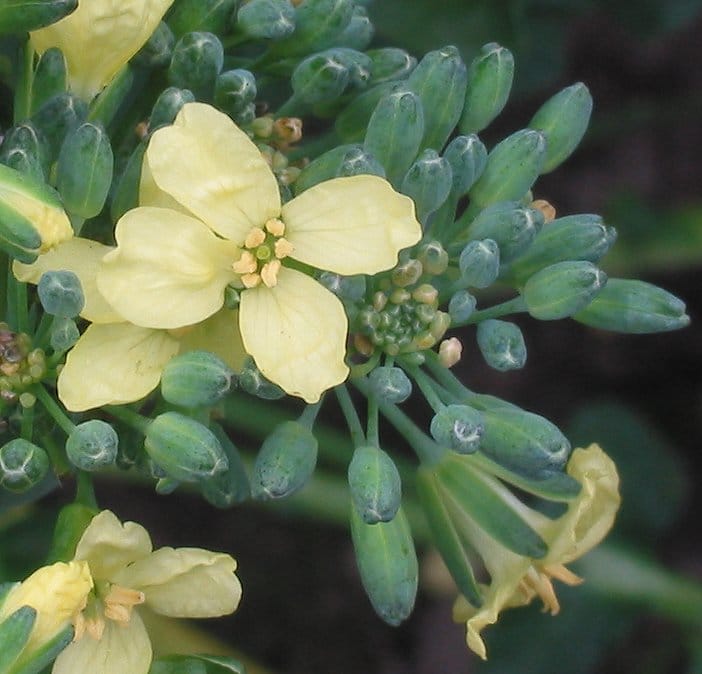
  1. Cucurbits – Flowers are yellow. Gourds must be harvested before frost.
    • Cucurbita pepo var. ovifera includes these varieties: Apple, Bell, Flat Striped, Egg, Finger (Crown of Thorns, Holy Crown, Ten Commandments), Miniature, Orange, Pear Spoon and waited sorts.
    • Cucurbita maxima includes the Turks Turban and Aladdin gourds.
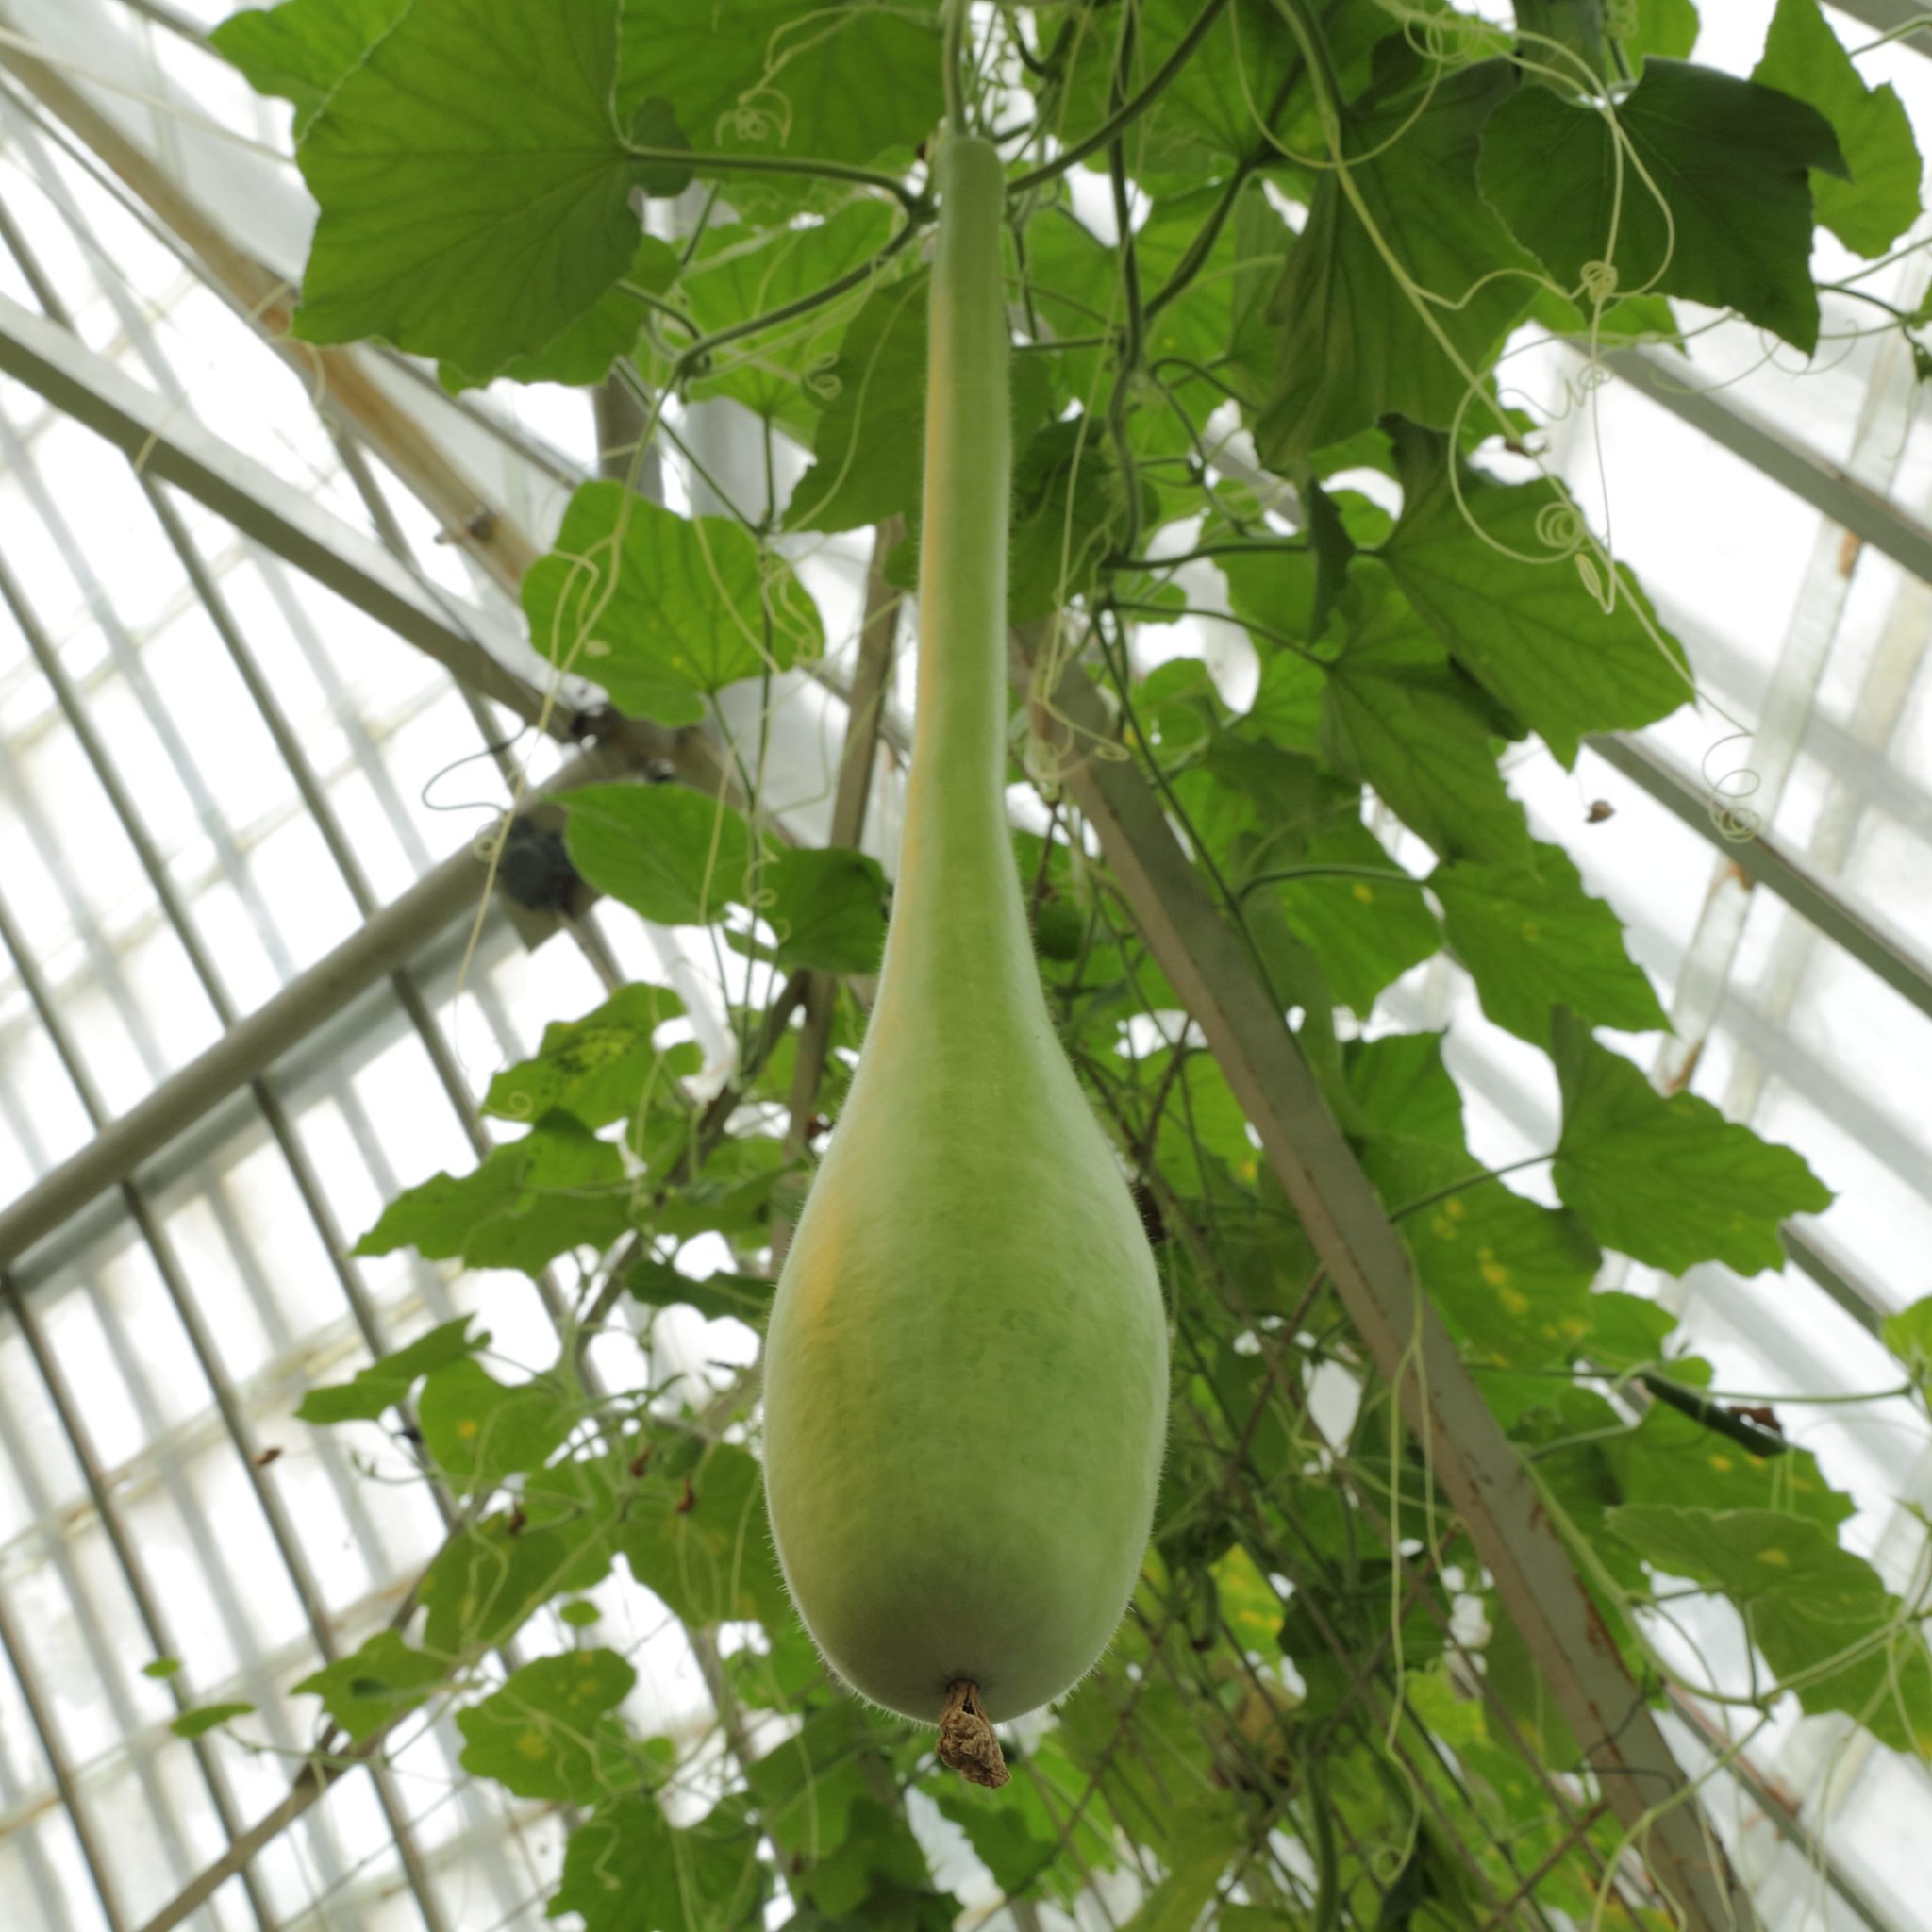
  2. Lagenaria – Flowers are white. Mature fruit not damaged by frost.
    • Lagenaria siceraria includes Dipper, Caveman’s Club, Giant Bottle, Calabash, Penguin, Powder Horn, Martin gourds and others (Healing squash is one of this group).
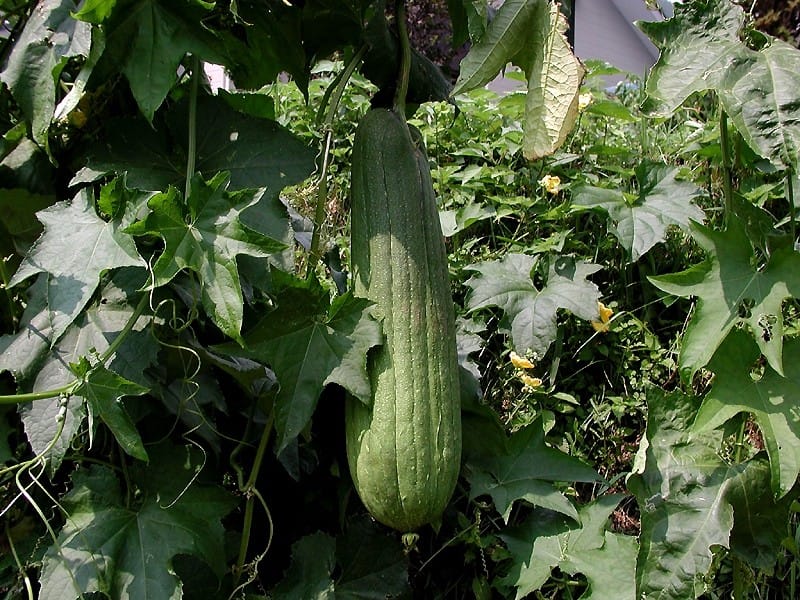
  3. Luffa – Flowers are yellow. Often called vegetable sponge, dishrag gourd, or running okra. One specie is ridged and the other is smooth.

Gourds are easy to grow provided some attention is given to all phases of production. These plants have the same general growth pattern as pumpkins, squash and melons and should be given similar treatment.

Planting should be accomplished as soon as the soil warms up in early spring. Gourds perform best when grown on trellises similar to those used for grapes, and will continue to produce fruits until killed by frost in the fall.

A fertile loamy soil in full sunlight is best for growth with organic matter or compost added when necessary. The soil should be worked to a depth of eight to sixteen inches with rotted manure, fertilizer and lime mixed in to the full depth.

Gourds are fertilized the same way as cucumbers and melons. Incorporate 5-10-10 or a similar fertilizer (6-12-12) into the soil at planting, at a rate of 4 pounds per 100 feet of row.

When the plant runners are 12 to 18 inches long, fertilize again spreading the fertilizer at least 18 inches away from the plant stems.

Make a third application after your first gourds are set on the vine.

Gourds require a great deal of growing room. All types may be grown on trellises with a bamboo stake placed near the growing mound and tied to trellis wires to help train the plants upward.

Cultivation is necessary to keep down grass and weeds until the vines have become well established. Insects and diseases will also cause extensive damage and must be controlled with a spray or dust program.

Remove the gourds from the vine with sharp clippers or shears. They should not be twisted or pulled from the vine as the stem enhances the decorative value.

Cucurbitas mature in August and should be harvested as soon as they become hard.

All gourds should be handled as gently as one would eggs, in order to prevent the slightest bruises which may serve as an entrance for rot organisms. Clean containers with smooth inside surfaces should be used for transporting gourds from the field and to storage.

The Luffa gourd has gained wide attention due to its large yellow fruits which are up to thirty inches in length, giving them a greater ornamental value. Also, the fibrous interior of the Luffa has been used in oil filters on diesel engines, upholstery, life preservers, hats, dish cloths, sandals and many other items.

One of the best methods of cleaning and curing gourds is to wash them in a strong solution of sulpho naphthol or any other non-bleaching disinfectant. A soft brush is ideal for removing dirt, dust and other foreign matter when washing.

After being cleaned thoroughly, the gourds should be placed in a cool, airy location in the absence of direct sunlight. Direct sunlight will cause the gourds to lose their color.

When the gourds have dried completely, they may be waxed with a liquid floor wax or varnished and at this point are ready for use as decorations or any other purpose to which they might be suited.


Resource(s): Vegetable Gardening in Georgia

Center Publication Number: 25

Growing Broccoli

Source(s): Walter Reeves, College of Agricultural and Environmental Sciences, Former County Extension Agent – DeKalb County


One of the fastest growing vegetables (in popularity, that is) in recent years has been broccoli. Although this delectable food has been farmed for many years, it has only recently become popular in the American diet. Much of this can probably be attributed to its use on salad bars in restaurants, which has exposed many people to broccoli for the first time.

Whether eaten raw, cooked with cheese sauce over the top, or in a tasty soup, this vegetable is not only good, but is also quite healthy.

Studies in recent years have shown that vegetables from the Brassica family have potential to prevent some cancers. This has caused an increase in broccoli consumption, as well as other leafy greens.

While it may not be for everyone, broccoli is easy to grow and prepare. Of course, there are those like former President George Bush who just won’t eat the stuff no matter how good it is for them.

Broccoli, Brassica oleracea L.var. italica, has been around since Roman times, but was not heard of in America until the early 1800s.

A close relative of cauliflower as well as other cole crops such as cabbage, collards and Brussels sprouts, the type of broccoli most popular in the United States is the Italian green type.

It is generally believed to have originated in the eastern Mediterranean and southern European area.

Broccoli is a cool-season crop and will not fare well in Georgia’s mid-summer heat. But fall and spring crops are commonly produced.

Broccoli is best grown from transplants, although direct seeding is also possible. Consider head size, yield, color, bead size and uniformity and doming when.choosing a variety. Most people prefer varieties with small beads and dark green to blue-green heads. Start seeds five to six weeks before the transplanting date. You can grow them in a seedbed or in small pots or recycled plastic cell-packs. Container-grown transplants are preferable over bare-root plants.

Delay transplanting until most chance for a major freeze has passed. The major production problems associated with broccoli are buttoning, the production of small, undesirable heads, and bolting, the production of a flower head prior to maturity. Keeping the plant healthy and growing is the best prevention for both of these. Stresses of any sort can result in increased buttoning and bolting.

Till the garden properly and apply lime to raise the pH to 6.0-6.5. Fertilize according to soil test recommendations. Apply one- third of the required potassium and nitrogen before planting and the rest in equal applications four and seven weeks after transplanting. Space plants 8-10 inches apart in the row, and space rows three feet apart. Spring transplanting is best: from February 15- March 30. Fall transplanting can be done from August 1-September 20 in south Georgia. More northern areas will have to transplant later in the spring and earlier in the fall.

Keep the crop well-watered and free from stress. Disease, weed and insect control are also important.
Check with your county Extension office for latest recommendations on these practices.


Resource(s): Vegetable Gardening in Georgia

Landscape Drainage Problems

Source(s): Walter Reeves, College of Agricultural and Environmental Sciences, Former County Extension Agent – DeKalb County


Predicting Drainage Problems

There are a number of indicators which may help you identify current or potential drainage and water problems around your yard or home.

First, check your survey or plat for the location of nearby flood plains. If you own land in a flood plain, it is reasonable to expect the area will be inundated with water at some point. It is important that no structures, especially homes, are built within a designated flood plain.

Flood plain designations also indicate that hydric soils may be present on your property. Characteristically, hydric soils will hold water more readily than other soils. These areas may be muddy, or collect water, and may be incapable of supporting certain types of landscape plants.

Also check the map for drainage easements. They should be labeled “d.e.” on the plat and are usually located along property lines. A drainage easement indicates that water will be flowing across that stretch of land during a rain storm. Erosion is usually a common problem along such drainage easements. Structures and fences should not be constructed in these areas.

Next, check for nearby rivers, creeks, and bodies of water which would increase the probability of flooding. For example, a creek may appear to be an attractive feature until you realize the flood threat, the unstable soils, and the stream bank erosion problems that may occur. Also remember that the water flow in your creek will increase as upstream development and construction increases. If you do acquire property near a waterway, do not remove the vegetation adjacent to and along the stream bank. This vegetation is an essential buffer zone that will help maintain the water quality and curb erosion problems.

Run off water that is improperly channeled also will cause damage to and devaluation of your property. It is important to note the elevation of your property in relation to adjacent properties. Does the land slope? Where will rain water come from and what is in its path? During a rain storm watch to see where run off water flows and exits. Ideally your home will have sufficient outlets to handle rooftop, driveway, and overland run off.

Run Off Erosion

Erosion due to run off coming from higher elevations is the most common water problem faced by home owners. The problem is most obvious and most damaging when you live downhill from a number of properties. The first step toward finding a solution is watching it rain and noting where the run off originates and where it concentrates or puddles.

Roof water can be piped to a low-impact location such as a drainage easement, a creek, or the street. Down spout fittings can be purchased at a home supply store and used to pipe the water to the low-impact area. You will need to avoid sags in the pipe to ensure downhill flow. This may mean burying the pipe to give it enough “fall.” Always ensure that the outlet is open and clear of debris.

Water flowing over the driveway, as well as other concentrated flows, may be more difficult to handle. If the concentrated flow moves over a relatively flat surface, a thickly grassed area may prevent erosion. Shrubbery, ground covers, or other deep- rooted plants can also be used. It is important to consider the shade and sun factors and the soil type when selecting plants for a particular purpose. You can contact your local Cooperative Extension Service office for recommendations.

If vegetation alone is not the answer to control erosion, a swale or diversion may be a solution. A swale is a broad depression that can be constructed in your yard to transport water more directly where you want. A swale should be constructed to carry the majority of the water flow. By design, it should be at least three feet wide across the top and at least six inches deep. Be sure the swale has enough downhill slope to prevent ponding. The surface should be sodded for protection. Occasionally flat rocks are necessary to protect large swale surfaces from erosion. Rock may also be placed at the outlet to disperse the force of the water. Swales should drain into a creek, drainage easement, street, or wooded area.

If the water flows over a steeper grade and vegetation alone will not control the problem, it may be necessary to terrace the area in order to slow down the water. Ideally, short slope lengths and flattened slopes should be used to prevent erosion. To do this, you can ” stair step” the area. This can be done by installing crossties and filling in behind them to create a flatter, shorter slope length. Each crosstie “wall” should be less than two feet high. These small walls should be embedded into the earth a minimum of four inches and fastened securely with spikes. Steel reinforcing rods (rebar) driven through the ties are usually sufficient. Other types of constructed walls can be made of rock, brick, or block.

Ponding Water

On many sites, water may collect in flat areas or the soil may simply stay saturated for long periods. This could be the result of surface depressions that allow the water to pond.

If surface water stands in depressions on your lawn or flows toward your house, consider constructing a swale or grading portions of your yard so that surface water drains away from the house or surface depressions. If the situation does not allow for regrading or installing diversions, an underground drainage pipe may be necessary.

Water enters these underground drainage pipes through drop inlets, with grates, which are connected to the pipe. The inlet box “T”‘s into a horizontal underground pipe. Place these inlets in low areas or depressions where water will collect. The horizontal pipe should be solid, not perforated, and the pipe slope should be constant to insure water flow.

Perforated drain pipes can be used against foundation walls and basements to collect water or to drain saturated areas. Perforated drain pipe shoo d be at lease four inches in diameter and b surrounded with 12 inches of gravel. Pipe glades should be gentle enough to allow water to enter but provide enough fall so the water can drain readily. Water should be emptied into an existing drainage ditch or curb inlet where possible. Ideally, perforated pipes should be placed 12-18 inches below the surface of the ground (see figure-below).

Hiring a Professional

Sometimes a drainage problem can not be solved without heavy machinery or a professional landscaping company. Difficult situations or tremendous amounts of water in your landscape may be beyond the skills of a homeowner. Consult your phone business pages under “Landscaping” to find companies which specialize in grading and drainage work. The Metro Atlanta Landscape and Turf Association (MALTA) publishes a list all of their members and their specialties. Call (770) 975-4121 to receive your free booklet.

After receiving bids for your project, make sure your contractor has both liability and workman’s compensation insurance. Phone their insurance company before work starts to make sure the premiums are paid and insurance is in force.


Center Publication Number: 14

Mosquito Control

Source(s): Walter Reeves, College of Agricultural and Environmental Sciences, Former County Extension Agent – DeKalb County


Buzzzzzzzz…SMACK! Spring and summer rains can cause a population explosion of mosquitoes! Two kinds of mosquitoes are commonly seen (and felt!): the ” swamp” or “Egyptian” mosquito, which feeds at dusk and the Asian tiger mosquito, which feeds during the day. The tiger mosquito has tiny white stripes around its rear legs. Since the tiger mosquito flies and feeds during the day, it is the one that causes the most distress to gardeners and others.

Although they can be blown into your yard by the wind, it is likely that the mosquito biting you has come from just a few yards away! Adult mosquitoes lay eggs in damp soil or rotting vegetation. The eggs remain dormant until rain saturates the area. A small, hidden pool of rainwater that remains for just ten days may produce hundreds of ravenous pests.mosq

Many people have seen the fogging trucks which operate at dusk in communities along the coast of Georgia. The insecticide fog stays close to the ground and kills most of the night feeding swamp mosquitoes. Unfortunately, it is VERY difficult to control Asian tiger mosquitoes with fogged or sprayed insecticides. Since these blood-suckers feed during the day, fogs and sprays are quickly dispersed by the wind.

NO STANDING WATER

The BEST first step toward control for either type of mosquito is to look for pockets of water outdoors and drain them. An organized search among neighbors may turn up dozens of mosquito hiding places. Look for clogged gutters, leaf-filled drains, drain outlets from air-conditioners, plastic wading pools, dog dishes, soft drink cans, plastic bags, old tires, birdbaths, potted plant saucers, standing water in tire ruts, stumps, tree holes, puddles hidden under English ivy and pools left by flooded streams.

TREAT PUDDLES

If a pool of water can’t be permanently drained, i.e. bird baths and landscape water features, a special organic mosquito control can be used. The mosquito disease spore Bacillus thuringensis (B.t.) is sold at garden centers. A common brand name is “Mosquito Dunks”. These can be put in pools of standing water, where they provide control for several weeks. The active ingredient has no effect on birds or animals.

FOGGERS? MAYBE

Temporary relief outdoors can be had by using a fogger (not a garden sprayer) made specifically for mosquito control. A special insecticide will be sold for use with the fogger. Use it a few hours before an outdoor activity is planned. It will not be very effective on a windy day.

MOSQUITO PLANTS

In recent years, a plant advertised to repel mosquitoes has appeared in garden centers. This citrosa plant is actually a scented geranium. It has not been proven effective for repelling mosquitoes. The herb lemon balm also is reputed to repel insects. It is possible that if you rub the plant leaves on your skin, insects will be kept away for a short time. One experimenter estimated plant oils to be only 40 – 60 percent as effective as DEET, the active ingredient in most mosquito sprays (Off, Cutters, etc.). If you depend on the citrosa plant to keep mosquitoes away from your patio, the results may be much less than you desire. The citrosa is grown as an annual in Atlanta. It may be perennial in places where frost is rare.

CITRONELLA CANDLES

Citronella oil is extracted from citronella grass, which is grown in the tropics. The oil can be vaporized by mixing it with wax and manufacturing a candle to be burned outdoors. Citronella oil is effective for repelling insects. However, the smoke and odor may be too strong for some people’s taste. Several candles must be used to be effective outdoors.

ULTRASONIC REPELLERS

These gadgets are a perfect example of the quotation “If it sounds too good to be true it probably is. ” In fact, the ultrasonic mosquito repellers are absolutely useless. Do not waste your money on ultrasonic mosquito, flea, rat or squirrel repellers!

REPELLENT SPRAYS

Sometimes the best you can do is to station cans of mosquito repellent spray near the garden, lawn and deck. The active ingredient, DEET, is a proven insect repellent. Questions have arisen concerning the safety of the chemical, so avoid heavy application to your skin. Lightly spray exposed flesh plus sock tops, pants cuffs and t-shirt collars. The repellent sprays may be our only hope when all else fails.


Center Publication Number: 29

Sinkholes In The Landscape

Source(s): Walter Reeves, College of Agricultural and Environmental Sciences, Former County Extension Agent – DeKalb County


Sinkholes in the yard are an unfortunate but common problem that may arise five to ten years after a home is constructed. These holes, or underground cavities, form gradually but can appear in your lawn overnight.

In Florida, where some homes have been built on top of underground limestone caves, a sinkhole is a serious situation. In the northern half of Georgia, sinkholes like these are rarely seen.

Sinkholes typically develop where construction crews have buried debris, such as tree branches, stumps and construction materials. After a few years this buried debris decays. This leaves behind a large underground cavity hidden by a relatively thin surface layer of soil and grass. The soil layer eventually caves in, causing a sunken area or hole that can seem bottomless.

1f a sinkhole appears in your lawn, inspect it carefully to determine if the problem was caused by buried debris. Enlarge the surface opening so that you can inspect the entire cavity with a flashlight. If you can see traces of decayed trees or building materials, you have a construction sinkhole. By probing the bottom and sides of the cavity with a long rod, you can confirm your suspicions. If you find solid earth on the bottom and sides, the cavity probably is man-made, and can be treated with one of the remedies listed below.

If you find a large pipe in the cavity, a leaky sewer pipe may have caused the sinkhole. Rainwater might have washed soil into the pipe. As the soil is taken away, more soil washes in and the ground above sinks. The best course of action is to consult the proper municipal authority before proceeding any further.

When the cavity is so large that you cannot reach the sides or the bottom or if you see lots of water or soft, mucky soil, you could have a more serious problem. A private geotechnical or soils consultant should be contacted to inspect the site and recommend a solution.

Treating Underground Cavities

  1. Check the location of buried utility lines before you dig. Call 1-800-282-7411 within Georgia and 404-325-5000 within metro Atlanta for free utility location services.
  2. Enlarge the surface opening to access the entire cavity. Look for decaying debris and confirm the cause of the problem.
  3. Remove any large pieces of undecayed debris.
  4. Fill the entire cavity by adding loose fill dirt in 12-inch layers. Pack the soil firmly after each 12-inch layer to prevent future settling. Failure to pack the entire cavity may cause another sinkhole in the future.
  5. Once the cavity is filled, establish grass or other plants on the bare soil. It is probably not a good idea to plant a tree in this area for at least a couple of years. After that time, you can be relatively sure your problem is solved.

Center Publication Number: 32

Construction Damage in Your Landscape

Source(s): Walter Reeves


Construction damage to plants on a home site is common. In many cases it is an unavoidable consequence of building a home. In other cases, the damage could have been avoided with just a few precautions. The best time to control construction damage is before it occurs. Unfortunately, few of us are afforded that luxury. By the time we see a home and decide to buy it, the damage, much of which may be unseen, has occurred.

What You Don’t See

Some of the damage will be obvious when you first inspect the site, particularly damage to the shrubs and ground cover. However, your landscape could also be suffering from hidden damage that is difficult to detect and expensive to repair. When homes are built, the grading, trenching, tunneling, and excavating of the construction site damages nearby plant roots. It also changes the soil structure and affects the natural drainage system that existed before the site was cleared. Problems that show up months or even years after the home is occupied probably did not exist before construction began.

Building Your Home

When construction began, the site was likely cleared of most of the small plants in the immediate area and bulldozed flat. Soil was removed to construct a basement. Trenches were dug for the foundation and for drains. Paths were scraped and compacted for driveways and walks. Sewer trenches were dug or drain fields were laid and septic tanks placed in position. Trenches were dug for electric, gas, telephone, and cable lines. Soil was replaced along the foundation and the basement walls. Finally the soil was graded, seeded or sodded, and watered.

What You Get

The result of these construction activities is a less than natural situation. The soils are compacted. Plants are displaced. The natural drainage system has been replaced with something possibly less efficient. There are fewer plants for controlling runoff. Roofs, walks, patios, and drives may cover up to 70% of the lot.

Construction and Trees

Possibly you bought your new home because of the beauty of its trees. But the trees may have hidden damage that will cause them to die within two years. Before purchasing a home, you should inspect the trees on the lot to determine if they have been damaged by construction activities. Above ground damage to trees seldom causes the tree to decline in health or die. Rather, the more serious problems lie underground. Depending upon the severity of the injury and the species of tree, damage may take as long as seven years to show up. It is important to recognize situations where damage is likely to have occurred.

How Trees Grow

The natural trees in your yard grew in much different conditions than what exists now in their environment, which has been disturbed by construction activity. It is important that you assess the damage they may have suffered as soon as possible. The following facts about tree growth will help you understand which trees in your yard may be suffering from construction damage.

Tree roots extend from the trunk about two to three feet for every inch of the trunk’s diameter measured 4 feet above the ground. For example, a 10 inch diameter tree may have roots growing 30 feet away from the trunk. Knowing the “root zone” of your trees can help you identify possible problems. If construction activity has come into the root zone by 30 percent or more, you can expect some leaves and limbs to die. More significant damage might cause the whole tree to die eventually.

In the heavy clay soils of the Georgia piedmont, up to 90% of a tree’s roots will be located in the top 12 inches of soil. These roots are seeking oxygen, water and nutrients. The addition of as little as four inches of dirt above the existing soil may cause oxygen levels around the roots to decrease, damaging the tree. On the other hand, the removal of the upper 12 inches of soil on a construction site will take away roots which will not grow back.

A tree is anchored by large roots close to the trunk and farther away. If construction activity has severed any roots close to the tree, it may cause the tree to fall in a strong wind.

The trunk of a tree will naturally swell at its base, where you can see the major root collars entering the ground. If you can’t see the top of the roots, the trunk has had soil added to the original grade.

Trees do not heal – they seal. When part of a tree is damaged, whether root, trunk, or branch, the tree will give up that area and seal it off to prevent disease and insect attack. Dead limbs may occur near a damaged area as the tree seals it off. The limbs may die sporadically for several years after the damage occurs.

Nutrients travel from the leaves to the roots in tubes just 1/8 to 1/2 inch under the tree’s bark. Without bark to protect the tubes, nutrients cannot be transported to the roots and eventually the tree, will die.


Center Publication Number: 12

Calibrating Your Spreader

Source(s): Walter Reeves


Application of the correct amount of fertilizer and pesticide to a lawn is important! Too much fertilizer may burn the grass. Too little herbicide gives ineffective weed control.

There are many brands of lawn spreaders. Each spreader has its own method for setting the rate of application. To confuse matters even more, a spreader setting that accurately dispenses the correct fertilizer rate at one setting might not dispense the same amount of pesticide or seed at that setting.

To protect the environment and your lawn, your spreader should be calibrated for each product you use. This includes seed if you have a fescue lawn.

Calibration is not difficult. It only involves measuring a known area and then measuring the amount of product applied to that area at a certain spreader setting.

This only needs to be done one time for each product.

The only equipment you will need is a bathroom scale, a bucket and a tape measure.

To calibrate a spreader

1. Set your spreader at about 1/3 open. (Example: if the spreader has settings from #1 to #9, set it at the #3.)

2. Put two to three pounds of clean sand in the spreader; walk forward and let it dispense for ten to twenty feet. Visually note the width of the swath of sand applied by the spreader. Stop and measure the width of the swath. Remove remaining sand.

Swath width:________feet

NOTE: ‘Drop’ spreaders are easy; the swath width is the width of the spreader body.

3. Divide the swath width into 1000.

1000 square feet =_______feet width from step #2

4. Put ten pounds of the product you wish to apply in the spreader. Walk forward and operate the spreader for the number of feet determined in step #3.

5. Stop. Remove product from spreader and weigh it. Subtract this weight from ten pounds. The result is the number of pounds of the product applied at that spreader setting per 1000 square feet.

Ten pounds minus what is left =________ (amount of product applied per 1000 square feet)

6. Adjust the spreader opening up or down to achieve the application rate you wish for that product. (Repeating steps #4 – #5.) Use a felt tip marker to write on the spreader and indicate the proper setting.

Example:

#4 setting = six pounds of 16-48 fertilizer/1000 square feet

1. Hold an Empty bucket in your hand. Step on the scale and note the weight shown.
2. Scoop out of the bag approximately the weight of product you want and place in bucket.
3. Re-weigh yourself holding the bucket.
4. Add or subtract material from the bucket, re-weighing each time, until you have the right amount.


Step by Step Example Action/Calculation

1. You want to apply six pounds of fescue seed per 1000 square feet.

2. Spreader settings are #1 – #10 Set spreader to #3

3. Walk 20 feet with sand in spreader. Measure with tape measure.

4. Divide ten feet swath width into 1000. 1000 sq. ft. / 10 ft. = 100 ft. to walk 10 ft.

5. Place ten pounds of fescue seed in spreader and walk 100 feet. Weigh remaining seed. There are six pounds remaining. You have applied only four pounds of seed to 1000 square feet at spreader setting #3. Need to adjust spreader opening.

6. Adjust spreader to #4 opening. Put ten pounds of seed in and walk another 100 feet. Four pounds of seed remain in spreader. You have applied six pounds of seed per 1000 square feet.Mark on spreader #4 = six pounds fescue/1000 square feet.

Resource(s): Lawns in Georgia

Center Publication Number: 11