A Shady Perennial Garden

Source(s):  Rebecca Pickett


Herbaceous perennials usually die back in winter and reappear each spring to thrive and bloom again. They don’t always live forever, nor are they free of maintenance.

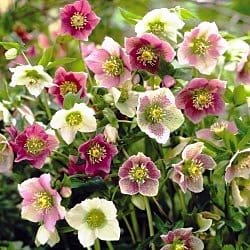
royal-helleborus

GET READY …

  • Good bed preparation is essential for the growth of healthy perennials. Prepare all beds in the summer for fall planting and in the winter for spring planting. Correct drainage problems before planting.
  • Check the drainage by running a percolation test. Dig a 10″ hole and fill it with water. The next day, fill the hole with water again and time how long it stays in the hole. If the water is gone in 8-10 hours (1″ per hour), this site is suitable for most perennials.

BED PREPARATION …

  • Dig or till your soil 8 inches deep.
  • Remove all this worked soil and set it aside (your topsoil). -With a spading fork loosen the next 8″ of soil and work in coarse (granite) sand or wood chips.
  • Replace your topsoil and mix in 4″ of coarse sand or granite dust and 4″ of organic material (compost, shredded bark, etc.). This results in a 24″ thick layer of improved soil.
  • Add lime and fertilizer as recommended by your soil test. (Barbara Allen)

GET SET …
Resist the urge to plant one of each kind. Use odd numbers of plants (3,5,7) and plant them in asymmetrical groups or “drifts.” The visual effect of this type of planting will be more effective than a polka-dot or geometric design.

RECOMMENDED PERENNIALS

FOR PARTIAL SHADE: (Afternoon shade or dappled light under trees)

PROPER NAME (COMMON NAME)

‘BEST VARIETY’

FLOWER COLOR HEIGHT

BLOOM TIME

COMMENTS
Ajuga reptans (bugleweed) ‘Burgundy Glow’,

“Atropurpurea’

blue, lavender,

pink, white

4-12″, late spring Ground cover grown mainly for foliage. Several types available.
Anemone vitifolia (grapeleaf anemone)

‘Robustissima’

pink 11/2-3′, early fall Spreads rapidly. Nice foliage all

summer. Also try A. japonica.

Aquilegia canadensis (Canadian columbine) red & yellow 1-2′, spring Better here than the hybrids.
Astilbe arendsii ‘Deutschland’; ‘Fanal’;

‘Rheinland’, ‘Finale’

white; red;
pink
1-3′, late spring Lovely feathery blooms. Needs lots of water. Watch for spider mites.
Astilbe chinensis ‘Pumila’ pink 1-2′, spring Needs less water than arendsii.
Digitalis mertonensis (strawberry foxglove) rosy pink 3-4′, summer Lasts 2 or 3 years. Very pretty.
Heuchera americana (alum root)

‘Sunset’

greenish white 1-11/2‘, summer Does better than hybrids.
Heuchera micrantha (alum root)
‘Palace Purple’
creamy 1-11/2 ’,summer Grown for its purplish foliage.
Lobelia cardinalis
syphilitica
(cardinal flower)

(big blue lobelia)

red

blue

2-4′, late summer Must have rich, moist soil. Likes stream banks. Reseeds like crazy.
Phlox divaricata (woodland phlox) ‘Fuller’s White’
‘Louisiana’
white

blue

12-15″, spring Evergreen, spreads slowly. This native should be used more.
Tiarella cordifolia (foamflower) white 6-12″, spring Rich, moist soil, not much sun.
Tradescantia virginiana (spiderwort)
‘Snow Cap’
‘Zwanenburg Blue’
white

deep blue

1-2′, summer Blooms mornings & cloudy days.
Will take a good bit of sun.
FOR FULL SHADE: (meaning little if any direct sunlight)
Begonia grandis (hardy begonia) pink 2′, late summer Angel-wing leaves. No dividing.
Brunnera macrophylla (heartleaf brunnera) light blue 18″, spring Forget me-not flowers, big heart­ shaped leaf. Goes dormant in heat
Chrysogonum virginianum (green and gold)

‘Piccadilly’

yellow 6-9″, spring Thick mat of foliage. Blooms on and off all year. Evergreen.
Dicentra eximia (fringed bleeding heart) pink, white 1-1½’, spring Better than spectabilis for heat.
Dicentra spectabilis (common bleeding heart pink, white 1-1½, spring Beautiful sight in spring.
Helleborus orientalis (Lenten rose) shades of deep rose to white 18”, February Evergreen foliage. Flowers las a long time. Reseeds prolifically.
Hosta (plantain lily, funkia) hundreds White, lilac 6” – 4”, summer Grow different kinds for contrast of foliage. The shade plant here.
Iris cristata (crested iris) Blue with yellow crest 6”, late spring Spreads quickly. Charming dwarf.
Mertensia virginica (Virginia bluebells) Blue 1-2’, early spring Dies back after early bloom. Nice.
Sanquinana canadensis (bloodroot White 6”, early spring The harbinger of spring
Trillium grandiflorum (wake-robin) None 1-2” early spring Spring delight. Cutting will kill.
Ferns Japanese Painted Fern,
Christmas Fern (evergreen),
Maidenhair Fern (evergreen),
Japanese Shield Fern
None 12” and up There are various textures and heights to try. They offer a pleasing contrast to the leaves of hostas and can fill in where early spring bloomers have died back

GROW

  • Best planting time in Atlanta is near Oct. 15 or April 1.
  • Loosen root balls and set the crown no deeper than it was before.
  • Firm soil gently around roots and water deeply.
  • Markers will help identify and protect. Put stepping stones in wide beds to limit soil compaction caused by footsteps.
  • Heavy winter mulch is not recommended here; it encourages crown rot. A 1 1/2 to 2′ summer mulch of pine straw, bark or wood chips is necessary to hold moisture in and keep weeds out.
  • Once established, fertilize your bed with 1 1/2 lb, of 8-8-8 or 10-10-10 per 100 sq. ft. in early spring and again during late spring and/or midsummer. A pound of granular fertilizer is equal to about 2 cups.
  • Water deeply once a week during dry spells. Avoid frequent, shallow watering or watering late in the day. Wet foliage promotes disease problems.
  • Keep weeds, dead foliage and spent blooms removed.
  • Some plants will need staking. Try bamboo stakes and soft jute twine, or cut up tomato cages.
  • When foliage dies in fall, clean it out and do not let leaves pile up in winter. Yep, crown rot again! Give the bed a good cleanout in spring and add new mulch as summer heat approaches.
  • Some plants will need dividing every two or three years, others will not. Divide and share with friends.

POSSIBLE PROBLEMS…

  • Snails or slugs: They eat leaves and leave a slime trail. Try beer in saucers or crushed eggshells around plants.
  • Spittlebuq: Deposits foamy ‘spittle’ in crown or leaf joint. Try rotenone or recommended insecticide.
  • Mealybug: Small, cottony spot on stem. Blast off with hose or touch with alcohol swab.
  • Leafminer: Leaves trails in leaf of columbine. Pick off leaf or use appropriate pesticide.
  • Aphids: Clusters of oval green/black/brown specks on leaf or stem. Blast with hose, use insecticidal soap or an insecticide.
  • Thrips: Cause malformed, brown flower buds. Pick off affected buds or use insecticide.
  • Spider Mites: Cause a stippled white or dried out look on leaves. Daylilies turn bronze or yellow. Blast with hose or use a miticide.
  • Powdery Mildew: A white haze develops on leaves, especially phlox and crepe myrtle. Use a recommended fungicide for both prevention and treatment.
  • Crown rot, Root rot: Just about any plant will succumb to these if planted too deeply or allowed to have wet feet for too long.

Many thanks to the following for the benefit of their ideas:

  • Barbara Allen, Master Gardener (Her ‘Recipe’ for preparing a bed is one of many methods.)
  • Allan M. Armitage, The University of Georgia
  • Jane Bath, Land Arts, Inc,, Monroe, GA
  • Jimmy Stewart, Garden Designs, Atlanta, GA
  • Chuck Zdeb, Master Gardener

Resource(s): Flowering Perennials for Georgia Gardens

Center Publication Number: 1

A Landscape Feature that Helps Protect Water Quality

Source(s): Steve Brady, Cobb County Extension


How can your landscape help protect water quality? By installing a rain garden you can have an attractive display of interesting colors, textures and forms that improves water quality.

land1

A rain garden is not a bog garden or a swamp. It is designed to receive some of the water that pours off of your driveway, roof or other impervious surfaces. Instead of sending it rushing off to the nearest storm drain or stream, the water is allowed to slow down and pause long enough for some of it to soak into the water table. This helps reduce the volume of water that scours our creeks. In addition, the water that exceeds the pool capacity of your rain garden has a moment to settle out soil particles, fertilizers, chemicals, etc in a process called biofiltration.

Naturally people think a rain garden will breed mosquitoes. If properly constructed, the water that is held in the garden will perk into the soil in 24 to 48 hours after a rain event. Mosquitoes need more than three days to breed in calm water.

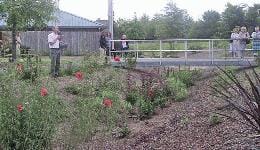
Construction of the garden is not without challenges. The Demonstration Rain Garden here in Cobb County met and overcame several. A stormwater channel carries water off of the highway and runs next to our rain garden site. Just days before we started construction, a 4 inch rain event filled the channel and water backed up to the Cobb County Water System’s back door. Before we could go any farther the channel had to be re-engineered.

The next challenge stemmed from the fact that this location was once used as a steam locomotive factory. Te soil was not only extremely compacted, but also had a pH of 7.8 (very high) due to all the ash. After much plowing, grading, amending, and tilling the rain garden was functional.

Today the garden not only reduces runoff and pollution, it also serves as an environmental education site, and place for plant evaluations. It adds beauty to an otherwise boring landscape.

The garden is located at 660 South Cobb Drive where it intersects with Atlanta Road in Marietta. It is behind the Cobb County Water System’s building. The public is always welcome.

An excellent and easy to follow brochure is available called Rain Gardens for Home Landscapes. It will take you through the construction step by step. It includes the plants that are adapted to both wet and dry periods. You would only water this garden to get plants established. After that, the plants should be able to tolerate the extremes and still add interest to your landscape. Consider adding this low maintenance landscape feature to your yard and help protect water quality at the same time.


Resource(s): Landscape Plants for Georgia

A Better Way To Plant Shrubs and Trees

Source(s):
  • Carl Whitcomb, PhD, Carl is a consultant to the nursery industry and author of several books, including Establishment and Maintenance of Landscape Plants, Lacebark, Inc., P.O. Box 2383, Stillwater, OK 74076). He lives in Stillwater, Oklahoma.
  • Walter Reeves

For starters, dig a shallow hole and avoid soil amendments.

Planting Shrubs and Trees

How you plant a shrub or tree determines whether the plant struggles to grow, dies outright, or takes off and thrives. I know this firsthand. For 20 years I conducted research with a wide variety of ornamental shrubs and trees, planting them in different ways and observing the results. I learned, often to my surprise, that many common recommendations about planting are wrong or useless. You may think that the traditional approach to transplanting-digging a deep planting hole, amending the soil with organic matter, pruning branches to compensate for lost roots, and not fertilizing at planting time produces good results, but my research shows that a different approach works better.

Whether you’re planting a bareroot, balled and burlapped (B&B), or container plant, your shrub or tree is more likely to thrive if you provide a well-drained site, a wide, shallow planting hole, the right kind and amount of fertilizer, and regular watering. It will do even better if you use organic matter as a mulch instead of as a soil amendment and leave the plant unpruned, unless it has weak, damaged or ill-placed branches.

The time of year is another important consideration when you plant a tree or shrub. Spring, summer and fall can all be appropriate planting times, as long as you take into account the impact of each season on plant growth. In many parts of the country, the cool weather, high humidity, and abundant rainfall of spring make this a particularly good time to plant. In summer, warmer temperatures promote growth but also increase a plant’s demand for water, so if you decide to plant at this time, choose a plant that has been well watered at the garden center, and irrigate it as needed after planting. Fall planting also has advantages – cooler air temperatures reduce the demand for water while the lingering warmth of the soil encourages rapid root growth. Take care, however, to allow your transplant enough time to become established before winter sets in.

Check the soil drainage before you plant. No amount of care in planting can make a shrub or tree thrive if the soil is so wet that the roots don’t get enough oxygen and they suffocate. To test drainage, dig a hole 8 in. wide and 12 in. deep, fill it with water several times during the day until the soil is saturated and then fill it again in the evening. If there is standing water in the hole 24 hours later, you must improve the drainage or limit yourself to the relatively few woody plants that tolerate wet sites.

The easiest way to improve drainage is to plant on berms or raised mounds of soil. Start by loosening the soil beneath the mound to a depth of 4 in. to 6 in. Next, pile additional topsoil 6 in. to 1 ft. high in a circle at least three times as wide as the root system of the plant, and set it in place as if the top of the mound were ground level. Mounds tend to dry quickly (and the lighter the soil, the faster they dry out), so you have to water diligently the first, and often the second year, until the roots establish themselves.

The surest way to improve drainage is to run perforated drain pipe through a gravel-filled, underground trench. The pipe must run to a low spot to carry away water. Since most roots are in the top 1 ft. of soil, the pipe must be installed 16 in. to 18 in. deep.

If you can’t improve the drainage plant shrub or tree species that tolerate wet sites. For help in choosing a suitable plant, check with a local nursery or consult these books: Landscape Plants for Eastern North America, by Harrison L. Flint, John Wiley & Sons, 1 Wiley Drive, Somerset, N.J. 08875); Pocket Guide to Choosing Woody Ornamentals by Gerd Krussmann Timber Press, 9999 S.W. Wilshire, Portland, OR 97225); and Know It and Grow It 11: A Guide to the Identification and Use of Landscape Plants, by Carl Whitcomb, Lacebark, Inc., P.O. Box 2383, Stillwater, OK 74076).

Dig a wide planting hole

The ideal planting hole is wide and shallow – at least twice the width of the root system of the plant, and the wider the better. Roots need oxygen for growth, and they get most of it from open spaces between particles of soil. A broad circle of loosened soil around a new shrub or tree helps to insure that the roots have the air they need during the first growing season.

Dig a planting hole the same depth as the root system of your shrub or tree. Deeper holes can lead to trouble. The soil may settle enough after transplanting to create a depression around the plant. If rain collects and stands in the depression, or if soil washes in and packs around the trunk, there is a danger of encouraging root and trunk diseases. Many publications suggest digging a deep planting hole, then packing the soil in the bottom to prevent settling. Since air is vital to root growth, it makes no sense to dig the soil out, then pack it back in.

Prune sparingly, if at all

On the face of it, pruning a shrub or tree at planting time sounds plausible. When a nursery digs up a bare-root or a B&B plant, most of the root system remains in the ground, producing a plant with a top too big for its roots. Even container-grown plants can end up disproportionately top-heavy after their potbound roots are pruned away.

It would seem that such extensive root loss would prevent the plant from taking up enough water, so you’d need to cut back the top to reduce its water needs. But, in fact, my research shows that even if shrubs or trees lose many roots during transplanting, the unpruned plants do better than the pruned ones during the first year. They put on more growth, and fewer of them die. After two years, the pruned trees catch up with their unpruned neighbors, but pruning takes its toll. The pruned trees, especially those with one-third or more of their branches removed, often have less attractive shapes. Also, severe pruning frequently prompts young trees to produce new branches that are too close to adjacent ones, or that grow out from the trunk at narrow angles. By contrast, unpruned trees generally have better-spaced branches with stronger angles, and they look more natural.

Why does an unpruned shrub or tree thrive? I have a theory. The root system, though diminished in size by digging or pruning, appears to be able to keep up with the early demand for water from the top if the soil has plenty of moisture. Meanwhile, the root system of an unpruned plant grows faster than that of a pruned plant because expanding leaf buds produce hormones and sugars that stimulate root growth, and the more buds, the faster the growth. Plants with better root systems are more likely to thrive, especially during hot, dry weather.

While I’ve found that pruning for balance between top and roots does no good, corrective pruning does have a place at planting time. If a shrub or tree has a cluster of branches growing too close together for good looks or health, remove a branch or two. You also should remove damaged branches; the weaker of two branches that cross; and branches that ascend from the trunk at a steep angle, because their crotches, the places where the branches meet the trunk, will always be weak.

Hold the soil amendments

For decades, gardeners have mixed organic amendments into the soil to help establish newly planted shrubs and trees. The resulting “lighter” soil might sound like a good idea, but I’ve found that soil amended with peat moss, pine bark and similar organic materials produces no better results than unamended soil and sometimes gives less vigorous growth. Of all of my findings, this one has generated the most controversy among professionals and home gardeners alike. When I finished my first talk about these experiments, the moderator implied that my results were somehow unpatriotic, commenting that he didn’t intend to ask me what I thought about apple pie or motherhood. Actually, I, too, once believed in the need for soil amendments. In fact, my first experiments were designed to learn which additives were best for planting, and I was as surprised as anyone to learn that none of them produced better results than unamended soil. I’ve since repeated my experiments in several parts of the country and on different kinds of soil, and got the same results.

In the first year or two after planting, the difference between shrubs and trees in amended soil and unamended soil is moderate above ground, but often striking below ground. Since plants in amended soil rarely show visible signs of stress, there is no reason to question the

practice. But after digging up hundreds of plants, I’ve learned that plants in unamended soil send roots as far as 3 ft. or 4 ft. from the original root ball in a year or two, while the roots of plants in amended soil are still largely confined to the planting hole.

Roots in amended soil grow more slowly because they often have too little or too much water. On well-drained sites, soil amendments such as peat often deprive the roots of moisture. The amended soil quickly loses much of the water it absorbs to the surrounding, often finer-textured, soil, which acts like an ink-blotter and pulls water from the peat by capillary action. The loss is very rapid when the ground is relatively dry, and is compounded by the demand for water from the top growth of the plant. During hot, dry spells, when a plant loses lots of water, the amended soil may be dry enough to cause plant stress even though the surrounding unamended soil is still moist enough to support growth.

On poorly-drained sites, soil amendments can collect too much water. The amended soil has a coarser texture than the surrounding soil and therefore allows water to penetrate more rapidly. During a rainy period or prolonged irrigation, the planting hole can fill up like a bathtub, causing roots to suffocate, or suffer enough stress and dieback to encourage root diseases.

Some acid-loving plants, such as azaleas, do grow better when the soil is heavily amended with organic matter, which tends to be acidic as it breaks down. The benefit, however, stems largely from the decrease in soil Ph rather than improved soil structure. You could skip the peat moss, lower the pH with powdered or granular sulfur and have equally good results.

If you have organic matter available, you’ll have better results if you use it as a mulch, imitating the way organic matter would be added to the soil in nature, rather than using it as a soil amendment.

Fertilize as needed

Should you fertilize newly-planted shrubs and trees? Yes, provided a soil test shows that fertilizer is, in fact, needed. It’s important not to deprive the plant of nitrogen or other nutrients following planting.

You can apply fertilizer by spreading it on the soil surface, or by adding it to the planting hole. Much has been said and written to warn gardeners that fertilizer in the planting hole causes root damage, a bugaboo probably based on experiments in the 1920s and 30s when the principal form of nitrogen fertilizer was sodium nitrate. Fertilizers are salts. Those with a high salt index (the measure of saltiness)- may absorb water that roots need when the soil is dry. Leaves die, and the damage is misleadingly called fertilizer burn. Today, though, there are forms of nitrogen fertilizer that can be added to the planting hole safely. For example, urea, one of the most widely available forms of nitrogen fertilizer, has a salt index of 1.6 per.

Test the soil before you plant, and apply no more fertilizer than the soil test calls for. (Any fertilizer applied at excessive rates can cause problems.) If fertilizer is needed, choose one with a low salt index. To supply nitrogen, look for a formulation that includes ureaformaldehyde, IBDU (isobutylene diurea) or ammoniated phosphate. If your soil has a phosphorus deficiency, incorporate superphosphate (with an analysis of 0-20-0) or triple superphosphate (0-46-0) into the soil as the test results suggest. (It is important to note that phosphorus does not move through the soil. It must be mixed into the root zone in order to be readily available to plants.) The salt index of superphosphate and triple superphosphate is near zero. If you have to add potassium, be aware that potassium chloride (muriate of potash), the most common potassium source, has a very high salt index. Use it with care.

In general, fertilizers derived from organic sources pose little risk of salt damage because they release nutrients very slowly. Slow-release or controlled-release chemical fertilizers offer the same advantage; even if they contain nutrients in forms that have high salt indices, they become available to plants so slowly that they are unlikely to cause any harm. Organic and other slow-release fertilizers cost more initially, but they don’t need to be applied as frequently.

In good soils, fertilizing at planting time has little impact on the first flush of top growth following planting. That growth is influenced mostly by growing conditions the previous summer and fall, when buds were formed. However, remember that fertilizing at, or shortly after, planting encourages additional growth that year and promotes bud development the first fall following planting. These buds will produce the spring flush of growth one year after planting, and it’s that growth that reflects how “happy” the plant is in the new site.

Lay on the mulch

Young shrubs and trees do better when competition is kept in check, and mulch is the best way to supply the relief they need. Mulch suppresses weeds, conserves moisture, checks erosion, prevents soil compaction in heavy rains and moderates soil temperature. Pine bark, aged woodchips, pine straw, chopped leaves – most organic materials, in fact – work well as mulch.

Apply mulch to a sizable area around a newly-planted tree or shrub – the roots will eventually extend far from the trunk. The right depth for mulch is 2 in. to 4 in., depending on the type of soil it covers. Less mulch is required for heavy soils, more for light soils. In either case, mulch that is too deep can cause problems. It can prevent the soil from drying out, depriving plant roots of necessary oxygen. Extremely deep mulch also may encourage rodents which can damage plant stems. Do not place mulch more than 2 in. deep next to the stem of a tree or shrub. an excessively deep, fine-textured mulch around the stem may kill the bark near the soil line, resulting in the eventual death of the entire plant.

Keep in mind that organic mulches may temporarily tie up a substantial portion of soil nitrogen, which is used by the microorganisms that break down the mulch. In time, the nitrogen bound by the microorganisms will be released, but in the short run, additional nitrogen may be required to support vigorous growth of new plantings. To prevent problems, broadcast a bit of nitrogen fertilizer on the soil before you mulch.

Water diligently

All plants need soil with adequate moisture, especially while their root systems are growing rapidly. Water is the necessary ingredient for plant growth that is most often in short supply. If rain falls short, make up the deficit by watering deeply every five to seven days, taking care not to suffocate roots by overwatering. In my research, supplemental watering throughout the first growing season made an enormous difference in the growth of transplanted shrubs and trees.

I recommend drip irrigation systems whenever possible. They conserve moisture, while minimizing the liability of overwatering. Since you don’t wet the foliage, you don’t encourage leaf diseases. The key to using drip irrigation is to water thoroughly, then allow the soil to dry moderately before watering again. Placing mulch over the drip system helps slow evaporation of moisture from the soil.

Start with a healthy plant

I have one last suggestion to offer about planting shrubs and trees: select only thrifty plants, those grown properly at the nursery and handled with care before sale. Thrifty plants are those with good, deep leaf color and plump stems and buds. The key to successful transplant establishment is the energy inside the plant. This is more important than what is done outside the plant. All the care in the world cannot make a sickly plant thrive.

Once you have chosen a healthy specimen, it is up to you to provide the conditions that will enable the plant to adapt to its new site and prosper there. Give it a wide hole, the necessary fertilizer, mulch and plenty of water, and it will reward you with vigorous growth.


Resource(s):

Center Publication Number: 10
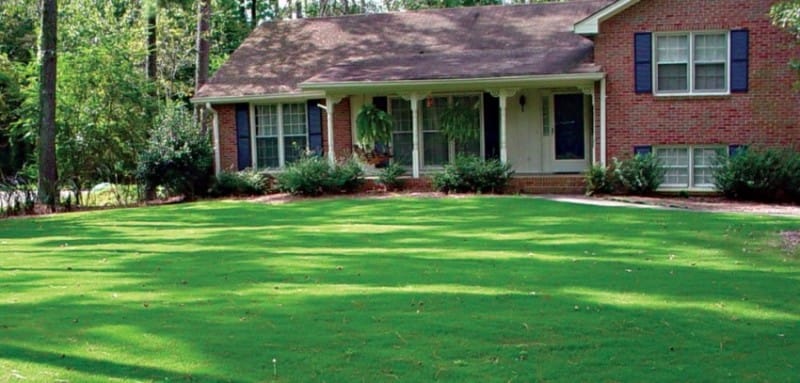
Responsible Lawn Care

Source(s): Clint Waltz, Extension Turfgrass Specialist, The University of Georgia


Water is a precious resource that has long been taken for granted. However, the recent droughts and our rapid population growth has helped focus the need for better resource management.

Often overlooked, our landscapes can help reduce the environmental impact of urbanization. Plants reduce soil erosion, cool the environment, improve air quality, decrease water run-off, filter impurities from the water and enhance community character.

The time has come for everyone to share in protecting our precious water resources and the environment. The following lawn management steps will minimize water pollution from fertilizers, pesticides and sediment while maintaining a healthy, vigorous and attractive lawn.

Lawns and landscapes need water, fertilizers, and sometimes other chemicals to maintain good health. However, improper use of these products can pollute lakes, rivers and streams. In sandy soils, some lawn care products may seep into groundwater and pollute aquifers.

Regardless of whether you hire a commercial lawn care company or do it yourself, insist that the following steps be followed. Make sure your contractor has a Georgia Pesticides Applicators License if they are going to apply pesticides.

For more information, contact your local county Extension office. Additional turf management information is available on the Georgia Turf website.


  1. Prevent Problems
    • Plant the right grass. UGA Extension bulletin 773, “Lawns In Georgia”, explains which grasses grow best in Georgia. It also provides recommended establishment steps for a new lawn and maintenance practices for an established lawn.
    • Plant at the right time so that the lawn gets a good start. Sod is the most effective and rapid means of establishing a lawn. If you establish by seeding, cover with a straw or other type of mulch to prevent soil erosion.
    • Do not try to seed a lawn on a steep slope or in an area that does not drain well. Sod across the slope to protect the soil from erosion and runoff.
  2. Water it Right
    • Water only when the lawn needs it. Most grasses need about one inch of water per week of active growth. It is time to water when the grass appears a dull bluish green, the leaf blades begin to fold or roll and footprints remain as the grass begins to wilt.
    • Do not overwater. You should wet the soil to just below the root depth or generally to a depth of 6 to 8 inches. Apply 1/2 inch of water to a sandy soil and about 1 inch to a clay soil. If runoff occurs during irrigation, stop and allow the water to soak into the soil for a few hours before applying more.
    • Water the grass – not the pavement or street. Place sprinklers and automatic irrigation heads so that the water falls only on the lawn.
    • Water in early morning to reduce evaporation losses and remove disease-enhancing dew.
    • Water newly seeded areas lightly and often enough to prevent the surface from drying out for the first 2 weeks until seedlings become established.
  3. Mow it Right
    • Mow regularly at the correct height (see Table) to encourage deep roots and help keep out weeds. Use a sharp blade and remove only a third of the grass height at one time. Mow when the grass is dry.
    • Leave clippings on the lawn. If you mow regularly and let the clippings decompose on the lawn, you will recycle about 25% of the nitrogen your lawn needs. If you remove clippings, compost them for use as a mulch.
  4. Fertilize it Right
    • Apply the right amount of fertilizer at the right time to maintain a healthy lawn.
    • Do not apply fertilizer before a heavy rain is expected.
    • Test the soil every two to three years to determine if lime, phosphorus or potassium is needed.
    • Choose a fertilizer with some slow-release form of nitrogen to reduce the potential leaching into groundwater, especially on sandy soils or to reduce loss from runoff.
    • Calibrate your spreader every time it is used to apply the right rate and get even distribution.
    • Fill the spreader on a paved surface so spills can be easily cleaned up. Don’t leave fertilizer on paved surfaces where it will wash off. Blow or sweep this fertilizer back onto the lawn.
  5. Use Pesticides Sparingly
    • Have weeds, diseases or insects properly identified before applying a pesticide. Follow the product label directions and time applications when the pest is most sensitive.
    • Do not apply pesticides when heavy rain is likely because some chemicals can leach through sandy soils and pollute shallow water tables or runoff sloping sites or compacted soils.
    • Calibrate your sprayer or spreader to deliver the correct amount of product and ensure even application.
    • Prevent spills. Mix liquid solutions and fill sprayers on grassy surfaces so no liquid spills on pavements. Mix granular materials on smooth, impenetrable surfaces so spills can be easily cleaned up.

**** Mowing Height for Lawn Grasses in Georgia ****
Grass Cutting Height (inches)
Bahiagrass 2 to 3
Bluegrass 2 to 3
Common Bermudagrass 1 to 3
Hybrid Bermudagrass 0.5 to 1.5
Zoysia 0.5 to 1.5
Centipedegrass 1 to 1.5
Carpetgrass 1 to 1.5
St. Augustine 2 to 3
Ryegrass 1 to 2
Tall Fescue 2 to 3

Resource(s):  Lawns in Georgia

Center Publication Number:  143

Fall Interseeding and Overseeding: Not One and the Same

Photo by Wayne Hanna, Professor, UGA Crop & Soil Sciences

Clint Waltz, Ph.D., UGA Turfgrass Specialist

It’s nearing that time again, time to think about fall interseeding and overseeding.  These two practices are similar but technically not the same.  Interseeding is the practice of seeding the same species into itself for the purpose of increasing stand density and recovery of lost grass.  For example, tall fescue is interseeded into tall fescue in the fall to improve the overall stand which may have declined through the summer stress period.  Different cultivars may be used but the turfgrass species remains constant.  Adding centipedegrass seed to a thin centipedegrass lawn in the spring is another example where like species is seeded into like species.

Prior to interseeding, particularly with tall fescue, core aeration is a common practice.  The benefits for core aeration are numerous (e.g. soil air exchange, relieving compaction, improved water infiltration, etc.), including improving a planting or seed bed conditions.

Overseeding, however, is the practice of temporarily introducing a second turfgrass species – typically a cool-season grass – into a permanent species – typically a warm-season species – for the purpose of winter color or traffic tolerance.  An example of overseeding would be incorporating a second, or temporary, species into a permanent species, as in overseeding a bermudagrass baseball field in the fall with perennial ryegrass to have a green field in the early spring.  The second species can compete with the permanent species for light, water, space, and nutrients, so overseeding can become an additional stress that has to be managed.  Of the warm-season turfgrasses, bermudagrass is best adapted and tolerant of overseeding.  It is ill-advised to overseed solely stoloniferous grasses like centipedegrass and St. Augustinegrass.

Successful overseeding involves growing healthy grass prior to overseeding, proper seed and seeding rate selection, overseeding timing and preparation, post planting maintenance, and spring transition.  It is particularly important to maintain proper soil fertility, to relieve soil compaction, and to prevent excessive thatch development.

Overseeding selection involves selecting grasses that have characteristics suited to the particular needs.  Annual ryegrass has been replaced by perennial ryegrasses, because of improved turf quality, color, stress and pest tolerance, and manageability.  The “intermediate” ryegrasses tend to perform as the name implies somewhere between annual and perennial ryegrass, unfortunately most are more like annual ryegrass, not half way between the two.

Overseeding rates generally range between 5 and 10 pounds per 1000 ft2 in lawns.  In higher traffic situations, like sports fields and golf courses, the seeding range is between 8 and 12 pounds per 1000 ft2.  Using high quality “Certified” (blue tag) seed that is free of weed species is important to maintaining quality turf.  It is also important to use seed treated with fungicides such as Apron particularly for early fall overseeding since seedling blight diseases can be a problem.

The ten pound seeding rate generally provides a rapid stand for fall use, while the five pound rate provides a thinner stand and may not provide much coverage until spring.  Seeding rate generally relates to desired appearance and intended traffic or use.  Higher trafficked areas need higher seeding rates.  However, higher seeding rates may lead to more difficult spring transition.  Balancing seeing rate with need and desired appearance is a management decision that can affect bermudagrass the following fall, so seed appropriately.

Proper timing of overseeding should result in a gradual transition from the warm-season turf to cool-season turf.  Some common indicators that tell us it is time to overseed include:  soil temperatures at a four‑inch depth approaching 75° F, night temperatures falling into the 50’s, average midday temperature in the mid-70° F, or 2 to 4 weeks before the average annual first killing frost date.

The objective to insuring a successful overseeding is good soil to seed contact.  Seedbed preparations generally consist of close mowing or scalping, with some light vertical mowing, and blowing, sweeping, or vacuuming the loose plant debris from the soil surface.  Generally, the more the turf is opened, the better the establishment rate, but the more competitive the cool-season turf will be in the spring.  Seed which germinate in thatch or above the soil surface are more likely to dry-out and die before becoming established.

After dragging the seed into the soil, begin lightly irrigating to maintain good surface moisture and get the seed to germinate.  This generally means irrigating three to five times per day until the seedlings are well established, but the total amount of water applied during a day would seldom exceed 0.5 inches.  This irrigation practice should be done without causing puddling on the soil surface, free water encourages disease.  After germination, gradually reduce the frequency and increase the time of irrigation until a normal irrigation program can be established.

Begin mowing when seedling height is 30% higher than desired.  Use a mower with sharp blades and mow when the grass is dry to reduce seedling injury.  Because first-mowed grass is tender and succulent a reel-type mower tends to lay seedlings over and not cut them.  Using a rotary-type mower is commonly used for the first mowing with the fear of “ripping” seedlings being unfounded or insignificant.  Transitioning to a reel-type mower after the second or third mowing can provide a high quality appearance.

Wait to fertilize after seedling emergence (generally three weeks after seeding) since earlier fertilizing may encourage warm-season turf competition.  One pound of N per 1000 ft2 per month is adequate with less (e.g. 0.25 to 0.75 lb N / 1000 ft2) commonly used.  Use a soil test report to guide phosphorus needs but it is typical to apply some phosphorus shortly after seeding to improve rooting.

2013 reports show ryegrass and tall fescue seed crops being harvested earlier and faster than normal.  This may not indicate a bountiful year for seed production.  In fact, the forecast is for an average yield with a reduced quality due to more contaminants (i.e. weeds) in the seed fields.  Combine these factors with short carryover inventories and reduced acres in production, the result may be higher seed prices for 2013.

Fall is rapidly approaching and seeding, be it interseeding or overseeding, will again be part of turfgrass management programs.  Proper preparation prior to seeding and sound management afterward can provide a turfgrass surface that performs well and is attractive throughout the winter.

Emerald Ash Borer found with a foothold in North Georgia

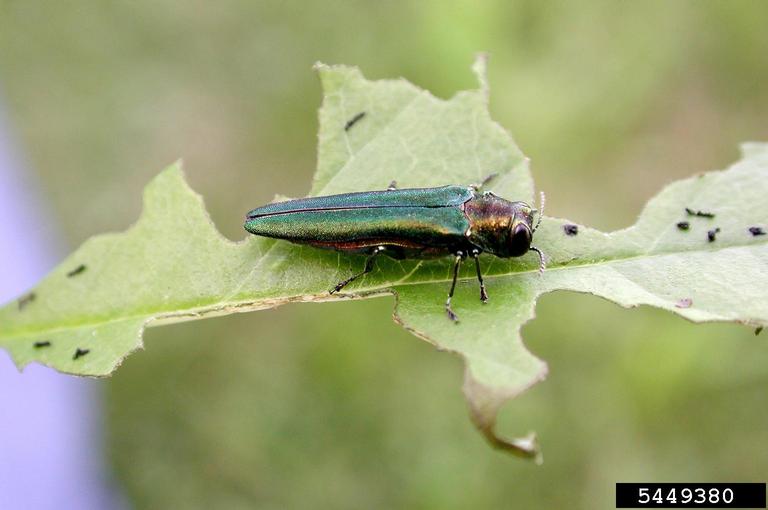
EAB Debbie Miller, USDA Forest Service
Emerald Ash Borer, Debbie Miller, USDA Forest Service, Bugwood.org

Sandi Martin and Merritt Melancon,  University of Georgia 

For years foresters and invasive insect experts have been on the lookout for the arrival of an unwelcome guest in Georgia. Now that it’s here, they hope the public will help restrict its spread within Georgia.

The small, iridescent-green beetle has killed millions of ash trees across a wide swath of Canada and the upper Midwest since it was first detected in 2002. The emerald ash borer — Agrilus planipennis— has spread south and west from infested areas over the last decade.

In July, researchers found adult emerald ash borers in survey traps in DeKalb and Fulton counties. A follow-up ground survey found larvae in nearby ash trees, confirming an established emerald ash borer infestation.

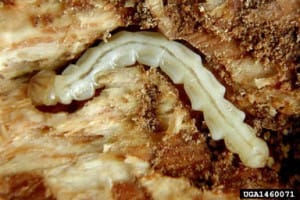
EAB larvae David Cappaert, Michigan State University
Emerald Ash Borer larvae in tree, David Cappaert, Michigan State University, Bugwood.org

Since 2005 University of Georgia invasive species experts have conducted an extensive trapping program in Georgia to screen for the emerald ash borer.

Georgia’s five species of native ash trees usually grow along stream banks. While ash only makes up about 1 percent of Georgia forests, they play an integral role in preventing the erosion of stream banks and keeping silt out of natural waterways. Ash is also a popular landscape tree, with 2.9 million trees planted around Georgia homes, businesses, parks and greenways. The value of these city trees in Georgia is estimated to be around $725 million.

EAB exit hole Penn. Dept. of Conservation & Natural Resources - Forestry Archive
Emerald Ash borer creates a D-shaped exit hole, Image from Penn. Dept. of Conservation & Natural Resources – Forestry Archive, Bugwood.rog

Although the adult beetle is an active flyer, it is believed that the primary way the beetle spreads is by hitching a ride on infested ash firewood, logs and nursery stock. Emerald ash borer larvae kill ash trees by burrowing serpentine tunnels in the inner layers of bark, preventing the tree from transporting water and nutrients to and from the tree canopy.

The Georgia Invasive Species Task Force will launch a public outreach plan to try to curb the spread of this pest in the near future. This task force consists of the Georgia Department of Agriculture, the Georgia Forestry Commission, UGA, the Georgia Department of Natural Resources and the USDA Animal and Plant Health Inspection Service.

People can help slow the spread of this beetle through Georgia by not moving firewood and by helping others to understand how dangerous it can be to move firewood from one area to another.

“To prevent the spread of emerald ash borer, it is important not to move firewood in which the insect can hide,” said Kamal Gandhi, associate professor in the UGA Warnell School of Forestry and Natural Resources. “Buy local firewood, whether camping or for your home.”

To help reduce the spread of the emerald ash borer in Georgia, homeowners with ash trees should have a certified arborist check their trees for signs of emerald ash borer infestations.

Suspected infestations should be reported immediately so that foresters or arborists can understand how the infestation is spreading. This will aid in the development of effective methods to reduce its spread and impact.

“The faster (scientists) can track the spread of the insect, the faster they can work to stop it,” said Joe LaForest, integrated pest management and forest health coordinator at the UGA Center for Invasive Species and Ecosystem Health.

The public can report suspected infestations by:

For more information about the emerald ash borer and how to protect ash trees, visit www.gainvasives.org/eab.

For more information about spotting signs of emerald ash borer infestations, watch this.

(Sandi Martin is the public relations coordinator with the University of Georgia Warnell School of Forestry and Natural Resources. Merritt Melancon is a news editor with the University of Georgia College of Agricultural and Environmental Sciences.)

Other information:

Emerald ash borer factsheet

Emerald Ash Borer 2013 Update

Frequently asked questions about EAB in Georgia

Destructive tree pest discovered in Georgia

New bee advisory on neonicotinoid pesticides

See original article from the Southern Region IPM News here

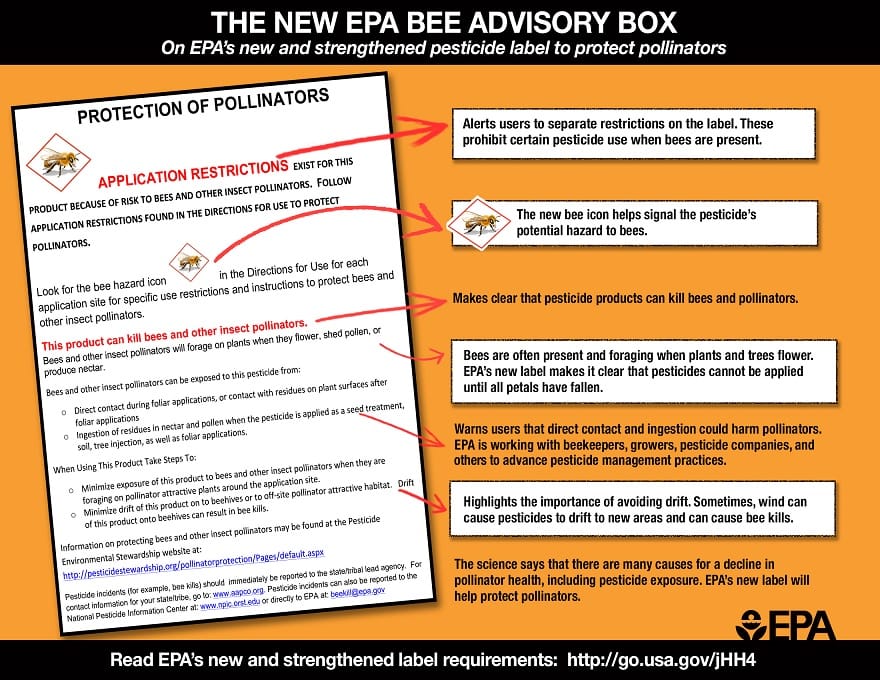
In an ongoing effort to protect bees and other pollinators, the U.S. Environmental Protection Agency (EPA) has developed new pesticide labels that prohibit use of some neonicotinoid pesticide products where bees are present. (This announcement affects products containing the neonicotinoids imidacloprid, dinotefuran, clothianidin and thiamethoxam. – Editor’s note)

“Multiple factors play a role in bee colony declines, including pesticides. The Environmental Protection Agency is taking action to protect bees from pesticide exposure and these label changes will further our efforts,” said Jim Jones, assistant administrator for the Office of Chemical Safety and Pollution Prevention.

Bee advisory box from EPAThe new labels will have a bee advisory box and icon with information on routes of exposure and spray drift precautions. Today’s announcement affects products containing the neonicotinoids imidacloprid, dinotefuran, clothianidin and thiamethoxam. The EPA will work with pesticide manufacturers to change labels so that they will meet the Federal Insecticide, Fungicide, and Rodenticide Act (FIFRA) safety standard.

In May, the U.S. Department of Agriculture (USDA) and EPA released a comprehensive scientific report on honey bee health, showing scientific consensus that there are a complex set of stressors associated with honey bee declines, including loss of habitat, parasites and disease, genetics, poor nutrition and pesticide exposure.

The agency continues to work with beekeepers, growers, pesticide applicators, pesticide and seed companies, and federal and state agencies to reduce pesticide drift dust and advance best management practices. The EPA recently released new enforcement guidance to federal, state and tribal enforcement officials to enhance investigations of beekill incidents.

More on the EPA’s label changes and pollinator protection efforts: http://www.epa.gov/opp00001/ecosystem/pollinator/index.html

View the infographic on EPA’s new bee advisory box: http://www.epa.gov/pesticides/ecosystem/pollinator/bee-label-info-graphic.pdf

Largest Mushroom Species in the Western Hemisphere Found Growing in Georgia

Jeff DeLong, Undergraduate Researcher, Department of Plant Pathology
Marin Talbot Brewer, Assistant Professor, Department of Plant Pathology

See the original article here

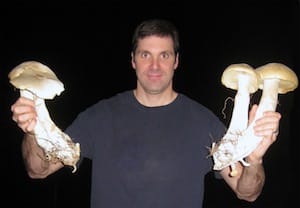
Mushrooms from clusters of M. titans

Macrocybe titans is the largest gilled mushroom of any species in the Western Hemisphere, with caps in excess of 100 cm (3 ft). These giant mushrooms often occur in clusters within the tropics and subtropics of the New World, with previous sightings reported in the Caribbean, Central America, Mexico, South America, and only in Florida within the USA. Confirmation of this species in Georgia now extends the previously known range of M. titans. To our knowledge, this is the first report in Georgia. The mushrooms were discovered in October 2012 in the yard of an abandoned house in Athens. The fungus was identified as M. titans based on morphological features, habitat where it was found and DNA sequence similarity with known specimens.

The large, cream to buff-colored mushrooms were found growing in three large, dense clusters of eight to 10 mushrooms each (Figure 1). Single caps were 20-30 cm (8-12 in) across and convex with incurving at the margin. Younger mushrooms (Figure 2) had more convex caps than those of older specimens that became flattened with age. The smooth, dry surfaces of the caps were cinnamon-buff in color at the crowns fading to cream toward the margins. The inner flesh of the caps was white. The spore print, which was obtained by placing a cap on half white and half dark-colored paper and covering it with a bowl overnight, was creamy white (spore prints are necessary for proper mushroom species identification).

The stipes (stems) of the mushrooms were cream to buff measuring 30-45 cm (12-18 in) in length (Figure 3). They were club-shaped, tough and fibrous with bent-back scales and striations that curved around the stipe like stripes on a candy cane. The dense clusters of mushrooms were formed by the attachment of individual stipes at the base. Several miniature mushrooms less than 2.5 cm (1 in) in height were found attached to the base of the clusters. The cream to dull-yellow gills of the mushrooms were wavy, crowded and attached to the stipes. The species of the mushroom-producing fungus was confirmed as M. titans by sequencing a region of its DNA.

The mushrooms of M. titans, like the fruiting bodies of any fungus, are the reproductive structures where the spores are produced. The majority of the fungus is actually growing as filamentous hyphae underground and out of sight in decomposing dead and decaying plant matter in the soil. The three nearby clusters that were observed likely came from a single individual growing in the soil beneath the tall grass. M. titans is saprotrophic, which means that it decomposes dead or decaying plant matter and does not cause disease or rot on living grasses or trees.

It is not clear why or how this fungus found its way into Georgia. The mushrooms were close to landscape ornamental grasses and it may have arrived with the container plants, as Florida is a large producer of ornamental landscape plants. Or, it may be expanding its geographic range into Georgia due to climate warming or some other factor. This species was previously known as Tricholoma titans, but in 1998 was renamed Macrocybe titans, which literally translates from Latin into “giant large head.” The mushrooms are reportedly edible; however, never consume a wild mushroom without identification confirmation by an expert. Contact your county Extension office should you happen to encounter the giant mushrooms of M. titans.

We thank Kirk Edwards for discovering these mushrooms and contacting us about their identification.

References:

Bessette, A.E., Roody, W.C., Bessette, A.R., and Dunaway, D.L. 2007. Mushrooms of the Southeastern United States. Syracuse University Press, Syracuse, NY.

Bigelow, H.E., and J.W. Kimbrough. 1980. Tricholoma titans, a new species from Florida. Mycotaxon 11: 425- 429.

Pegler, D.N., Lodge, D.J., Nakasone, K.K. 1998. The pantropic genus Macrocybe gen. nov. Mycologia 90: 494-504.

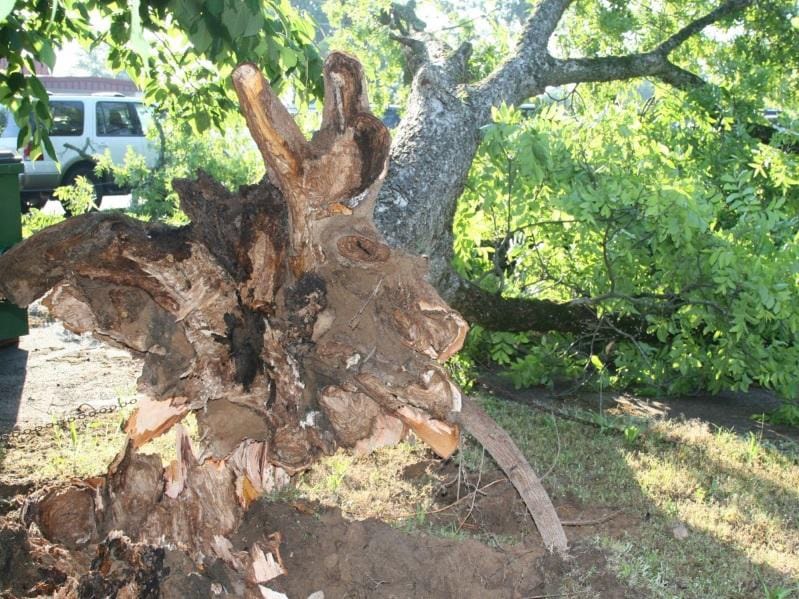
Wood decay and falling trees are of great concern

Jean Williams-Woodward, UGA Extension Plant Pathologist

Damage from past years of drought has taken a toll on our trees. Drought stress, construction injury, soil compaction and root girdling injures tree roots and provides an entry point for wood decay fungi. Storm damage, improper pruning, and wounding of trunks and branches also leads to wood decay fungi entry and infection.

Wood decay fungi can be classified into two broad categories: white-rot and brown-rot fungi.

White-rotters are those fungi that rapidly breakdown lignin and eventually cellulose. The infected wood becomes soft, spongy and stringy. It is usually a root and butt rot by a white-rot fungus that causes hardwood trees to fail and fall (see images of Inonotus dryadeus).

Brown-rotters are those fungi that breakdown cellulose and eventually lignin. Wood crumbles and shrinks. These rots are often referred to as a cubical or dry rot.

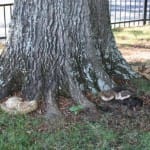
Regardless of the type of rot and what fungus is infecting the tree, if you see conks or mushrooms growing on the tree trunk or root flare, then the tree is in advanced stages of infection and decay and there is a concern for possible tree failure. It takes years for infection and growth of the fungus in the wood to produce outward signs of conks and mushrooms.

At present, methods to accurately detect how much rot is present in the wood do not exist. There are methods to detect internal cavities in trees to determine the thickness of a trunk shell, but measurements of spongy wood is difficult. There is no cure for wood decay. The best management approach is preventing injury to trunks, branches, and roots.

Mosquito season continues through September

Elmer Gray, UGA Extension Entomologist

As we move into the last weeks of summer, be aware of the excellent conditions for mosquito development that this summer’s heavy rains have created. This year has been very different from recent years when we consider our local rainfall totals. To date, much of the state is 15 inches or more ahead of normal rainfall for this time of the year. As a result there is more standing water in our counties and communities than in recent memory. This standing water will provide excellent larval habitat for mosquitoes as we move into the last few weeks of summer.

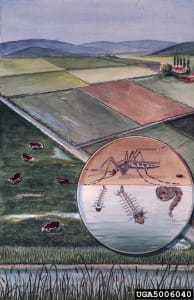
Mosquitoes are semi-aquatic insects that require standing water for the larval and pupal stages. There are 63 species of mosquitoes

Mosquito life cycle
Mosquito life cycle, Art Cushman, USDA Systematics Entomology Laboratory, Bugwood.org

known in Georgia and as result they exhibit a range of life histories.

Typically, the female mosquito will lay eggs on the surface of the water, attached to the sides of a container just above the water’s surface or on moist soil that will become covered with water at a later date. After being covered with water and in due time, the eggs hatch and the larvae (or “wigglers” as they are commonly called) develop in the standing water. The larvae are filter feeders, feeding on small particles of plant and animal matter.

After developing through 4 instars the larvae progress to the pupal stage which is commonly called a “tumbler” due to their movement through the water. Both the larvae and pupae come to the water’s surface for air and move down into the water when disturbed. After 2-3 days in the pupal stage the adult mosquito that we are all familiar with will emerge onto the water’s surface.

In the late summer, this cycle can be completed in as little as 7 days. This summer, with the numerous cloudy days and relatively cool temperatures, this cycle has surely been extended. The cool night temperatures have probably been the only thing preventing even worse mosquito populations than we have already experienced.

Homeowners can often reduce mosquito populations around their homes and neighborhoods by being diligent. All standing water should be eliminated or treated with an EPA approved larvicide if mosquito larvae are present. Emptying buckets, plant saucers, boats, tarps and anything else that can hold water is extremely helpful. Keeping gutter’s clear of leaves and debris will help to eliminate the often neglected larval habitat of backed up gutters. Homeowners should also check those rain barrels that were so helpful in past year’s droughts. It is vital that screens are intact around all openings or these barrels will become highly productive mosquito habitats. In addition, screens on the windows and doors should be checked to make sure there are no holes. Many mosquitoes are attracted to light and will be drawn to open windows after dark when we’re trying to get some fresh air in our homes.

As of August 22, the Georgia Department of Public Health has only reported 2 human cases of West Nile virus (WNV) in Georgia. This low number of cases is in contrast to last year when Georgia experienced a record 117 cases of WNV with 6 deaths. The WNV is now known to occur across the state and has been isolated from mosquitoes in the four counties (Chatham, DeKalb, Glynn and Lowndes) where adult mosquito surveillance and testing are being conducted this year.

The low number of human WNV cases is likely related to the fact that the mosquito (the Southern House Mosquito) that transmits the disease often develops in the storm drain system, particularly during dry periods. With this year’s heavy and regular rainfall, the storm drain systems across the state are regularly flushed and populations of this mosquito have been somewhat suppressed. However, we don’t want people to let down their guard as football season arrives. The peak period for WNV transmission in Georgia has historically been August 15-September 15. The proper use of EPA approved repellents is highly recommended if people are expecting to encounter mosquito populations in the next few weeks.

Products containing DEET are recommended for use on children as young as two months by the American Academy of Pediatrics. Parents should apply the repellent to their hands and then apply it to the children. It is important to get good coverage and then wash the treated skin upon returning indoors.

In conclusion, mosquito control districts across the state are reporting high numbers of complaints due to a variety of species of mosquitoes that have benefited from the abundant rainfall. Health districts across south Georgia are also seeing an increase in Eastern Equine Encephalitis (EEE) in horses. This disease is caused by a virus that is transmitted by mosquitoes that typically develop in the swamps and woodlands below the fall line in Georgia. While cases are rare in humans, EEE symptoms range from mild flu-like illness to encephalitis (inflammation of the brain), coma and possibly death. Symptomatic cases have a fatality rate of 30-50% and it is classified as the most severe mosquito-borne disease of humans in the United States.

Preventing mosquito bites is crucial to avoiding any of the mosquito-borne diseases. Loose fitting, light colored clothing, coupled with the proper use of EPA labeled repellents, will go a long ways towards this goal by making us less attractive to mosquitoes.


For more information

Stinging and Biting Pests

Management of Pest Insects in and Around the Home

Georgia Mosquito Control Association